Ardy Plays Radical Red 3.1! (Completed)

Fingers crossed my laptop doesn't shit itself to death this time

Old Playthrough Here

Hello everyone! So all the way back in *checks notes* Jesus Christ, 2020, I tried playing through Radical Red here. It was a really really fun experience, but midway through the run, my laptop inexplicably decided to self destruct, and I lost all my save data, so the run ended right before we really got access to a lot of fun stuff. Now, three years later, Radical Red has released version 3.1, which I had a lot of fun beating last week, so I decided to give this run another go. So, without further ado, let me copy paste all the relevant shit from the old thread and:

Pokemon Radical Red is a rom hack of, well, FireRed, that is currently making the waves in the romhack community for being, well, one of the fucking best rom hacks out there. Just the quality of life features it offers would be enough, but Radical Red amps it up a notch by increasing the difficulty severely, being updated to Gen 8 in terms of movepool and Pokemon, and a very improved AI that utilises competitive sets. In short, it is awesome, frustrating, and has made me shut off my laptop and do a shot more times than I am willing to admit. (6 times. 4 of those were vs Sabrina.) While Im enjoying my main run through the game, I realised this is a perfect candidate for a Lets Play on this forum, especially the way Im playing it.


If you went through the Pokecommunity Page, you might have noticed the astounding list of features this game has. For brevitys sake, Im going to mention the ones most important to this playthrough: Buffs to many pokemon, a working Dexnav feature, Gen 8 Breeding mechanics, Battle Style forced to Set, a better system for determining IVs of a Pokemon, and a Nature Changer in every town.
Also, we are gonna be playing on minimum grinding mode, because it is SO much less frustrating that way.
Apart from that, Im going to be posting videos of most major boss battles, rather than putting up screenies. This is because I am addicted to save state resetting, and this is the only way to physically stop me from cheating during Misty.
I am going to leave nicknames to the side for the early game, until we get to the Name Rater in Lavender. This gives you all ample time to help me with nicknames, because two of my cats were named Pepper and Salt. Pepper was white and Salt was black. I am not good with names.
I may cry multiple times during this playthrough. Viewer discretion is advised.


Radical Red 3.1_01.png
Radical Red 3.1_02.png

Lets FUCKIN GOOOO
Radical Red 3.1_03.png
Radical Red 3.1_04.png

Blah blah all caps because I crave childhood joy once more
Radical Red 3.1_05.png
Radical Red 3.1_06.png
Radical Red 3.1_07.png

We turn on Minimal Grinding Mode. This makes every pokemon guaranteed 31 IVs in every stat, and disables EVs. This also affects bosses. There are NPCs for edge cases like Hidden Power or Trick Room as well, so this is just eliminates the frustration of hunting for good IVs that permeated the last playthrough, as well as making boss fights more consistent since I wont have random EVs on every poke I have.
Radical Red 3.1_08.png

We spawn in our room as always. Talking to the NES gives you the chance to put in some cheat codes.
Radical Red 3.1_09.png

This one gives you unlimited rare candies and pomeg berries. In MGM, Pomeg just raises friendship.
Radical Red 3.1_10.png

This activates the "Care Package". After some bosses and story progessions, you get a bunch of items that you could have thief'd from wild pokemon in that area. Eliminates the need for thief grinding. Very welcome additions.
Radical Red 3.1_11.png

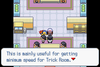
This one just makes it so you can see DexNav encounters without actually encountering those pokemon. Very useful timesave.
Theres also one for Team Preview, but since Im gonna be using the documentation in any case, we dont need that one.
Radical Red 3.1_12.png

With all that done, lets start the game!
Radical Red 3.1_15.png

We can choose our starter from upto Gen 8 now, which is a very nice upgrade from RR V1 where you had to stick with Gen 1 starters, who are, for the most part, not all that useful actually. With so many options, I decide to go for Froakie, because I love the Kalos starters, and you get Froakie much later than the other Kalos starters in this game, and I havent tried Froakie yet.
Radical Red 3.1_16.png
Radical Red 3.1_17.png

Blah Blah normal FireRed stuff, everyones seen this all before.
Radical Red 3.1_21.png

No matter what gen you decide to take your starter from, Green will always choose a Kanto starter.
Radical Red 3.1_22.png

BRING IT ON
Forgot to screencap this part, but we win. I dont think it is possible to lose this fight in RR.
Radical Red 3.1_23.png

Before we leave the lab, theres this Oak Aide we have to talk to. If we answer his questions correctly, we get a nice lil item from it.
Radical Red 3.1_29.png
Radical Red 3.1_30.png
Radical Red 3.1_31.png

Correct answers have the cursor on them
Radical Red 3.1_33.png

Doing this unlocks the Time Changer skills, which allows us to change the time of day it is for different encounters. Very fun, very useful. We have Auto Run unlocked from the start btw, and we will unlock all the other skills before the end of this update.
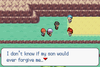
Radical Red 3.1_34.png
Radical Red 3.1_35.png
Radical Red 3.1_36.png

<3
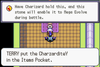
Only some pokemon can come out of their balls, which is the downside to this mechanic, but you usually have SOMETHING that can walk behind you. Also, if they are holding their mega stone/have their form change ability, they will change form in the overworld. I love this mechanic so much. It is so fun.
Radical Red 3.1_37.png

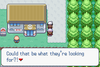
You can feed them Oran Berries as well to grind friendship. We dont have any rn, but we will soon.
Radical Red 3.1_39.png

Last stop before the Pokemart is this kid.
Radical Red 3.1_40.png

He gives you upto 900 Rare Candies, and 900 Pomeg Berries, in 400/100 each every time you talk to him. If you have less than 900 in your bag when you talk to him, he'll just fill it up real quick.
Radical Red 3.1_41.png
Radical Red 3.1_42.png

Blah blah Fire Red stuff. Although, how is this the custom Poke Ball? its literally every other Pokeball in the game.
Radical Red 3.1_44.png
Radical Red 3.1_45.png

See??
Radical Red 3.1_46.png

Straight after this, we go to the Pokemart in Viridian to sell all our rare candies.
Radical Red 3.1_47.png

Yes, that should be enough money for this run.
Radical Red 3.1_48.png

Refill the bucket real quick...
Radical Red 3.1_49.png

Last pitstop in Viridian is this woman in the school.
Radical Red 3.1_50.png
Radical Red 3.1_51.png
Radical Red 3.1_52.png
Radical Red 3.1_53.png

LEGGOOOO
Radical Red 3.1_57.png
Radical Red 3.1_58.png
Radical Red 3.1_59.png
Radical Red 3.1_60.png

Sounds simple enough. Lets see our team.
Radical Red 3.1_55.png

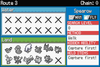
Okay so its an LC match. Chilling. Lets check her team out and...
Radical Red 3.1_56.png

Well. Thats not an LC Team.
Still, this battle is pretty easy to figure out.
Radical Red 3.1_61.png

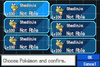
Aron, Gible and Skarmory should be your choices.
Radical Red 3.1_62.png

Lead with Aron and click SR as Shed takes you down to sturdy. Then, swap to Gible, and Shed will knock itself out with Rough Skin. After that, swap in Aron again, and watch as every Shed except for the last perishes to rocks. The last has HDB, and its very strange. You cant directly go to Skarm after Gible dies, because for whatever reason, the last Shed ignores Sturdy on its first turn out. But once Aron is killed, you go Skarm and click Drill Peck to take it out as it takes you down to Sturdy.
And for that we get...
Radical Red 3.1_68.png
Radical Red 3.1_70.png

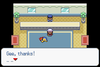
The Poke Vial! This is a portable pokecenter with 6 charges, that can be refilled at a regular poke center. Its very useful for dungeons and gauntlets and the like.
With all that done, we are ready to head out of Viridian for a sec and..
Radical Red 3.1_01.png
Radical Red 3.1_02.png
Radical Red 3.1_03.png
Radical Red 3.1_04.png

And we get the Dex Nav! Very fun.
Radical Red 3.1_06.png
Radical Red 3.1_07.png

Nice!
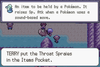
he gives us 10 of the following items:
quick ball
absorb bulb
aspear berry
black glasses
blues hard
charti berry
chilan berry
coba berry
green shards
kebia berry
light ball
mental herb
miracle seed
mystic waters
never melt ice
occa berry
passho berry
payapa berry
pecha berry
pixie plate
poison barb
potion
red shard
revive
rindo berry
sharp beak
silver powder
soft sand
spell tag
twisted spoons
yache berry
deep sea tooth
deep sea scale

In addition, we also get 306 Bottle Caps, and 20 Oran Berries. Very nice for this early in the game. Some of these (shards and bottle caps) arent gonna come into play for a while, but its nice to have it now.
Radical Red 3.1_02.png

FIRST THINGS FIRST
Radical Red 3.1_03.png

<3 <3 <3
Now onto some catching
Radical Red 3.1_05.png

We need this for 2 battles then we are gonna dump it in the PC, but its nice to have for those 2 battles. We take a second to Rare Candy both Ponyta and Froakie to the level cap of 15. Froakie learns Water Pulse, Lick, and Aerial Ace.
Radical Red 3.1_06.png

Before we do anything else, I want a few things, so we head straight into Viridian Forest.
Radical Red 3.1_07.png
Radical Red 3.1_08.png
Radical Red 3.1_09.png
Radical Red 3.1_11.png

LEGGOOOO
Radical Red 3.1_12.png

He has two pokemon: Corphish and Treeko. Ponyta handily kills both.
Radical Red 3.1_16.png
Radical Red 3.1_17.png

Stat Scanner is useless in this run cuz no EVs and we already know everything is gonna be 31 IV. Exp. Share is similarly useless, because of the Rare Candies, but Brendan is still my favorite rival in this game because of how useful these two items were in V1.
We then sneak through the forest until we get to this trainer.
Radical Red 3.1_20.png
Radical Red 3.1_21.png

She has three pokemon: Togepi, Clefairy and Audino. Togepi and Clefairy only know Metronome, and Audino has Yawn/Wish/Swagger/Protect. This is a total RNG fest of a battle, so theres no prep needed apart from two pokemon so one can activate Sleep Clause. We power through with Ponyta, and get..
Radical Red 3.1_26.png
Radical Red 3.1_32.png

LEGGOOO!!
Also, aside, theres a very fun interaction here. Every time a cutscene plays, the screen gets a tiiiny bit darker. Theres two cutscenes in Viridian, Brendan and this girl leaving. To my knowledge, this is the only place in the game where you can have two cutscenes without needing to reload the area (which resets the brightness), so this is the only place with noticeable darkness between fights (since the first cutscene darkness isnt that noticeable, but the second one is).
Now that we have all the skills, lets go ahead and get catching.
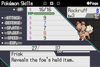
Our first stop is a Chinchou. Thankfully, with the DexNav we can catch one immediately!
Radical Red 3.1_33.png

Well, Volt Absord would be nice. Lets try again.
Radical Red 3.1_34.png

Well thats ass. Again.
Radical Red 3.1_35.png

Are there no fucking Volt Absorbs in Viridian or
Radical Red 3.1_36.png

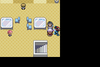
I finally catch a Volt Absorb on my fourth try, although I was so relieved I didnt take a screenie. Heres a screenie of me right before I released all the Illuminate ones though.
Radical Red 3.1_37.png

We also pick up a Deerling in Viridian. It has Seed Bomb at level 1, and thats REALLY good for the early game.
Radical Red 3.1_38.png

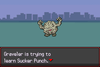
Rockruff is SO useful in this game I basically cant play a game without it. So we pick one up early in Route 22.
Radical Red 3.1_39.png

Meditite is also useful for Brock.
Radical Red 3.1_41.png

We also pick up a Sentret with Run Away. I learn from my experience with Chinchou, and lead with Froakie (whos holding an Oran Berry) so I can weed out any Frisk Sentret immediately.
Radical Red 3.1_42.png

We immediately get it up to level 15 to get it to evolve into Furret.
Radical Red 3.1_01.png

Furret gets Adaptability instead of Run Away, and learn ExtremeSpeed at level 31 iirc, so its gonna be very useful for the early to mid game.
Radical Red 3.1_43.png

Heading out of Viridian Forest(where we dont pick anything up because there are no good encounters), we get some items from the Care Package.
Radical Red 3.1_45.png
Radical Red 3.1_46.png
Radical Red 3.1_47.png
Radical Red 3.1_48.png
Radical Red 3.1_49.png
Radical Red 3.1_50.png
Radical Red 3.1_51.png

Very nice additions. 10 of each.
Radical Red 3.1_52.png

There is also this offshoot of Diglett cave we can access early after the Forest and before Brock.
Radical Red 3.1_53.png

We pick up the TM for Thief in here. TMs are infinite in this game.
Radical Red 3.1_55.png

We also pick up a diglett. Trapping is really good in boss fights.
Radical Red 3.1_02.png

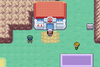
We also pick up a nice lil grimer in Pewter. Nothing in the cave sparks my curiosity, so this should be all our encounters for now.
Radical Red 3.1_56.png

Before we fight Brock, we have a mandatory miniboss to clear.
Radical Red 3.1_61.png

Falkner - Pewter City (Rufflet) @ Berry Juice
Ability: Hustle
Level: 13
Jolly Nature
- Aerial Ace
- Slash
- Rock Smash
- Roost

Falkner - Pewter City (Emolga) @ Berry Juice
Ability: Lightning Rod
Level: 13
Timid Nature
- Shock Wave
- Air Cutter
- Sleep Talk
- Roost

Falkner - Pewter City (Corvisquire) @ Berry Juice
Ability: Unnerve
Level: 14
Careful Nature
- Pluck
- Roost
- Rock Smash
- Hone Claws

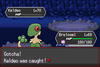
Pretty easy fight with Chinchou. We bring the Rufflet to red with Chinchou, then swap to Rockruff as he swaps to Emolga. Rockruff brings Emolga to red with 2 rock throws, but dies in return. Furret comes out and then easily cleans up the fight with 3 headbutts.
Radical Red 3.1_66.png

And we get Roost for our troubles!
And now, finally, our first challenge.

Brock - Pewter City (Geodude-Alola) @ Custap Berry
Ability: Sturdy
Level: 13
Bashful Nature
- Spark
- Rock Tomb
- Self-Destruct
- Bulldoze

Brock - Pewter City (Vulpix) @ Oran Berry
Ability: Flash Fire
Level: 14
Modest Nature
- Incinerate
- Ominous Wind
- Hidden Power Grass
- Sleep Talk

Brock - Pewter City (Archen) @ Oran Berry
Ability: Defeatist
Level: 12
Bashful Nature
- Pluck
- Rock Tomb
- Bulldoze
- Roost

Brock - Pewter City (Onix) @ Berry Juice
Ability: Sturdy
Level: 14
Bashful Nature
- Rock Tomb
- Bulldoze
- Sleep Talk


We lead off with Meditite. Medi uses Fake Out to break Sturdy, then Force Palm to KO the Geodude. Onix comes in next. I thought I was gonna do a big IQ play by matching his bulldoze with Rock Tomb to break sturdy, then OHKO with Force Palm, but somehow it was a speed tie and Force Palm doesnt OHKO anyways, so egg on my face I guess. I then swap to Diglett, who makes his debut by doing fucking nothing with Magnitude and dying immediately. Annoyed, I bring in Froakie, who proceeds to wipe the rest of the team with Water Pulse.
For our trouble, we are rewarded with a Rock Tomb TM.


And thats where we will leave it off for now! Next update should have a ton more boss battles. Stay tuned y'all!
 

Attachments

Hello all! Sorry for the late update, I was in New Hampshire for a sec and didnt have good enough internet to upload videos there.

Radical Red 3.1_03.png

Last time we left off having just defeated Brock. This time we will keep going until we get Misty done.
Radical Red 3.1_04.png

Imagine being a 6 year old and your best friend is a goddamn dinosaur bunny that...is only slightly taller than you, what the fuck? Nidoking is 4.5 feet tall canonically. This changes things. Im not sure what things, but it changes them.
Radical Red 3.1_05.png
Radical Red 3.1_06.png
Radical Red 3.1_07.png
Radical Red 3.1_08.png

If Im not mistaken, this is a Wonder Egg, so can hatch into any pokemon in the game. We gotta spend all this money somehow, so we take it.
A little running around and...
Radical Red 3.1_09.png
Radical Red 3.1_10.png

Trapinch is a very decent encounter. In RR, Flygon and Vibrava have Tinted Lens as a Hidden ability, and Flygon got a stat buff to its HP and Sp.Atk, from 80/80 to 100/100. Itll take a bit before Trapinch is a good poke to have on our team, but a welcome entounter nonetheless.
Radical Red 3.1_11.png
Radical Red 3.1_13.png
Radical Red 3.1_14.png

You cant like actually dynamax in battle in this game, so all this does is unlock rare encounters in Raid Dens.
Radical Red 3.1_16.png
Radical Red 3.1_17.png
Radical Red 3.1_18.png

We also get these as part of the Care Package. 10 Cheri Berries, 10 Moon Stones, and 5 Wish Pieces.
Radical Red 3.1_20.png

We also pick up a Spearow on Route 3. Spearow and Fearow both get Technician as an ability now, and Fearow recieves a stat buff to attack and speed, from 90/100 respectively to 100/115. Good pokemon to grab here.
Radical Red 3.1_22.png
Radical Red 3.1_23.png

We also get some evolutions now that the level cap is at level 22.
Right before we leave Route 3, we get another Care Package, this time consisting of the following:
throat spray
berry juice
chesto berries
ethers
heal balls
leppa berries
lucky eggs
pp ups
sitrus berries
stardusts
iron balls

50 of heal balls, 10 of everything else.
Radical Red 3.1_36.png

We pick up the TM for Teleport here.
Radical Red 3.1_37.png

Before we head to Mt Moon, I check out the Raid Den nearby. This Nidoran would eliminate a lot of effort trying to catch one with a hidden ability, so I figure, why the hell not.
Radical Red 3.1_39.png
Radical Red 3.1_40.png

As expected, it has its HA. It is, however, at the level cap, so we cant get a Nidoking yet.
Radical Red 3.1_42.png

This guy is also here. We buy the first Magikarp, then talk to him again.
Radical Red 3.1_46.png

Steep price, but we can pay it.
Radical Red 3.1_47.png

The second one is Shiny(!!).
Radical Red 3.1_48.png
Radical Red 3.1_49.png
Radical Red 3.1_50.png
Radical Red 3.1_52.png

>:) no
In Mt Moon, before doing any plot, I decide to go for some encounters.
Radical Red 3.1_53.png

Zubat line all gets Corrosion as a Hidden Ability. They wont be relevant for a while tho, so lets just forget about them for now.
Radical Red 3.1_54.png
Radical Red 3.1_57.png
Radical Red 3.1_56.png

This took SO LONG jesus. I legitimately had to DexNav 70 Torkoals before I found one with Drought, and then an additional 10 to find one holding the Heat Rock. And all of this work is (for the time being) for nothing, because I decided against using Torkoal in the misty fight anyways (spoiler). Smh smh. Atleast I can breed one with Eruption for a Trick Room team or somethin
Radical Red 3.1_58.png

We pick up this guy for egg hatching in the future.
Radical Red 3.1_59.png

We also DexNav a Riolu with Meteor Mash. Riolu line learns Mach Punch at level 1 in this game.
Radical Red 3.1_60.png

Krookodile learns Wicked Blow at level 68. Moxie Wicked Blow is insanely good for that portion of the game. We are getting this early as an investment.
Radical Red 3.1_61.png

An old favorite. Machamp gets a custom mega in this game, but more on that later.
I then turn my sights to Clefairy and...
Radical Red 3.1_62.png

Not this shit again
Radical Red 3.1_63.png

20 encounters later. How did I find the Hidden Ability before I found the regular ability 2 lmaooo
Radical Red 3.1_64.png

We pick up Low Sweep in Mt Moon.
And now, for the first boss of this update: Super Nerd Miguel.

:voltorb-hisui:
Miguel - Mt. Moon (Voltorb-Hisui) @ Focus Sash
Ability: Reckless
Level: 17
Naive Nature
- Magical Leaf
- Self-Destruct
- Volt Switch
- Hidden Power Ice

:thwackey:
Miguel - Mt. Moon (Thwackey) @ Eviolite
Ability: Grassy Surge
Level: 19
Bashful Nature
- Fake Out
- Razor Leaf
- Knock Off
- U-turn

:bibarel:
Miguel - Mt. Moon (Bibarel) @ Grassy Seed
Ability: Simple
Level: 18
Careful Nature
- Headbutt
- Aqua Jet
- Curse
- Rock Smash

:sableye:
Miguel - Mt. Moon (Sableye) @ Leftovers
Ability: Prankster
Level: 18
Careful Nature
- Will-O-Wisp
- Recover
- Protect
- Foul Play


This is a double battle thats more annoying than actually dangerous. If your team gets worn down, Bibarel can actually be a really big threat after a Curse or two. Luckily, we are prepared.


We lead off with Grimer and Meditite as he leads off with Voltorb and Thwackey. Thwackey uses Fake Out on Grimer as Meditite uses Fake Out on Voltorb. Next, I Poison Fang into Voltorb and Force Palm into Thwackey. Voltorb switches to sableye, who avoids the poison, as Thwackey takes about half and U-turns back into Voltorb. Voltorb immediately swaps out again to Thwackey as I swap Meditite for Chinchou. Thwackey dies to Poison Fang as Chinchou takes a Wisp. Voltorb comes in once Thwackey goes down. Knowing Voltorb is going to either blow up or magical leaf into Chinchou, I decide to swap to Furret, who covers both eventualities, and Poison Fang into the Voltorb slot just incase its Magical Leaf. Voltorb blows up, Sableye predictably avoids the poison once again, and Foul Plays Grimer for decent chip. Bibarel comes out now, and, stupidly, I decide to double into it with Furret and Grimer, forgetting that Sableye is gonna Wisp it. The chip does very little as Furret gets burnt, and Bibarel avoids the poison once again. I swap Furret for Chinchou as Sableye protects and Grimer tries to toxic Bibarel again. Chinchou takes a Rock Smash down to half on the switch, and Bibarel once again avoids Poison. Next turn Chinchou Shock Waves Bibarel, who gets down to red, and Poison Fang finishes it off, but Chinchou goes into Red due to Quick Attack. Sableye just Protects again. The fight is all but won now, and we finally get a poison off before whittling the Sableye down to zero.


We get the Dome Fossil for our troubles.
We dont get far before the next boss fight though.

:impidimp:
Archer - Mt. Moon (Impidimp) @ Oran Berry
Ability: Prankster
Level: 18
Bashful Nature
- Fake Out
- Bite
- Thunder Wave
- Drain Kiss

:houndour:
Archer - Mt. Moon (Houndour) @ Wise Glasses
Ability: Flash Fire
Level: 19
Modest Nature
- Snarl
- Incinerate
- Hidden Power Grass
- Thunder Fang

:mightyena:
Archer - Mt. Moon (Mightyena) @ Berry Juice
Ability: Strong Jaw
Level: 21
Bashful Nature
- Bite
- Ice Fang
- Howl
- Poison Fang


We lead off with Grimer against Impidimp. I take a Fake out turn 1. He then swaps to Mightyena, who takes a Poison Fang, which once again does not Poison(what the fuck is it with this move). The next Poison Fang takes it down to red, although he Sitruses back up to just under 50% HP, as he Howls. I make a dumb play then and Rock Tomb, trying to outspeed him next turn, as he Howls once again. I do not outspeed, and Ice Fang takes me down to 5 HP as Poison Fang takes him out. Impidimp comes out, and I go to Trapinch on the Fake Out. Bite annoyingly finches me next turn, but the turn after that, I take a bite and Bulldoze takes out Impidimp. Houndour comes out, and I go to Chinchou, who takes an Incinerate. Thunder Wave + Bubble Beam ends the fight.


Radical Red 3.1_67.png
Radical Red 3.1_68.png
Radical Red 3.1_69.png
Radical Red 3.1_70.png

Leaving Mt Moon gives us these items from the Care Package.
Radical Red 3.1_71.png

We get the TM for Power Up Punch.
Radical Red 3.1_72.png

And this other guy gives us 4 PP Ups.
Radical Red 3.1_73.png

We also find the TM for Roar.
Radical Red 3.1_74.png

In Cerulean, we find the Move Relearner. Similar to the Pokevial NPC, he wants us to complete a puzzle battle before he teaches us anything.
Radical Red 3.1_81.png

Our team.
Radical Red 3.1_82.png

His team.
Radical Red 3.1_83.png

These should be your choices.
He will lead off with Aron as you lead Buneary. Buneary Fake Out -> Drain Punch will take out Aron. Pikachu will come out. Go Phanpy on the Volt Tackle. Next turn, Freeze Frost takes Phanpy down to Focus Sash as EQ KOs. Then, Ice Shard the Gastly as he kills Phanpy. Go Fletchling and kill both Gastly and Skorupi with Brave Bird. When Timburr comes in, switch to Buneary. The Timburr has Choice Scarf and will go for Ice Punch, which fails to 2HKO the Buneary. Fake Out + Return kills the Timburr, then Healing Wish on Larvesta. Fletchling comes in, Gale Wings procs again when the Wish heals you up, and Brave Bird takes out Larvesta with a little health to spare, unlocking the Move Reminder for us.
Radical Red 3.1_84.png
Radical Red 3.1_85.png

Woohoo! Very useful.
Radical Red 3.1_86.png
Radical Red 3.1_87.png
Radical Red 3.1_88.png
Radical Red 3.1_89.png

We pick up these TMs from the Cerulean mart.
Now, the Rival Fight.

:kirlia:
Rival 2 [Water] - Cerulean City (Kirlia)
Ability: Trace
Level: 18
Bashful Nature
- Confusion
- Disarming Cry
- Magical Leaf

:staravia:
Rival 2 [Water] - Cerulean City (Staravia)
Ability: Intimidate
Level: 19
Bashful Nature
- Wing Attack
- Quick Attack

:rockruff:
Rival 2 [Water] - Cerulean City (Rockruff)
Ability: Frisk
Level: 20
Bashful Nature
- Rock Tomb
- Bite
- Howl

:ivysaur:
Rival 2 [Water] - Cerulean City (Ivysaur) @ Sitrus Berry
Ability: Overgrow
Level: 21
Adamant Nature
- Bullet Seed
- Leech Seed
- Sleep Powder
- Take Down


We lead off with Furret as he leads off with Kirlia. Kirlia goes down to 1 headbutt. Next, he swaps in Staravia, who, despite Intimidating us, is the only switch in that actually enables a Furret sweep. We Coil three times as Staravia pathetically Wing Attacks us, then Headbutt OHKOs the Staravia, Rockruff and Ivysaur.


Winning this fight gives us the PokeRider, which is a key item thats basically Fly. Its great with how much u zoom all over the map in this game, and very good to have this early in the game. We dont use it right now, but we will soon. Winning this fight also raises the level cap to 27, which unlocks a couple evolutions.
Radical Red 3.1_91.png
Radical Red 3.1_92.png

We teach Lycanroc Accelerock and Thrash.
We go through Nugget Bridge, which is much more difficult than in vanilla. I didnt record it cause there were already so many bossfights this update, but the Rocket Grunt at the end nearly wiped me, I only won because Lanturn somehow survived three u-turn and chipped his Togedemaru to death.
Winning that fight unlocks another Care Package, which gives us:
leek sticks
prism scales
quick balls
silk scarf
wacan Berry

50 Quick Balls, 10 of everything else.
We pick up the tm for Drain Kiss, then its time for a couple of encounters.
Radical Red 3.1_101.png

Unchanged from Vanilla, just a good fuckin mon.
Radical Red 3.1_102.png

Gets Prankster, type change to Bug/Electric, and HP/Attack/Sp.Atk/Speed goes from 65/73/47/85 to 85/47/73/100, and can learn Volt Switch.
Radical Red 3.1_103.png
Radical Red 3.1_104.png

We also pick this up from a Raid Den. Flapple and Appletun gets some nice move additions, and both get a Mega. More on those later, possibly.
Radical Red 3.1_105.png

We pick up this Leaf Stone from the grass.
Route 25 isnt too bad, we pick up the tm for Defog there, forgot to grab a screenie.
Radical Red 3.1_109.png

We quickly finish this bullshit

And then its time for a boss fight!

:ariados:
Bugsy [Pre-Surge] - Route 25 (Ariados) @ Poison Barb
Ability: Swarm
Level: 32
Adamant Nature
- Shadow Sneak
- Fell Stinger
- Bug Bite
- Poison Fang

:scyther:
Bugsy [Pre-Surge] - Route 25 (Scyther) @ Charti Berry
Ability: Technician
Level: 32
Bashful Nature
- Bug Bite
- Aerial Ace
- Brick Break
- Swords Dance

:ledian:
Bugsy [Pre-Surge] - Route 25 (Ledian) @ Focus Sash
Ability: Iron First
Level: 32
Bashful Nature
- Drain Punch
- Ice Punch
- Mach Punch
- U-turn

:scizor:
Bugsy [Pre-Surge] - Route 25 (Scizor) @ Sitrus Berry
Ability: Technician
Level: 32
Bashful Nature
- Bullet Punch
- U-turn
- Aerial Ace
- Roost


note: Ledian has been massively buffed. It is now Bug/Fighting, and its attack has gone from 35 to 90 at the cost of Sp.Atk and a little Sp.Def.
Flash has also been buffed, now being a 60bp Electric Move with a chance to lower Attack.
We lead Furret into Ariados. Bugsy immediately swaps to Scizor, who takes decent chip from a Headbutt. I coil, knowing that Bugsy is more likely to go for U-Turn if he doesnt see a KO, and he does, going to Scyther. Bug Bite does a little chip as Headbutt into Quick Attack takes out Scyther. Scizor comes back in, and, thinking I dont need Furret for anything, I just Power Up Punch, which does a little chip and scizor gets me into red with Bullet Punch. In hindsight, Headbutt would have done more if I was hellbent on staying in. We swap to Lanturn on the next Bullet Punch, who takes nothing from it. I misclick Electro Ball next turn, Sitrusing Scizor back into green as he Roosts back up to full. Then, I thunder wave, and Scizor gets fully paralyzed. Bubble Beam does a little over half next turn as Scizor U-turns to Ledian. I thunder wave as Ledian Drain Punches me down to red. Mach Punch takes us out next turn. Volbeat comes in, and uses Flash, as Ledian u-turns to Ariados. We swap to Lycanroc, who takes a Poison Fang, and Rock Tombs ariados to red as Bug Bite brings us down to 16 HP. Accelerock takes it out the following turn. Scizor comes out, and, lacking better options, I go to Volbeat and hope for full paralysis. I dont get one on the first turn, so I Confuse Ray. I get lucky over the next couple turns, and Scizor hits itself twice and dies to two Flashes. Ledian comes out now, and between a first turn full paralysis and a second turn Flash crit, it goes down to three Flashes.

We get U-Turn as a reward, which is neat, because it is a necessary part of our Misty strat.
Radical Red 3.1_108.png

We pick up the TM for Flame Charge on our way back to the city.
Radical Red 3.1_110.png

In prep for the Dig House fight, I spam Pomegs on Riolu and level it up to get a Lucario.
Radical Red 3.1_111.png

Persian-A has special Huge Power in this game. We Swords Dance twice, then Mach Punch takes it out.
Radical Red 3.1_113.png

Dies to Meteor Mash
Radical Red 3.1_114.png

Dies to Mach Punch
Radical Red 3.1_115.png

Would have died to Force Palm, but I get cocky and use Mach Punch, which just baaarely misses the OHKO. Water Pulse takes us out, so Furret comes in to KO it.
Radical Red 3.1_116.png

We get Dig as a reward. We also get the following Care Package:
Ability Pills
Big Pearl
Charcoal
Haban Berry
Luxury Balls
Pearls
Terrain Extender
Ultra Balls
Air Balloon

100 Ability Pills, 50 Ultra Balls, 50 Luxury Balls. 10 of everything else.
Radical Red 3.1_126.png

Finally, in prep for the Misty Fight, we evolve Diglett into Dugtrio, teaching it Bulldoze over Magnitude, and giving it a Rawst Berry.

:frogadier:
Misty - Cerulean City (Frogadier) @ Eviolite
Ability: Protean
Level: 26
Naughty Nature
- Ice Punch
- Rock Tomb
- Flip Turn
- Grass Knot

:floatzel:
Misty - Cerulean City (Floatzel) @ Mystic Water
Ability: Technician
Level: 25
Modest Nature
- Water Pulse
- Flip turn
- Icy Wind
- Hidden Power Grass

:starmie:
Misty - Cerulean City (Starmie) @ Sitrus Berry
Ability: Natural Cure
Level: 27
Modest Nature
- Scald
- Recover
- Psyshock
- Icy Wind

:lanturn:
Misty - Cerulean City (Lanturn) @ Iapapa Berry
Ability: Illuminate
Level: 25
Bashful Nature
- Parabolic Charge
- Scald
- Icy Wind
- Hidden Power Dark


We lead with Volbeat against Frogadier. Now, the problem is, we need to trap and kill Lanturn with Dugtrio. Dugtrio also cant take any damage before the trap. Misty has a high chance of swapping to Lanturn if an electric type is on the field, but since Frogadier has super effective coverage against both my electrics, its not guaranteed. So, we put on U-Turn on both Volbeat and Furret.
-Voltorb Turn into Furret Turn will always bring Frogadier into the range where it will switch into Lanturn.
-If Frogadier goes into any water type not named Lanturn on Furret, the U-Turn will bring in Volbeat, who will be able to u-turn on the forced switch to Lanturn.
-If Frogadier immediately switches to Lanturn, the trap goes off immediately.

In this battle, Frogadier immediately switches, which allows us to get off the trap easily. Rawst Berry is incase Lanturn goes for Scald and Scald burns, which ruins the trap, but in this battle he just goes for Icy Wind, which doesnt matter, because we outspeed at -1 anyways. Frogadier comes in, takes some damage from Sucker while killing in return, and from there, our Lanturn and Voltorb clean up easily.


And thats all for this update! Next update is Lt Surge! Love you all! Bye!
 

Attachments

Hey guys! Short update this time, but dont worry. Next few updates will have a LOT of content. Unfortunately, there isnt too much going on in the beginning of these playthroughs, as Im trying to do 1 gym leader per update, and the game only really picks up once you've beat Surge.

Radical Red 3.1_127.png

Last time we left off having just defeated Misty. Now, in prep for the Lt.Surge fight, we are first gonna go out and do a bunch of catching.
Radical Red 3.1_128.png

The cap after Misty reaches level 34. This is annoying, because a lot of fun evolutions (medicham, greninja, Obstagoon, gothorita) are just baaarely out of our reach. Its also just a wee bit before Furret learns Extreme Speed and becomes a hell of a lot more threatening.
Radical Red 3.1_129.png
Radical Red 3.1_130.png
Radical Red 3.1_131.png
Radical Red 3.1_132.png

Our first stop is this house in Cerulean, where a lady offers us an egg. There are two options here. Theres the Wonder Egg, which can hatch into any first stage pokemon, and the Hisuian Egg, which hatches into any hisuian first stage (including pokemon like Cyndaquil that evolve into Hisuian forms). This is one of the very few ways we can have a Hisuian mon before post-game, so we will definitely go with that option.
Radical Red 3.1_133.png

Voltorb is a really fun roll to get. It hilariously completely walls Lt Surge's Vikavolt with Soundproof, although it cant really do much in return unfortunately. Still, Electrode Hisui gets a sp.atk buff from 80 to 95, Reckless as a Hidden Ability, and Chloroblast, which in this game is a 120 BP special grass move with 1/3rd recoil, which is an absolute nuke with Reckless, so I like this get overall.
Radical Red 3.1_134.png

We then fly back to Viridian Forest, where we begin hunting for...
Radical Red 3.1_136.png

A Joltik with the egg move Disable. 20 DexNav searches, not bad overall. Next, we fly to Mt Moon and grab ourselves...
Radical Red 3.1_137.png

A geodude. Lastly, we fly back all the way back to Route 1 and pick up...
Radical Red 3.1_138.png

An Alolan Rattata with Hustle. That is mostly our prep for surge complete.
We then spend a couple mins getting our party up to the level cap.
Radical Red 3.1_139.png

Furret gets a 10BP upgrade over Headbutt.
Radical Red 3.1_140.png

Lycanrock gets a 15 BP upgrade over Rock Tomb.
Radical Red 3.1_141.png

Geodude evolves into Golem. I dont teach it Sucker Punch, a decision I regret later this update.
Radical Red 3.1_142.png

It also learns Stealth Rock over Rollout.
Radical Red 3.1_143.png

Joltik evolves.
Radical Red 3.1_144.png

And learns Sticky Web over Spider Web.
Radical Red 3.1_145.png

Signal Beam over Screech.
Radical Red 3.1_146.png

Rattata picks up Pursuit.
Radical Red 3.1_147.png

And after evolving, Raticate picks up Sucker Punch over Bite.
Radical Red 3.1_148.png

With that, our Surge team is set in stone. Fortunately, there is other stuff to do before we get to that.
Radical Red 3.1_153.png

Upon hitting this tile in Vermillion City, we are greeted with another care package.

great ball
mystic water
roseli berry
shuca berry
star pieces
yellow shard

50 great balls, 10 of everything else.

Radical Red 3.1_159.png

There is another egg vendor in Vermillion. Similar to the vendor in Cerulean, he will offer either a Wonder Egg or a Hisuian Egg. Again, we go for a Hisuian Egg.
Radical Red 3.1_162.png

This is honestly one of the worst hatches we could have gotten. I actually wouldnt even mind if there was the option to evolve this into regular Typhlosion, since regular Typhlosion is really good, but its locked to the Hisui evolution. Infernal Parade is a good move, but getting Flash Fire instead of {Spoiler Alert} Blazing Soul is such a downgrade its not even funny. This will be boxed indefinitely, do not see ANY reason to ever use this over regular typhlosion or, failing that, Chandelure.
Radical Red 3.1_163.png

We get our old team out in anticipation of a couple upcoming boss fights and get them up to level cap as well. Lanturn learns Scald over Bubble Beam.
Radical Red 3.1_164.png

Volbeat learns Thunderbolt over Flash.
Radical Red 3.1_175.png

One other thing of note is that Whitney is here on Route 11. We will NOT be fighting her. In my prep, I couldnt figure out a way to reliably beat her at this point with anything we had access to other than a cheese with a Sun Team, and honestly, Im kinda burnt out of Weather teams for now. Whitneys team scales to the level curve, so its not like when we come back to finish her off its gonna be a steamroll due to levels or anything, I just prefer to do Whitney and {Spoiler Alert} Morty post-Sabrina when we have way more options at our disposal. Im definitely going to come back and kick her ass, just not in this update.
Now, onto the SS Anne!

Firstly, almost immediately, there are two minibosses in the SS Anne that we are required to fight before we can progress. Since this update was pretty short, I recorded both of these fights.

:Dewott:
Gentleman Brooks - S.S. Anne (Dewott) @ Eviolite
Ability: Battle Armor
Level: 32
Bashful Nature
- Water Pledge
- Flash Cannon
- Ice Beam
- Hidden Power Grass

:simisear:
Gentleman Brooks - S.S. Anne (Simisear) @ Charcoal
Ability: Gluttony
Level: 32
Naive Nature
- Fire Pledge
- Low Kick
- Grass Knot
- Hidden Power Ice

:dartrix:
Lass Ann - S.S. Anne (Dartrix) @ Miracle Seed
Ability: Tinted Lens
Level: 29
Modest Nature
- Shadow Sneak
- Grass Pledge
- Air Slash
- Hidden Power Fire

:simisage:
Lass Ann - S.S. Anne (Simisage) @ Miracle Seed
Ability: Gluttony
Level: 29
Timid Nature
- Grass Pledge
- Focus Blast
- Hidden Power Fire
- Power Gem

:wigglytuff:
Lass Ann - S.S. Anne (Wigglytuff) @ Life Orb
Ability: Sheer Force
Level: 29
Modest Nature
- Draining Kiss
- Shock Wave
- Round
- Incinerate


This is a double battle against a Pledge themed team.

We lead off with Fearow, who has picked up Dual Wingbeat while hitting the level cap, and Lanturn. Fearow Dual Wingbeats the Dartrix to death as Lanturn hits Dewott for 40ish with Shock Wave. Dewott goes for a Water Pledge on Fearow in return. Next comes in Simisage. Again, DW and Shock Wave, Simisage dies, and Fearow takes another Water Pledge. Wigglytuff comes in. Dual Wingbeat on Wiggly, Shock Wave on Dewott. Dewott finally goes down, and Wigglytuff goes for a Round on Lanturn. Simisear comes in. Dual Wingbeat takes Simisear into Red, who then Fire Pledges Fearow to death. Scald takes out Simisear. Wiggly goes for another Round, and knocks itself out with Life Orb recoil, winning us the fight.


Immediately after, I progress to the next floor to get the next miniboss over with.

:lileep:
Sailor Edmond - S.S. Anne (Lileep) @ Eviolite
Ability: Storm Drain
Level: 30
Modest Nature
- Power Gem
- Giga Drain
- Earth Power
- Hidden Power Fire

:lumineon:
Sailor Edmond - S.S. Anne (Lumineon) @ Mystic Water
Ability: Storm Drain
Level: 29
Timid Nature
- Scald
- Ice Beam
- Hidden Power Grass
- Flip Turn

:gastrodon:
Sailor Edmond - S.S. Anne (Gastrodon) @ Rindo Berry
Ability: Storm Drain
Level: 30
Modest Nature
- Scald
- Earth Power
- Protect
- Sludge Bomb

:cramorant:
Sailor Trevor - S.S. Anne (Cramorant) @ Focus Sash
Ability: Gulp Missile
Level: 29
Timid Nature
- Surf
- U-turn
- Air Slash
- Safeguard

:nidoqueen:
Sailor Trevor - S.S. Anne (Nidoqueen) @ Black Sludge
Ability: Sheer Force
Level: 29
Timid Nature
- Surf
- Scorching Sands
- Sludge
- Reflect


This is another Double Battle.

We lead off with Fearow and Volbeat against Cram and Lileep. Cram is a massive threat with Gulp Down, so we focus into it, going for Dual Wingbeat and Thunderbolt. Cram dies before getting a hit off, but Lileep uses Ancient Power on Fearow, not only bringing us down into yellow, but also getting the omniboost, which is very unfortunate. Nidoqueen comes in to replace Cram. Next turn, we focus down the horribly threatening Lileep, going for Dual Wingbeat into U-Turn, bringing in Lycanroc. Sludge from Nidoqueen and Ancient Power from Lileep take Fearow down, and we send out Lucario. We go Force Palm into Lileep and Thrash with Lycanrock. I had no idea that Thrash in a double battle chooses a random target. So, unfortunately, Lycanrock targets Lileep, who would have died to Force Palm anyways. Nidoqueen Scorching Sands Lucario into yellow, although atleast she cannot burn us due to Sheer Force. We go Force Palm into Gastrodon and Thrash again. Gastrodon unfortunately protects our Force Palm, and Thrash luckily hits Nidoqueen, taking her into Yellow. Nidoqueen then finishes off Lucario with Scorching Sands. We send out Galvantula. I Signal Beam Gastrodon as Thrash continues. Gastrodon annoyingly gets a lucky double protect, and Lycanrock chooses Gastrodon, meaning we waste a turn and Nidoqueen gets off a clutch Scorching Sands on Lycanrock. We go for the same play again, and luckily this time Gastro doesnt go for Protect as well as targetting Gastro, causing it to go down. Nidoqueen then takes out Lycanrock with Scorching Sands, and we send out Lanturn as Lumineon comes out. Signal Beam into Shock Wave takes out Lumineon, as Lanturn takes an HP Grass and Sands. Next turn, Signal Beam into Scald takes out Nidoqueen, winning us the fight that went really wrong really quickly.


After doing these two battles, I run around the SS Anne picking up items.
Radical Red 3.1_165.png

TM For Brick Break
Radical Red 3.1_166.png

TM for Rock Polish. Both are good moves we will use here and there.
Now, its time for a Rival Fight!

:loudred:
Brendan 2 - S.S. Anne (Loudred) @ Chople Berry
Ability: Punk Rock
Level: 32
Naive Nature
- Hyper Voice
- Brick Break
- Ice Beam
- Shadow Ball

:lunatone:
Brendan 2 - S.S. Anne (Lunatone) @ Colbur Berry
Ability: Levitate
Level: 32
Modest Nature
- Psyshock
- Power Gem
- Hypnosis
- Calm Mind

:grovyle:
Brendan 2 - S.S. Anne (Grovyle) @ Sitrus Berry
Ability: Overgrow
Level: 32
Adamant Nature
- Power-Up Punch
- Aerial Ace
- Leaf Blade
- Rock Tomb

:crawdaunt:
Brendan 2 - S.S. Anne (Crawdaunt) @ Focus Sash
Ability: Adaptability
Level: 32
Adamant Nature
- Aqua Jet
- Waterfall
- Knock Off
- X-Scissor


In prep for this fight, we put a Chople Berry on Lucario. Now, for whatever reason, Brendan will never go for Brick Break on Lucario if we have a Chople, allowing us to set up 3 swords dances in the face of weak Hyper Voices. Then, Mach Punch KOs through the Chople. Next comes the Lunatone, who dies to Meteor Mash. Crawdaunt comes in, and Mach Punch takes it down to sash as it KOs with Waterfall. We send in Fearow. I pursuit just incase it switches out, and then Dual Wingbeat kills the Grovyle several times over.


Radical Red 3.1_167.png

We get Cut from the Captain.
Radical Red 3.1_168.png

Bye Bye, impossibly tiny ship.
Radical Red 3.1_170.png

We pick up the Good Rod in Vermillion.
Radical Red 3.1_171.png

Theres this guy, who can teach elemental punches for 2500 each. We will use him later, but for now we skip him.
Radical Red 3.1_173.png

We also teach Dugtrio Dig over Magnitude.
And now, Lt Surge.

:pincurchin:
Lt. Surge - Vermillion City (Pincurchin) @ Electric Seed
Ability: Electric Surge
Level: 32
Modest Nature
- Volt Switch
- Scald
- Discharge
- Hidden Power Grass

:raichu-alola:
Lt. Surge - Vermillion City (Raichu-Alola) @ Twisted Spoon
Ability: Surge Surfer
Level: 33
Modest Nature
- Psyshock
- Volt Switch
- Nasty Plot
- Grass Knot

:vikavolt:
Lt. Surge - Vermillion City (Vikavolt) @ Occa Berry
Ability: Levitate
Level: 33
Modest Nature
- Volt Switch
- Bug Buzz
- Energy Ball
- Roost

:boltund:
Lt. Surge - Vermillion City (Boltund) @ Expert Belt
Ability: Strong Jaw
Level: 33
Jolly Nature
- Thunder Fang
- Fire Fang
- Ice Fang
- Psychic Fang

:manectric-mega:
Lt. Surge - Vermillion City (Manectric-Mega) @ Manectite
Ability: Intimidate
Level: 34
Modest Nature
- Change Beam
- Flame Burst
- Volt Switch
- Hidden Power Grass


You'll notice we are facing our first Mega of the run at gym 3. We will not get access to Megas until right before Sabrina, and every boss from now on will have a Mega. (In one upcoming battle, there will be 2!) This is also the first weather/terrain boss.
Lt Surge is a pain in the fucking ass. He is a HUGE difficulty spike from Misty. In every other run ive done, I've used Hippo+excadrill to cheese a win, but I feel like trying a weatherless team here. And here was my thought process.

With Rocks up, Dugtrio can trap and kill Boltund and Manectric. However, Manectric will outspeed it. Thus, we want to run Webs as well as rocks. Vikavolt can be chipped to the point where Dugtrio can take it out with Rock Blast. The real threat is Raichu. +SpDef Raticate will always live atleast 2 hits, and atleast 1 +2 hit. If Raichu uses Volt Switch on Raticate, Pursuit will KO it, and will ignore the Hustle accuracy drop. If not, two Pursuits will always kill. That leaves Pincurchin, who gets chipped into Bulldoze range by Galvantula Electro Ball in terrain. My original thought was this:
Lead Galvantula. Set up webs as Pincurchin Scalds. Take another scald as Electro ball chips it. Disable Scald. Go into Graveler. If Pincurchin stays in, Graveler will block a volt switch, or live the HP Grass due to sturdy. If it switches out, it can set up rocks on whatever due to Sturdy. Explode. Go Dugtrio. Kill whatever you can. Go Raticate on Raichu, and Furret on Vikavolt. Bring back Dugtrio and win.

Lets see how that worked out.
Note: I realized that my battle animations were turned off in other boss battles during this update. I turned them on for Lt Surge, but had already saved so I couldnt rerecord the other bosses. Apologies.
We lead off with Galvantula, and, immediately, a problem. Pincurchin immediately switches out to Boltund. This isnt a huuuge problem, as I put Yache on Graveler just incase something went wrong with Boltund. So I switch out immediately, taking a Fire Fang. Boltund uses Psychic Fangs as I rocks, then Bulldoze takes it into Red. If I had Sucker I could have killed it here, but instead I have to sack Graveler. I go Furret next and Quick Attack to take Boltund out. Manectric comes in, and I U-Turn to prevent Intimidate messing up the calcs. I have no idea how the fuck Furret was faster, but I dont complain, going straight into Dugtrio, blocking a Charge Beam. Dig takes out Manectric. Vikavolt comes out, and we go Furret on the Energy Ball, which crits us into red. Slam brings Vika into yellow, and another Energy Ball takes us out. Dugtrio comes out and Rock blast takes out the Vika. Pincurchin comes out, and honestly here I should have just sacked Dugtrio, but I go Galvantula, which only delays things. I use Disable as he switches out to Raichu. I go Raticate, who comes in on a Psyshock. Grass Knot does a lil damage, but I miss Pursuit. Luckily, next turn, Raichu goes for the Volt Switch, allowing us to kill with Pursuit, and take out the Pincurchin with a Hyper Fang into Raticate death into Dugtrio Bulldoze, getting us the badge.


And thats all for this update! Theres a reason why this section of the game was labelled "The beginning". It really is an early game feeling to these three gyms, as the options you have are limited, and you havent unlocked a lot of evolutions yet. Next update, we will be exploring a shitton more of Kanto, and taking on Erika, as the game opens up a bit and gives us a whole load more options to consider. Until then, love you all, and see you next update!
 

Attachments

LETS GOOO MIDGAME TIME!

Radical Red 3.1_01.png

Last time we left off having just defeated Lt Surge.
Radical Red 3.1_02.png

We have to go to Route 2 to get Flash, so I cut through Rock Tunnel. The TM for Rest is in here.
Radical Red 3.1_04.png

Flash Acquired
Radical Red 3.1_05.png

We also find Charge Beam nearby.
Radical Red 3.1_06.png
Radical Red 3.1_07.png

We also pick up this nice Snow Warning Vulpix in a raid den nearby.
Radical Red 3.1_08.png

The level cap has jumped to 44 for Erika, which unlocks a bunch for us.
Radical Red 3.1_10.png

Firstly, our beloved Frogadier is allowed to finally become viable and turn into Greninja (too bad its right before the 1 gym where its useless).
Radical Red 3.1_17.png

Even better! Greninja gets Battle Bond as ability 2 in this game, not a seperate event, and it just so happens that our starter Froakie had Torrent in the ability 2 slot, letting us get Battle Bond immediately! (It wouldnt be an issue anyways since we have 100 ability pills but shhhh)
Radical Red 3.1_13.png
Radical Red 3.1_14.png
Radical Red 3.1_15.png
Radical Red 3.1_16.png

We also get some nice upgrades to our favs movesets.
Radical Red 3.1_18.png

Look how cool he is ;-; I love the him
Radical Red 3.1_19.png

We pick up Aerial Ace on Route 9 as well.
Radical Red 3.1_20.png
Radical Red 3.1_22.png

And get this encounter in a raid den on Route 9. This makes both of our hisuian eggs useless, but what can you do.
Radical Red 3.1_23.png

Upon entering this tile we get another care package.
Babiri Berry
Everstone
Flame Orb
Kasib Berry
Smoke Balls
Sun Stones
Thick Club
Weakness Policy

50 smoke balls, 10 of everything else.
Radical Red 3.1_32.png

This trainer is a bitch. She has a Smeargle with V Create, Dragon Ascent, Close Combat and Trick, and then 3 pokemon spamming Assist, one of which is a Contrary Spinda. We luckily get through this fight without much trouble, but shes a major surprise on the first playthrough.
Radical Red 3.1_33.png

We enter Rock Tunnel, which automatically lights up now if you have Flash. Very welcome upgrade from V1.
Radical Red 3.1_34.png

We are unfortunately road blocked from Terrakion for the time being. No worries, we will get him soon...
Radical Red 3.1_35.png

We pick up the TM for Rock Polish here as well.
Radical Red 3.1_37.png

Stepping on this tile in lavender triggers a Care Package.
DeepSeaTooth
Big Nugget
Dive Balls
Dusk Balls
Moomoo Milk
Misty Seed

50 Dusk and Dive balls, 10 of everything else.
Radical Red 3.1_44.png

Morty is in lavender town. As mentioned before, we are skipping him entirely for now. We will come back later when we are better equipped to deal with him.
Radical Red 3.1_45.png

We find Sablenite in the Pokemon Tower. Unfortunately, I forgot that you cant DexNav here without Silph Scope, so my plans of picking up a new pokemon were foiled. Also, dont be fooled by us finally having a Mega Stone, we still cant use Megas for a while.
Radical Red 3.1_46.png
Radical Red 3.1_47.png

We get this nice Girafarig with Parental Bond in a raid den on Route 8.
Radical Red 3.1_48.png

We pick up the TM for Silver Wind here.
Radical Red 3.1_49.png

As well as a Porygon.
Radical Red 3.1_50.png

And Tada! We are in Cerulean now.
Radical Red 3.1_51.png

Our first stop is picking up the Tea from the old woman. And now we do some farming.
Radical Red 3.1_52.png
Radical Red 3.1_53.png
Radical Red 3.1_54.png
Radical Red 3.1_55.png

We pick up an Amaura here. Aurorus gets Boomburst at level 1 in this game, so its a really nice pick.
Radical Red 3.1_56.png
Radical Red 3.1_57.png
Radical Red 3.1_58.png
Radical Red 3.1_59.png

This guy is the best part of Celadon. Its also why getting the Shards without farming is so nice.
Now, the problem is, we only have 10 shards of each type, and we dont want to go back and farm more, so Im gonna just use all my shards and hope for the best.
Also, some starters cant be gotten this way.
We start with the Fire types. The starters he will give out are: Cyndaquil, Chimchar, Tepig, Fennekin, Litten and Scorbunny.
We start off with 5 eggs and see what hatches.
Radical Red 3.1_62.png

Excellent!
Radical Red 3.1_63.png

Great!
Radical Red 3.1_64.png

Eh, one duplicate isnt bad. We have 2 more eggs.
Radical Red 3.1_65.png

Hmm.
Radical Red 3.1_66.png

Are u serious
Obviously 4 litten is just horrendously bad luck, so I make the executive decision to allow myself a single reset here.
After the reset, our hatches are 2 Fennekin, 2 litten, and 1 cyndaquil.
We go for our next 5 and...
Radical Red 3.1_72.png

This is such horrendously bad luck its kinda hilarious.
Its fine, we dont need chimchar anyways, and Scorbunny is more of a bonus than anything.
Now the water starters. Our potential hatches are Totodile, Piplup, Oshawott, Popplio and Sobble.
We get all 5 in 10 eggs.
The grass starters are Chikorita, Turtwig, Chespin, Rowlet and Grookey.
We get all 5 in 10 eggs.
Radical Red 3.1_82.png

We also pick up the Eevee from above.
Radical Red 3.1_83.png
Radical Red 3.1_89.png
Radical Red 3.1_92.png
Radical Red 3.1_93.png

That doesnt seem hygenic, but okay.
Getting access to Saffron early means we can access the Fan Club in Saffron, which has a bunch of neat things.
Radical Red 3.1_94.png

This guy lets you change the Pokeball of your pokemon
Radical Red 3.1_95.png

This guy sells Ability Pills
Radical Red 3.1_96.png

This guy lets you choose a Hidden Power type
Radical Red 3.1_100.png

This guy lets you set IVs to 0
Radical Red 3.1_103.png

And THIS GUY is the godsend. Changes to HA for a bottlecap, which we have over 300 of.
Radical Red 3.1_106.png
Radical Red 3.1_107.png

We change Cyndaquil and Fennekins abilities immediately.
Now, if you have read the previous playthrough, you know what Typhlosion does. Blazing Soul gives it +1 priority to Fire type moves at full health. In v1, Cyndaquil could get Eruption at level 64, meaning if you held off on evolving until then, you had an Eruption Blazing Soul Typhlosion for the lategame, which swept a LOT of bosses. Unfortunately, this was too powerful, and now only Typhlosion gets Eruption, and even then, only at level 100! You have to wait until the postgame to use this. Fortunately, we can get by with Flamethrower for the most part.
Delphox is funny as fuck. We didnt use it for the previous playthrough, but it got Mind Blown. With Magic Guard. This was also nerfed to only be available at level 100 on a fully evolved Delphox, but I personally think it paled in comparison to Eruption Typhlosion regardless.
We give Cyndaquil an Everstone and Rare Candy it until Level 40, where it learns Flamethrower. We then take the Everstone off and watch it evolve.
Radical Red 3.1_110.png
Radical Red 3.1_112.png

Beautiful.
Radical Red 3.1_113.png

Similarly, we hold off on evolving Fennekin until it learns Psychic at level 41. Forgot to grab screenies of it evolving.
Radical Red 3.1_116.png

Now, Erika time.

:rillaboom:
Erika - Celadon City (Rillaboom) @ Terrain Extender
Ability: Grassy Surge
Level: 43
Jolly Nature
- U-turn
- High Horsepower
- Drain Punch
- Grassy Glide

:meganium:
Erika - Celadon City (Meganium) @ Grass Seed
Ability: Triage
Level: 44
Modest Nature
- Giga Drain
- Dazzling Gleam
- Ancient Power
- Hidden Power Fire

:serperior:
Erika - Celadon City (Serperior) @ Focus Sash
Ability: Contrary
Level: 43
Timid Nature
- Leaf Storm
- Giga Drain
- Dragon Pulse
- Hidden Power Fire

:electrode-hisui:
Erika - Celadon City (Electrode-Hisui) @ Life Orb
Ability: Reckless
Level: 44
Naive Nature
- Thunderbolt
- Chloroblast
- Hidden Power Ice
- Explosion

:venusaur-mega:
Erika - Celadon City (Venusaur-Mega) @ Venusaurite
Ability: Thick Fat
Level: 44
Modest Nature
- Giga Drain
- Sludge Bomb
- Sleep Powder
- Earth Power


Now that we have unlocked so many options, Erika is so easy that I can do this fight with only 3 members. In prep for this fight, I make Typhlosion and Delphox modest, give Typhlosion a Charcoal, give Delphox a Chesto Berry, and give Lycanroc a Rindo Berry.

We lead off with Lycanroc vs Rillaboom. Because of the Rindo, Rillaboom cant OHKO us with Grassy Glide, which means Lycanroc can live any hit and set up stealth rocks. In this case, Rilla just goes for High Horsepower, which doesnt quite KO. We can use Accelerock the turn after as we die, although this doesnt matter much. In comes Typhlosion, who KOs Rillaboom with Flamethrower. Serperior comes in next, and, its sash broken, easily dies to Flamethrower as well. Venusaur then comes in. We cant KO Mega Venusaur through Thick Fat, so we swap to Delphox. Delphox can live an Earth Power, and has Chesto incase of Sleep Powder. In this case, we do get hit with Sleep Powder, and Chesto it off immediately. Psychic immediately takes Venu down to red, as it sleeps us again. This doesnt matter, because it would take 4 turns for Venu to get out of Flamethrower Range with Grassy Terrain, and if Venu somehow doesnt kill Delphox by then, we are still guaranteed to wake up by the third turn and kill it. In this case, we wake up on the second turn and kill it. Electrode comes in and kills Delphox with Explosion. Typhlosion comes in with only Meganium to go, and easily OHKOs it after rocks to get the badge.


So yeah, that was probably the easiest gym battle of the game.

Beating erika unlocks a couple things.
Radical Red 3.1_117.png

Firstly, the game corner opens! Theres no more gambling, you just buy the prizer for straight cash instead. Which we have an excess of. Left vendor sells Pokemon, right vendor sells TMs. Which we be buying all of.

Toxic
Ice Beam
Light Screen
Protect
Hyper Voice
Thunderbolt
Reflect
Flamethrower
Energy Ball
Explosion
Shadow Claw
Gyro Ball
Swords Dance
Dark Pulse
Sleep Talk
Scald
Poison Jab
Flash Cannon
Dragon Tail
Dazzling Gleam
Scorching Sands


The Pokemon available are below.

Dratini
Larvitar
Beldum
Bagon
Riolu
Rotom
Gible
Larvesta
Deino
Goomy
Jangmo-o
Toxel
Dreepy
Honedge


All pokemon cost 100000 base, can be made shiny for double the price, and have the option of coming with their Hidden Ability for free.
We pick up a shiny Honedge.
Radical Red 3.1_136.png


Lastly, as soon as we walk into the Pokecenter, we are greeted with this:
Radical Red 3.1_118.png
Radical Red 3.1_119.png
Radical Red 3.1_120.png

So, there are I think 11 or 12 new custom "Seviian Formes" that are exclusive to Radical Red. They are honestly all pretty amazing, and this is the only one we get before postgame, so it'll be fun to see what we get.
(in my first playthrough of 3.1 I got Mantyke-Sevii, which was a staple of my team)
Radical Red 3.1_126.png
Radical Red 3.1_127.png
Radical Red 3.1_128.png

We get Doduo-Sevii!

Heres the info:

Dodrio-Sevii

Type: Fire/Ground
Abilities: Rock Head/Early Bird/Anger Point
Stats: 65 HP/125 Atk/65 Def/40 SpAtk/65 SpDef/110 Spe

Dodrio-Sevii seems really powerful. It gets Flare Blitz, Brave Bird, Jump Kick, Headlong Rush, SD, Agility, Double Edge, Stone Edge, Wisp, Roost, and even u-turn! I'll for sure be using this in the future. For now though, level cap after Erika is 47, and it gets Flare Blitz at level 52, so i'll hold off for a bit.

Radical Red 3.1_129.png
Radical Red 3.1_130.png
Radical Red 3.1_131.png
Radical Red 3.1_132.png

nice
Radical Red 3.1_141.png
Radical Red 3.1_142.png
Radical Red 3.1_143.png

We also evolve Rowlett, who gets Tinted Lens in this game, and learns Thousand Arrows at level 60. Very nice.
Radical Red 3.1_139.png
Radical Red 3.1_140.png

Lastly, in prep for the Giovanni fight, we evolve Graveler and Honedge all the way through.

There was nothing of note in the Game Corner apart from Gio, so here we go!

:nidoking:
Giovanni 1 - Rocket Hideout (Nidoking) @ Expert Belt
Ability: Sheer Force
Level: 45
Timid Nature
- Earth Power
- Ice Beam
- Sludge Bomb
- Thunderbolt

:honchkrow:
Giovanni 1 - Rocket Hideout (Honchkrow) @ Scope Lens
Ability: Super Luck
Level: 45
Jolly Nature
- Drill Peck
- Sucker Punch
- Night Slash
- Heat Wave

:infernape:
Giovanni 1 - Rocket Hideout (Infernape) @ Focus Sash
Ability: Iron Fist
Level: 45
Jolly Nature
- Swords Dance
- Pyro Ball
- Thunder Punch
- Close Combat

:rotom-frost:
Giovanni 1 - Rocket Hideout (Rotom-Frost) @ Sitrus Berry
Level: 46
Timid Nature
Ability: Levitate
- Will-O-Wisp
- Volt Switch
- Freeze-Dry
- Frost Breath

:kangaskhan-mega:
Giovanni 1 - Rocket Hideout (Kangaskhan-Mega) @ Kangaskhanite
Ability: Parental Bond
Level: 46
Adamant Nature
- Power-Up Punch
- Body Slam
- Crunch
- Fake Out


We lead off with Golem into Nidoking. I forgot to put Sucker on Golem. We have Yache on Golem, because Im stupid and wanted to discourage Nidoking from Ice Beam, fearing a Freeze, completely forgetting about Sheer Force. In any case, we SR as Nidoking activates Sturdy, and die to Ice Beam next turn. In comes Greninja. With Modest Nature and Mystic Water, Greninja has a 98% chance to kill Nidoking with Scald. Sucker would have guaranteed it, but Nido dies in this fight anyways. In comes Kangaskhan. We swap to Aegislash, who has a colbur berry, on Fake Out. The first Crunch unfortunately crits on the PB hit as we SD. The next crunch drops defense, but we live anyways and OHKO with Sacred Sword. Rotom comes in, takes about 25% from Sneak and kills us with Freeze Dry. Greninja comes in again and, with Battle Bond activated, Scald is an OHKO on everything after rocks, winning us the fight and getting us the Silph Scope.


Thats all for this update! Next update is gonna be the longest one, probably. Till then, love you all, and see you next update!
 

Attachments

Last edited:
This is probably gonna be the biggest update apart from the last two updates for this series, so enjoy all the boss fights!

Last time we left off having just defeated Giovanni in Silph Co. The next step is Pokemon Tower. Lets catch something for that.
Radical Red 3.1_02.png

I pick up this Gastly in Pewter City. It will be used for one fight and nothing else.
Radical Red 3.1_03.png

We fully evolve it into Gengar, and teach it Destiny Bond.
Radical Red 3.1_04.png

Onto Pokemon Tower! There is one very important encounter here we need.
Radical Red 3.1_05.png

Chandelure in this game gets Shadow Tag as a hidden ability again. This makes it the most powerful trapper in the game, and a really really important part of this playthrough, that will only get better as the game progresses. Being able to guarantee a KO on a key enemy threat is invaluable in the elite 4.
Radical Red 3.1_06.png

Lycanroc also learns Stone Edge, replacing Rock Slide.
Radical Red 3.1_10.png

And now, why we brought Gengar.
This Marowak fight is INSANE. It comes in Omniboosted. It has 252 HP EVs, being the only pokemon in Minimal Grinding Mode to have ANY EVs. It has a custom ability that not only gives it Tinted Lens on its Bone moves, but lets those moves ignore immunities always. It is also alolan Marowak. And its 2 levels above the level cap. It can sweep unprepared teams.
Luckily, +Speed Gengar outspeeds +1 Marowak, and with a -Defense nature, guarantees it will get 1shot by all of Marowak's moves. And so:
Radical Red 3.1_12.png
Radical Red 3.1_13.png
Radical Red 3.1_14.png
Radical Red 3.1_15.png
Radical Red 3.1_16.png

GG ez.
Radical Red 3.1_19.png

We get the Thick Club, but I dont think I plan to use it.
Radical Red 3.1_20.png

That fight apart, Pokemon Tower is remarkably easy, and we rescue Mr Fuji without any hiccups.
Radical Red 3.1_21.png
Radical Red 3.1_22.png
Radical Red 3.1_24.png

We get the PokeFlute from Mr Fuji afterwards.
Now, usually, we would be able to go to Fuschia City from here, skipping Sabrina entirely for the time being. However, because this would play havok with the level curve, even if you wake up the Snorlax, you will be prevented from progressing until you've done the whole Silph Co and Sabrina thing, which is very unfortunate, because the Egg Move tutor is in Fuschia. Oh well.
Now we gotta do some prep work for the upcoming boss battles.
Radical Red 3.1_25.png

Firstly, we evolve our new Doduo into a very powerful Dodrio-Sevii. It now has a moveset of Flare Blitz, High Horsepower, Double Edge and Will-o-Wisp coming off 125 base Attack with Rock Head.
Radical Red 3.1_29.png

We then go to Rock Tunnel to pick up a Ferroseed.
Radical Red 3.1_31.png

It only takes us 13 encounters to find one with Spikes.
Radical Red 3.1_33.png
Radical Red 3.1_34.png

We evolve it and teach it Power Whip over Gyro Ball. This was a misclick, I meant to delete Iron Defense, but I only just now while writing this realized what I had done, so I guess it didnt matter too much in any case.
Radical Red 3.1_35.png

We also evolve Lampent into Chandelure. It kinda sucks that this locks us out of learning Overheat until we get the TM, but its worth it for the power at this point in the game.
Radical Red 3.1_36.png

Lastly, even though we cant actually progress, we are gonna catch this Snorlax. Not because we are using Snorlax (we arent), but because we need the Lefties its holding.
Radical Red 3.1_40.png

We immediately give it to Ferro.
Radical Red 3.1_44.png

And now its Silph Co time!
Radical Red 3.1_45.png

We pick up Hidden Power.
Radical Red 3.1_46.png

We pick up Thunder Wave.
Radical Red 3.1_48.png

We pick up Dragon Dance.
Radical Red 3.1_51.png
Radical Red 3.1_50.png
Radical Red 3.1_52.png

Bulk Up, Audinite, and Kangashkanite also join the fray.
And now, the Rival fight.

:staraptor:
Rival 3 [Water] - Silph Co. (Staraptor) @ Sharp Beak
Ability: Intimidate
Level: 54
Jolly Nature
- Brave Bird
- Quick Attack
- Close Combat
- U-turn

:azumarill:
Rival 3 [Water] - Silph Co. (Azumarill) @ Mystic Water
Ability: Huge Power
Level: 55
Adamant Nature
- Play Rough
- Liquidation
- Aqua Jet
- Ice Punch

:darmanitan:
Rival 3 [Water] - Silph Co. (Darmanitan) @ Charcoal
Ability: Sheer Force
Level: 55
Jolly Nature
- Flare Blitz
- Rock slide
- U-turn
- Earthquake

:electivire:
Rival 3 [Water] - Silph Co. (Electivire) @ Expert Belt
Ability: Iron Fist
Level: 55
Jolly Nature
- Plasma Fists
- Close Combat
- Ice Punch
- Mach Punch

:venusaur-mega:
Rival 3 [Water] - Silph Co. (Venusaur-Mega) @ Venusaurite
Ability: Thick Fat
Level: 55
Modest Nature
- Sleep Powder
- Giga Drain
- Sludge Bomb
- Earth Power


We lead off with Lycanroc into Staraptor. Now, it doesnt really matter if Lycnaroc dies to CC, since the only point of this interaction is to get up rocks and prevent Dodrio from getting Intimidated, so I was pleasantly surprised to see Lycanroc living the CC, since I didnt bother calcing it. Accelerock brings Staraptor to yellow, and Dodrio comes in as Lycanroc dies. Flare Blitz neatly takes out the Staraptor. Azumarill comes in, but this is just a free switch to Ferrothorn on the Jet. Azumarill swaps to Venu as we set up Spikes. Venusaur is guaranteed to go for Earth Power here, which lets me bring in Delphox without fearing the Sleep Powder. Delphox lives an Earth Power and KOs next turn with a modest twisted spoon Psychic. This brings in Electivire. Dodrio is a free switch in here, as the only move that hits Delphox nuetrally is Plasma Fists, which Dodrio is immune to. High Horsepower takes out Electivire. Darmanitan comes in. I use double edge, fearing the HH miss, but unfortunately it comes just shy of picking up the KO, and Dodrio goes down to an Earthquake. Typhlosion comes in here and picks up the KO with flamethrower. Even if Darmanitar switched, he was dead to rocks. Azumarill comes in, and its a simple matter of going Ferro and picking it off with a Power Whip to win the fight.


Radical Red 3.1_53.png
Radical Red 3.1_54.png

As always, we get a Lapras from this guy. Lapras in this game is a Water/Dragon type with a custom mega. Good pick.
Now, in prep for the next fight, I get a +spatk - speed nature on Lanturn.

:gothitelle:
Archer Tag - Silph Co. (Gothitelle) @ Colbur Berry
Ability: Competitive
Level: 54
Modest Nature
- Psychic
- Shadow Ball
- Hidden Power Fighting
- Thunder Wave

:aeglislash:
Archer Tag - Silph Co. (Aegislash) @ Leftovers
Ability: Stance Change
Level: 55
Adamant Nature
- Iron Head
- Shadow Claw
- Shadow Sneak
- King's Shield

:houndoom-mega:
Archer Tag - Silph Co. (Houndoom-Mega) @ Houndoomite
Ability: Dark Aura
Level: 55
Timid Nature
- Heat Wave
- Dark Pulse
- Scorching Sands
- Sucker Punch

:incineroar:
Ariana Tag - Silph Co. (Incineroar) @ Sitrus Berry
Ability: Intimidate
Level: 54
Adamant Nature
- Fake Out
- Parting Shot
- Darkest Lariat
- Fire Punch

:primarina:
Ariana Tag - Silph Co. (Primarina) @ Throat Spray
Ability: Liquid Voice
Level: 55
Modest Nature
- Hyper Voice
- Scald
- Psychic
- Dazzling Gleam

:mawile-mega:
Ariana Tag - Silph Co. (Mawile-Mega) @ Mawilite
Ability: Huge Power
Level: 55
Adamant Nature
- Play Rough
- Sucker Punch
- Iron Head
- Thunder Punch


This is a tag team double battle. Our partner is Brendan. He has a Masquerain, Exploud and Sceptile-mega.

Side note: we have still not unlocked mega evolution, and our opponents have two megas.

Now, unlike our last playthrough, we actually have a strategy for this fight this time round, mostly due to how good a get Dodrio-Sevii was for us.
We lead with Lanturn as Brendan sends out Masquerain, and Archer and Ariana send out Incineroar and Gothitelle. Masquerain's intimidate gives Gothitelle a Sp.Atk boost, which is REALLY annoying. We volt switch turn 1 as Incineroar fakes out Masq, and Gothitelle Psychic's Lanturn. We made Lanturn -speed specifically to get this slow volt out. We go to Dodrio, who is a massive threat on the field now. The volt switch damage also makes Masq see the kill on Gothitelle with bug buzz, making it extremely likely to use that move. Dodrio one shots Incineroar with High-Horsepower as Masq takes out Gothitelle. In comes Primarina and Houndoom. We immediately switch out to Lanturn. Houndoom goes for a Heat Wave, bringing Lanturn to red. Masq Scalds Houndoom into yellow. Primarina uses Hyper Voice, killing Lanturn but miraculously not killing Masq. It doesnt really matter if Masq lives or dies here, but its nice if it lives. We send out Greninja, who kills the Houndoom with Water Shuriken. Giga Drain from Masq does half to Primarina. Greninja unfortunately dies to Dazzling Gleam, as does Masquerain, and Dodrio comes right back out. Aegislash gets sent out. High Horsepower takes out Primarina next turn, as Flamethrower does half to Aegislash and Shadow Claw takes Dodrio to yellow. Mawile comes out, and even at -1, Charcoal boosted Flare Blitz is enough to kill Mawile as Aegislash protects. Next turn, Flare Blitz kills Aegislash even in shield forme, winning us the battle.

After the battle, Brendan gives us a Treecko before fucking off.

Now, Giovanni time.

:hippowdon:
Giovanni 2 - Silph Co. (Hippowdon) @ Smooth Rock
Ability: Sand Stream
Level: 54
Adamant Nature
- Earthquake
- Rock Slide
- Stealth Rock
- Roar

:polteageist:
Giovanni 2 - Silph Co. (Polteageist) @ White Herb
Ability: Weak Armor
Level: 55
Modest Nature
- Shell Smash
- Shadow Ball
- Giga Drain
- Stored Power

:excadrill:
Giovanni 2 - Silph Co. (Excadrill) @ Focus Sash
Ability: Sand Rush
Level: 55
Adamant Nature
- Earthquake
- Iron Head
- Rock Slide
- Swords Dance

:garchomp:
Giovanni 2 - Silph Co. (Garchomp) @ Yache Berry
Ability: Sand Veil
Level: 56
Jolly Nature
- Earthquake
- Scale Shot
- Rock Slide
- Swords Dance

:kangaskhan-mega:
Giovanni 2 - Silph Co. (Kangaskhan) @ Kangaskhanite
Ability: Parental Bond
Level: 56
Jolly Nature
- Power-Up Punch
- Body Slam
- Crunch
- Fake Out


Giovanni leads off with Hippo as we lead off with Greninja. Scald is an OHKO on Hippo, giving us Ash Greninja early. Kangaskhan comes in, and we go Ferro on the Fake Out to get chip damage. Next, we switch to Chandelure on the Power-Up Punch. Crunch nearly KOs us, but Flamethrower brings Kang into red and luckily gets the burn, killing Kanga. Garchomp comes in. We go to Ferrothorn, who takes a 4-hit scale shot. Next turn, Chomp SDs as we crit power whip, but it was a 2hko anyways. Earthquake gets us to red as the second power whip kills. Exca comes in and we just let Ferro die to EQ. Greninja comes in, and Water Shuriken is a clean OHKO. Poltegeist comes in, and we kill easily with Dark Pulse, winning us the battle.

Radical Red 3.1_55.png

We get the Master Ball. Neat.
Radical Red 3.1_56.png

As we head out of Silph Co, we pick up the Garbodorite.
Radical Red 3.1_57.png
Radical Red 3.1_58.png
Radical Red 3.1_59.png

And now, we have FINALLY unlocked Megas.
Radical Red 3.1_60.png
Radical Red 3.1_61.png

We can also now go back and rebattle gym leaders! We will be doing this in a later update however, probably the same update as Morty and Whitney.
Now, with the mega ring, we can finally go ham on Sabrina with a Mega Lucario, who I anticipate sweeping her whole team. Theres a man in Celadon we talk to.
Radical Red 3.1_65.png
Radical Red 3.1_66.png

...and he doesnt give it to us. Oh, right, we need to have Lucario be following us.
Radical Red 3.1_67.png
Radical Red 3.1_68.png

...
After checking the documentation, it appears we cannot get this mega until AFTER Sabrina. Which is bullshit, but whatever.
Radical Red 3.1_73.png
Radical Red 3.1_74.png
Radical Red 3.1_75.png
Radical Red 3.1_83.png

This guy gives us the mega stone for Sceptile if we show him one. And this is going to be our main mega for the rest of the game, more or less.
Mega Sceptile got a bunch of buffs in this game. Firstly, in exchange for its Sp.Atk dropping to 110, it gets its attack boosted to 135. Furthermore, it loses Lightningrod and get Technician instead. This is, in my opinion, the best mega for the base game from this point onwards. Mega Sceptile hits SO hard with Bullet Seed, gets Scale Shot, gets SD, and its last moveslot is so customizable that theres no reason to not run it. Its great. I love it. Brilliant mon.
Now, Sabrina time.

:hatterene:
Sabrina - Saffron City (Hatterene) @ Psychic Seed
Ability: Magic Bounce
Level: 57
Relaxed Nature
- Trick Room
- Expanding Force
- Draining Kiss
- Mystical Fire

:indeedee-f:
Sabrina - Saffron City (Indeedee) @ Terrain Extender
Ability: Psychic Surge
Level: 57
Quiet Nature
- Expanding Force
- Hyper Voice
- Mystical Fire

:crawdaunt:
Sabrina - Saffron City (Crawdaunt) @ Focus Sash
Ability: Adaptability
Level: 58
Brave Nature
- Knock Off
- Liquidation
- Aqua Jet
- Brick Break

:ursaluna:
Sabrina - Saffron City (Ursaluna) @ Flame Orb
Ability: Guts
Level: 59
Brave Nature
- Protect
- High Horsepower
- Facade
- Crunch

:porygon2:
Sabrina - Saffron City (Porygon2) @ Eviolite
Ability: Trace
Level: 58
Bold Nature
- Trick Room
- Teleport
- Ice Beam
- Thunderbolt

:gardevoir-mega:
Sabrina - Saffron City (Gardevoir) @ Gardevoirite
Ability: Pixilate
Level: 59
Timid Nature
- Hyper Voice
- Expanding Force
- Shadow Ball
- Trick Room


This is a double battle. In prep for this fight, we give Lucario a Metal Coat, and give Greninja BlackGlasses.
Also, just for reference:

Lvl 59 0+ SpA Black Glasses Greninja Dark Pulse vs. Lvl 57 0 HP / 0 SpD Indeedee: 152-180 (99.3 - 117.6%) -- 87.5% chance to OHKO
Possible damage amounts: (152, 152, 156, 156, 158, 162, 162, 164, 164, 168, 170, 170, 174, 174, 176, 180)

(indeedee's HP is 153)

We lead off with Greninja and Lucario against Indeedee and Hatterene. My good luck with Giovanni is instantly punished when Greninja gets the absolute minimum roll of damage on Indeedee with Dark Pulse, letting Indeedee live on exactly 1 HP. Lucario kills Hatterene with Meteor Mash. Indeedee uses Hyper Voice, which does a fair bit of chip on both pokemon. Crawdaunt comes out. Knowing Ill live another hyper voice, I double into Crawdaunt to break its sash and guarantee the kill. Ursaluna comes out. Knowing that Ursa is guaranteed to protect turn 1, I finally kill the Indeedee with Dark Pulse, getting Ash Greninja on the field 3 turns later than it should have been. Gardevoir comes out. Now, I CANNOT let Trick Room go up this turn or the battle gets extremely hard, so I just double into Gardevoir and hope that it is Greninja that dies, and not Lucario. To my surprise, Ursaluna just goes for Protect again, and Gardevoir dies. Porygon2 comes out. Ursaluna's AI must be bugged as HELL, because it goes for ANOTHER protect, allowing me to safely kill the Porygon2 with another double. Ursaluna finally decides to stop using Protect, but it could not matter less, as another double into it kills, getting us the badge.


Radical Red 3.1_85.png

Now, if you show Sabrina a shiny pokemon, she'll give you a Gardevoirite and a Shiny Charm. Luckily we have our Aegislash.
Radical Red 3.1_90.png
Radical Red 3.1_91.png


And thats all for this update! Love you all, and see you next time!
 

Attachments

Last short update. Next update we will take on all the optional minibosses (power plant, mudkip kid and dojo) in addition to the main line. The update after that, I plan to do all the gym leader rematches + Whitney and Morty, and the update after that is obviously the E4.

Also, just a question, Radical Red 3.1 has a pretty expansive post game as well, do you guys want me to cover that after the main game is over? Let me know!
Radical Red 3.1_01.png

Last time we left off having just defeated Sabrina. This time we'll keep going until Koga.
Radical Red 3.1_02.png
Radical Red 3.1_03.png

Now, the way I always play this part of the game is I skip Route 15 until I get surf, then I do that route to get all the items while surfing around the trainers, and instead I approach Fuschia from the west side on the cycling road. This does mean I have to pick up the bike, which I have not done yet actually lmao. So lets do that first.
Radical Red 3.1_07.png
Radical Red 3.1_09.png

Next, let's get our Sandile from all the way back in update 2 upto Krokorok. The level cap is now finally high enough for us to get Wicked Blow.
Radical Red 3.1_10.png

Leggooo
Radical Red 3.1_11.png

Greninja also learns Hydro Pump over Icy Wind.
Radical Red 3.1_12.png

We also pick up the TM for Dual Wingbeat from just above the cycling road.
Radical Red 3.1_16.png
Radical Red 3.1_17.png
Radical Red 3.1_18.png

Lastly, theres this trainer. This trainer is kinda weird. They arent in the docs, but they are the only optional trainer battle to give you an item afterwards that isnt in the docs. Considering this all, I dont consider them a miniboss, so I didnt record this match. It was pretty challenging though, so maybe I should have.
Radical Red 3.1_21.png
Radical Red 3.1_22.png

After winning, we get the Rocky Helmet and the Centiskite.
Radical Red 3.1_23.png

We also get this Yanma from the raid den nearby.
Radical Red 3.1_15.png

Cycling road! Fun note, those three trainers are forced back to back battles, and theyre all decently hard lol. Sceptile helps a lot in this battle tho.
Radical Red 3.1_25.png

We grab the Altarianite from just west of Fuschia.
Radical Red 3.1_26.png

This route also has Dracovish and Arctovish, which would be really fun, although pretty cheap to use. Maybe in a later episode??
Radical Red 3.1_27.png

And we reach Fuschia!
Radical Red 3.1_28.png
Radical Red 3.1_29.png
Radical Red 3.1_30.png

This guy teaches Egg Moves if you can pass his test. He will give you some pokemon cries, and you have to guess which Pokemon they are. Get four in a row, and you win!
I cheated. Answers are Magmar, Nincada, Gallade and Komala.
Radical Red 3.1_35.png

Krook learns Pursuit.
Radical Red 3.1_36.png

Dodrio learns Brave Bird
Radical Red 3.1_37.png
Radical Red 3.1_38.png

Ferro learns Leech Seed and Stealth Rock.
Radical Red 3.1_39.png

Foreshadowing
And now, boss time!

:metagross:
Brendan 3 - Safari Zone (Metagross) @ Air Balloon
Ability: Clear Body
Level: 66
Jolly Nature
- Stealth Rock
- Meteor Mash
- Explosion
- Earthquake

:crawdaunt:
Brendan 3 - Safari Zone (Crawdaunt) @ Choice Band
Ability: Adaptability
Level: 66
Adamant Nature
- Aqua Jet
- Liquidation
- Crunch
- Superpower

:gardevoir:
Brendan 3 - Safari Zone (Gardevoir) @ Pixie Plate
Ability: Trace
Level: 66
Timid Nature
- Focus Blast
- Moonblast
- Psychic
- Thunderbolt

:exploud:
Brendan 3 - Safari Zone (Exploud) @ Silk Scarf
Ability: Punk Rock
Level: 66
Timid Nature
- Boomburst
- Surf
- Flamethrower
- Shadow Ball

:sceptile-mega:
Brendan 3 - Safari Zone (Sceptile-Mega) @ Sceptilite
Ability: Technician
Level: 66
Jolly Nature
- Swords Dance
- Bullet Seed
- Dual Chop
- Earthquake

:medicham:
Brendan 3 - Safari Zone (Medicham) @ Choice Scarf
Ability: Huge Power
Level: 66
Adamant Nature
- Psycho Cut
- Close Combat
- Thunder Punch
- Ice Punch


Before this fight, we level up Dodrio to the level cap, where it learns Headlong Rush.

Brendan leads off with Metagross as we lead off with Dodrio. Flare Blitz is a straight OHKO. Crawdaunt comes in. We swap to Ferrothorn immediately, who takes an Aqua Jet on the switch. I set up rocks as he switches, weirdly to Sceptile. Sceptile dodges a Thunder Wave as he Swords Dances, but the second Twave on the second SD connects. However, since I want Ferro for Craw, I need to sack something here. Typhlosion seems the most useless honestly, and I sack it to EQ. Dodrio comes back in and OHKOs with Flare Blitz. Medicham comes in. I never die to CC from full health, so I stay in and Flare Blitz takes it out. And now me and Crawdaunt begin to play a game. When Craw comes in, I hard switch to Ferro, then immediately switch out back to Dodrio as Craw switches to take a free kill (Dodrio OHKOs the entire team after rocks). We get Exploud, then Gardevoir this way. When only Craw is left, I switch to Ferro, who misses a power whip as Craw takes itself out with the barbs damage from three aqua jets.

Radical Red 3.1_40.png

We get PP Maxes from the care package after the fight. We also get the Rock Smash HM. Which means we are gonna take a quick detour and go pick up some stuff.
Radical Red 3.1_43.png

First stop is catching this Breloom.
Radical Red 3.1_44.png
Radical Red 3.1_46.png

This guy teaches Nasty Plot. might be useful later.
Radical Red 3.1_47.png
Radical Red 3.1_49.png
Radical Red 3.1_50.png

And this guy gives us the Toxic and Flame orb.
Radical Red 3.1_51.png

Next, we go all the way back to Viridian Forest. Pick this up.
Radical Red 3.1_52.png

And more importantly, this.
Radical Red 3.1_53.png
Radical Red 3.1_61.png

Took 11 ultra balls.
Radical Red 3.1_54.png

Next, rock tunnel!
Radical Red 3.1_55.png

Coalossite here.
Radical Red 3.1_56.png
Radical Red 3.1_62.png

Fucking 60 dusk balls over 2 resets (motherfucker crit my breloom twice in a row)
Radical Red 3.1_57.png

Cobalion is in Mt Moon, and on my way to him, this grunt that I never battled challenged me.
Radical Red 3.1_58.png

I feel like I should get back the PP I lost from this battle.
Radical Red 3.1_59.png
Radical Red 3.1_60.png
Radical Red 3.1_63.png

Forgot to grab all the screenies, but 20 ultra balls.
Radical Red 3.1_64.png

Now its finally time for the Safari Zone. Ill post everything I picked up here after Im done showing the items.
Radical Red 3.1_69.png

Beedrillite
Radical Red 3.1_70.png

Steel Wing
Radical Red 3.1_71.png

Pidgeotite
Radical Red 3.1_72.png

Ew
Radical Red 3.1_75.png
Radical Red 3.1_78.png

We get these HMs as well.
Now for our pickups!
Radical Red 3.1_80.png
Radical Red 3.1_81.png
Radical Red 3.1_82.png
Radical Red 3.1_83.png

First set.
Radical Red 3.1_84.png
Radical Red 3.1_85.png
Radical Red 3.1_89.png
Radical Red 3.1_86.png

Next set.
Radical Red 3.1_87.png
Radical Red 3.1_88.png
Radical Red 3.1_90.png

I am not exaggerating when I say that I entered the Safari Zone at 4pm today and left the safari zone at fully 6pm because Chansey and Kanga were SO fucking hard to find. Fuck those two. Jesus.
Radical Red 3.1_91.png

And we immediately evolve Chansey into Blissey.
Radical Red 3.1_92.png

Care package infront of the gym.
Damp Rock
Heat Rock
Icy Rock
DeepSeaTooth
Leichi Berry
Metal Powder
Petaya Berry
Pink Nectar
Purple Nectar
Red Nectar
Salac Berry
Yellow Nectar
Heart Scale
Black Sludge


99 heart scales, 10 everything else.
Radical Red 3.1_106.png

We also catch the second snorlax for a second set of lefties.

Boss time!
:swellow:
Koga - Fuchsia City (Swellow) @ Choice Specs
Ability: Aerialate
Level: 67
Timid Nature
- Boomburst
- U-turn

:accelgor:
Koga - Fuchsia City (Accelgor) @ Life Orb
Ability: Sheer Force
Level: 68
Timid Nature
- Bug Buzz
- U-turn
- Focus Blast
- Sludge Bomb

:drapion:
Koga - Fuchsia City (Drapion) @ Choice Scarf
Ability: Sniper
Level: 68
Jolly Nature
- Wicked Blow
- Cross Poison

:greninja:
Koga - Fuchsia City (Greninja) @ Life Orb
Ability: Battle Bond
Level: 68
Timid Nature
- Surf
- Water Shuriken
- Dark Pulse
- Ice Beam

:dragapult:
Koga - Fuchsia City (Dragapult) @ Life Orb
Ability: Infiltrator
Level: 68
Timid Nature
- Shadow Ball
- Flamethrower
- Dragon Pulse
- U-turn

:toxtricity-mega:
Koga - Fuchsia City (Toxtricity-Mega) @ Toxtricitite
Ability: Punk Rock
Level: 68
Timid Nature
- Volt Switch
- Boomburst
- Sludge Bomb
- Overdrive
This is honestly the most boring boss fight. Blissey solos his entire team except for Drapion, who is just spikes fodder for Ferro. Its just a whole load of spamming hazards and blissey and just a wee bit of Greninja on greninja action. Just watch the video, cuz I tried writing this battle out but it just bored me.

After the battle, Koga will give you a Toxtricitite and a Life Orb if you show him a pokemon with 125 speed or higher. Luckily we have the Electrode-Hisui from all the way back in update 4.
Radical Red 3.1_107.png
Radical Red 3.1_108.png

LEGGOO


And thats all for this update! Next update should be out very soon. Love you all, and see you soon!
 

Attachments

HMs feel almost weird now. Been enjoying the run so far.
Just incase you didnt know, Radical Red has automatic HMs, so you only need to have the HM in your bag to use it, you dont actually need to teach anyone the HM, which is really neat, because even the buffed versions of them are pretty trash. But yeah, it is weird to go back to a game where the major roadblocks are HM related after so long lol.

Also, a moments explanation.
We are very much in the end game of Radical Red right now. Im trying to focus on the big boss battles, as well as any encounters we pick up or any important story beats, but the truth is that, apart from the bosses, theres not too much content left in this run. So while these last few updates are gonna be jam packed with boss battles, you shouldnt expect much commentary for the rest of the updates. I'll hit on any important screenshots, but for the most part, the next few updates are gonna be mostly video based (ofc with my commentary on the videos though).
Radical Red 3.1_19.png

Last time we left off after beating Sabrina. This time we will take it all the way to Blaine.
Radical Red 3.1_01.png

Now that we have the Soul Badge, we can FINALLY get our hands on that Lucarionite we've been eyeing up for a while.
Radical Red 3.1_02.png
Radical Red 3.1_03.png
Radical Red 3.1_04.png
Radical Red 3.1_05.png
Radical Red 3.1_06.png

I dont think it matters at all what you answer, he gives the Lucarionite anyways, but just incase it does, here is what I answered.
Radical Red 3.1_07.png

He so cute <3
Radical Red 3.1_08.png
Radical Red 3.1_09.png
Radical Red 3.1_10.png

If you have a fighting type following pokemon in the Saffron Dojo, interacting with it will give you Protective Pads. There are a couple other items you can get this way, but I think this is the only one that really matters.
Radical Red 3.1_11.png

Since the level cap jumped up, Sceptile can finally get Dual Chop, which is a REALLY welcome upgrade from Breaking Swipe. In the next update, this will get replaced with the even better Scale Shot.

Now, boss time!

:hitmontop:
Chuck - Celadon City (Hitmontop) @ Focus Sash
Ability: Technician
Level: 71
Jolly Nature
- Triple Kick
- Triple Axel
- Brutal Swing
- Fake Out

:poliwrath:
Chuck - Celadon City (Poliwrath) @ Mystic Water
Ability: Water Absorb
Level: 71
Jolly Nature
- Surging Strikes
- Drain Punch
- Ice Punch
- Earthquake

:breloom:
Chuck - Celadon City (Breloom) @ Toxic Orb
Ability: Poison Heal
Level: 71
Jolly Nature
- Spore
- Substitute
- Rock Slide
- Focus Punch

:lucario:
Chuck - Celadon City (Lucario) @ Shuca Berry
Ability: Inner Focus
Level: 71
Jolly Nature
- Bulk Up
- Extreme Speed
- Close Combat
- Meteor Mash

:gallade-mega:
Chuck - Celadon City (Gallade-Mega) @ Galladite
Ability: Inner Focus
Level: 71
Jolly Nature
- Drain Punch
- Psycho Cut
- Bulk Up
- Night Slash

:sneasler:
Chuck - Celadon City (Sneasler) @ Focus Sash
Ability: Poison Touch
Level: 71
Jolly Nature
- Close Combat
- Poison Jab
- Knock Off
- Stone Edge


In prep for this battle, I put rocky helmet on Lycanroc.

Chuck leads off with Hitmontop as we lead off with Lycanroc. We set up rocks as he uses Fake Out and then Triple Kick, getting chipped in the process. Lucario comes out, and after Megaing, Meteor Mash takes out Hitmontop. Poliwrath comes in and gets OHKOd by Close Combat. Sneasler comes in next, and we swap to Chandelure on the Close Combat. Knock Off does a ton, but we do a ton back with flamethrower. A second Knock Off takes us out, and we go to Greninja. Water Shuriken annoyingly leaves it at 1HP, and we die to Close Combat. Lucario comes back in and Mach Punch takes out Sneasler. Breloom comes in next and gets annihilated by Close Combat. Lucario comes in and Mach Punch comes juuust shy of an OHKO, and his Lucario takes us out with CC. Dodrio comes in and kills with Flare Blitz. Gallade comes out and takes us to yellow with Drain Punch while we bring it to red with Flare Blitz. It kills us the next turn with Night Slash, after which we go Typhlosion and kill with flamethrower.

Radical Red 3.1_12.png
Radical Red 3.1_13.png
Radical Red 3.1_15.png
Radical Red 3.1_16.png

If you show Chuck a pokemon with 125 attack or higher, he will give you the Galladite and the Focus Sash.

Next boss fight!

Note: I am not being mean. Dumbass Kid is his official name in the game and the docs.

:swampert:
Dumbass Kid - Saffron City (Swampert) @ Rindo Berry
Level: 71
- Stealth Rock
- Flip Turn
- Liquidation
- Earthquake

:scizor:
Dumbass Kid - Saffron City (Scizor) @ Metal Coat
Ability: Technician
Level: 71
Adamant Nature
- Swords Dance
- U-turn
- Bullet Punch
- Superpower

:pelipper:
Dumbass Kid - Saffron City (Pelipper) @ Damp Rock
Ability: Drizzle
Level: 71
Modest Nature
- Surf
- Hurricane
- U-turn
- Roost

:seaking:
Dumbass Kid - Saffron City (Seaking) @ Choice Band
Ability: Rain Dish
Level: 71
Adamant Nature
- Fishious Rend
- Megahorn
- Flip Turn

:frosmoth:
Dumbass Kid - Saffron City (Frosmoth) @ Leftovers
Ability: Ice Scales
Level: 71
Modest Nature
- Quiver Dance
- Ice Beam
- Hurricane
- Bug Buzz

:swampert-mega:
Dumbass Kid - Saffron City (Swampert-Mega) @ Swampertite
Ability: Swift Swim
Level: 71
Adamant Nature
- Liquidation
- Earthquake
- Ice Punch
- Flip Turn


In prep for this fight, we teach Sceptile Rock Tomb over False Swipe (which I was using for catching), and make it Jolly over Adamant.

We lead off with Lycanroc as he leads off with Swampert (breaking Species Clause, btw). We taunt to prevent rocks, then get up our own Rocks as he kills us with Liquidation. The chip damage doesnt matter at all, I just forgot to take off the rocky helmet is all. Sceptile comes in and kills easily with Bullet Seed. Scizor comes in, and we go Chandelure on the Swords Dance. He crits Bullet Punch next time, but we live and kill with Flamethrower. Seaking comes in and takes a ton from Shadow Ball as he kills with Fisheous Rend. Sceptile comes back out and SDs as Seaking is forced to Rend again. Bullet Seed takes it out next turn. Pelipper comes in next, and dies to a +2 bullet seed. Frosmoth comes in and dies to Rock Tomb. Lastly, Swampert comes in. We outspeed even through Swift Swim (thanks Jolly nature) and OHKO with a single hit of a crit bullet seed.


After this battle, if you show Dumbass Kid a swampert, he will give you a swampertite. However, I am a busy gal with things on her mind, so I completely forgot to do that. It doesnt matter too much, I dont plan on using Swampert-mega this run, but I should probably still get it at some point just incase.

Radical Red 3.1_20.png

Next we catch a Drednaw in prep for a couple upcoming fights. We give it the custom mega stone.

Okay, so, Mega Drednaw is kinda nutty ingame.

Mega Drednaw
Type: Water/Fighting
Ability: Strong Jaw
Stats: 90 HP/155 Atk/125 Def/48 SpAtk/98 SpDef/85 Speed

Now, Jaw Lock has been buffed in this game to be a 90BP Fighting Type Fang Move. Drednaw also gets the new move Aqua Fang, which is an 80BP Water Fang Move. This means it gets a 135 BP STAB fighting type move and a 120 BP STAB water type move (factoring in Strong Jaw). Mega Drednaw also has a fantastic matchup against many of the upcoming fights.

Lets see it in action.

:jynx:
Pryce 2 - Route 20 (Jynx) @ Focus Sash
Ability: Dry Skin
Level: 71
Timid Nature
- Lovely Kiss
- Freeze-Dry
- Psystrike
- Substitute

:mr. rime:
Pryce 2 - Route 20 (Mr. Rime) @ Choice Specs
Ability: Screen Cleaner
Level: 71
Timid Nature
- Freeze-Dry
- Psychic
- Ice Beam
- Focus Blast

:mamoswine:
Pryce 2 - Route 20 (Mamoswine) @ Life Orb
Ability: Thick Fat
Level: 71
Adamant Nature
- Earthquake
- Ice Shard
- Icicle Crash
- Knock Off

:walrein:
Pryce 2 - Route 20 (Walrein) @ Leftovers
Ability: Fur Coat
Level: 71
Calm Nature
- Rest
- Sleep Talk
- Surf
- Toxic

:arctovish:
Pryce 2 - Route 20 (Arctovish) @ Choice Scarf
Ability: Water Absorb
Level: 71
Adamant Nature
- Fishious Rend
- Icicle Crash
- Psychic Fangs
- Icicle Spear

:glalie-mega:
Pryce 2 - Route 20 (Glalie-Mega) @ Glalitite
Ability: Refrigerate
Level: 71
Jolly Nature
- Double-Edge
- Earthquake
- Ice Shard
- Crunch


So, Pryce has three possible teams he can use. The one with Jynx is the only one where lead Drednaw doesnt win on the spot, because Jynx can Lovely Kiss you turn 1. Its unfortunate, but it barely matters when we can ensure Dred gets every kill.

Pryce leads off with Jynx as we lead off with Drednaw. We hard switch to Greninja to sack it to Sleep, then hard switch to Sceptile. Annoyingly, he goes for Substitute instead of Freeze Dry, but we just Rock Tomb the sub without megaing to break it as we die to Freeze Dry. Drednaw comes in. As Pryce swaps to Walrein, we set up a Rock Polish. From there, Jaw Lock OHKOs every single pokemon. (in order, Walrein, Jynx, Mamoswine, Arctovish, Mr Rime and then Glalie). Very fun battle.


Pryce then gives us the Choice Scarf and the Glalitite before disappearing.

Radical Red 3.1_23.png

We pick up the TM for Triply Axel in Seafoam.
Radical Red 3.1_35.png

As well as Articuno (forgot to get a different screenie)
Radical Red 3.1_22.png
Radical Red 3.1_37.png

And Keldeo!
Radical Red 3.1_24.png

Bye Bye Seafoam
Forgot to grab screenies but after reaching Cinnibar, we fly back to Viridian and pick up a Caterpie.
Radical Red 3.1_01.png
Radical Red 3.1_02.png
Radical Red 3.1_03.png

In Cinnibar, we go straight to the lab and talk to this guy, who teaches tutor moves. We teach our now fully evolved butterfree Hurricane in prep for the next boss fight.

Now, Butterfree-mega time.

Mega Butterfree
Type: Bug/Flying
Ability: Compound Eyes
Stats: 60 HP/45 Atk/100 Def/140 SpAtk/100 SpDef/80 Speed
Nothing much to talk about here, this is just a massively buffed Butterfree stats wise while changing little else. Lets see if thats enough.

Dumbass Jojo Fan - Power Plant (Aegislash) @ Leftovers
Ability: Stance Change
Level: 71
Modest Nature
- Shadow Ball
- Shadow Sneak
- Flash Cannon
- Kings Shield

Dumbass Jojo Fan - Power Plant (Simisear) @ Choice Scarf
Ability: Sage Power
Level: 71
Modest Nature
- Flamethrower
- Hidden Power Ice
- Focus Blast
- Scorching Sands

Dumbass Jojo Fan - Power Plant (Ferrothorn) @ Rocky Helmet
Ability: Iron Barbs
Level: 71
Impish Nature
- Leech Seed
- Power Whip
- Thunder Wave
- Body Press

Dumbass Jojo Fan - Power Plant (Hoopa-Unbound) @ Choice Band
Ability: Magician
Level: 71
Jolly Nature
- Hyperspace Fury
- Drain Punch
- Fire Punch
- Gunk Shot

Dumbass Jojo Fan - Power Plant (Machamp-Mega) @ Machampite
Ability: ORAORAORAORA
Level: 71
Adamant Nature
- Power-Up Punch
- Bullet Punch
- Ice Punch
- Drain Punch

Dumbass Jojo Fan - Power Plant (Celebi) @ Life Orb
Ability: Natural Cure
Level: 71
Timid Nature
- Nasty Plot
- Giga Drain
- Psychic
- Earth Power


We lead off with Butterfree vs Aegislash. I go for a sleep powder turn 1. Next turn I QD as he annoyingly wakes up and Shadow Balls. I sleep again, and after a second QD, Hidden Power Fire OHKOs. Ferrothorn comes in and easily dies to a +2 HP Fire. Next comes Simisear. Now, the rest of this battle gets a lot more consistent if I can get a 3rd QD up, so I decide to just go for the risky play and sleep the simisear, get a QD off, and Hurricane it to death. After that, Celebi, Machamp and Hoopa are all killed by a +3 Hurricane, getting us a Machampite.


Radical Red 3.1_25.png
Radical Red 3.1_26.png

I also pick up the TMs for Superpower and Thunder in the power plant.
Radical Red 3.1_27.png

The Ampharosite is also here.
Radical Red 3.1_28.png
Radical Red 3.1_36.png

No joke, this took me like 40 balls. I was actually running out of Ultra Balls and seriously worried about having to reset.

Once again, boss fight time!

:steelix:
Jasmine 1 - Cinnabar Island (Steelix) @ Chople Berry
Ability: Sturdy
Level: Scale-2
Adamant Nature
- Stealth Rock
- Iron Head
- Earthquake
- Roar

:melmetal:
Jasmine 1 - Cinnabar Island (Melmetal) @ Choice Band
Ability: Clear Body
Level: Scale-2
Adamant Nature
- Double Iron Bash
- Earthquake
- Superpower
- Thunder Punch

:aegislash:
Jasmine 1 - Cinnabar Island (Aegislash) @ Leftovers
Ability: Stance Change
Level: Scale-2
Rash Nature
- Shadow Ball
- Shadow Sneak
- Close Combat
- Kings Shield

:durant:
Jasmine 1 - Cinnabar Island (Durant) @ Life Orb
Ability: Hustle
Level: Scale-2
Jolly Nature
- Iron Head
- Superpower
- X-Scissor
- Hone Claws

:duraludon:
Jasmine 1 - Cinnabar Island (Duraludon) @ Assault Vest
Ability: Light Metal
Level: Scale-2
Modest Nature
- Draco Meteor
- Flash Cannon
- Thunderbolt
- Dragon Pulse

:aggron-mega:
Jasmine 1 - Cinnabar Island (Aggron-Mega) @ Aggronite
Ability: Filter
Level: Scale-2
Adamant Nature
- Heavy Slam
- Earthquake
- Fire Punch
- Dragon Claw


Like Pryce, jasmine has three teams she can use. The team with Steelix is the most annoying lead for me to face, since Steelix will just roar out Drednaw if we get too many boosts.

Jasmine leads off with Steelix as we lead off with Dred. I go for a Jaw Lock turn 1, bringing Steelix to around half HP after chople berry, as Steelix uses Rocks. Next turn I use Swords Dance as Steelix goes for EQ. Aqua Fang takes Steelix out. Durant comes in next and gets us down to 7hp with Superpower before dying to Jaw Lock. From there, Jaw Lock OHKOs Melmetal and Duraludon, Aqua Fang OHKOs Aegislash, and Jaw Lock OHKOs Aggron, winning us the battle.

Radical Red 3.1_29.png
Radical Red 3.1_30.png
Radical Red 3.1_31.png
Radical Red 3.1_32.png

If you show may a pokemon with 125 defense or higher, she will give you the Assault Vest and the Steelixite. We show Ferro.

No rest for the wicked though, as there is another boss battle immediately after.

:solrock:
May - Cinnabar Island (Solrock) @ Focus Sash
Ability: Levitate
Level: 71
Jolly Nature
- Stealth Rock
- Photon Geyser
- Explosion
- Earthquake

:relicanth:
May - Cinnabar Island (Relicanth) @ Choice Band
Ability: Rock Head
Level: 72
Adamant Nature
- Waterfall
- Head Smash
- Earthquake
- Zen Headbutt

:flygon:
May - Cinnabar Island (Flygon) @ Life Orb
Ability: Tinted Lens
Level: 72
Hasty Nature
- Earthquake
- Draco Meteor
- Fire Blast
- Outrage

:breloom:
May - Cinnabar Island (Breloom) @ Toxic Orb
Ability: Poison Heal
Level: 71
Jolly Nature
- Spore
- Substitute
- Focus Punch
- Rock Slide

:manectric:
May - Cinnabar Island (Manectric) @ Choice Specs
Ability: Lightning Rod
Level: 72
Timid Nature
- Volt Switch
- Thunderbolt
- Overheat
- Switcheroo

:blaziken-mega:
May - Cinnabar Island (Blaziken-Mega) @ Blazikenite
Ability: Speed Boost
Level: 73
Adamant Nature
- Swords Dance
- Close Combat
- Flare Blitz
- Rock Slide


Finally, a boss we cant sweep with a single mega. May leads off with Solrock as we lead off with Sceptile. Solrock sees the kill here with Explosion, and a 2 hit Bullet Seed will NOT ko, so I play it safe and just switch to Chandelure as Solrock explodes. Manectric comes in, and this is just a free switch to Dodrio, who takes it out the next turn with Flare Blitz. In comes Flygon, who takes out Dodrio with EQ. Sceptile comes in, and takes out Flygon with Dual Chop. Blaziken comes in here, and we sack Ferrothorn for some chip damage. Greninja comes out and a 2 hit Shuriken isnt enough to take out Blaziken, who kills us with Close Combat. Typhlosion comes in and kills Blaziken with Flamethrower. In comes Relicanth, and we sack Chandelure to EQ before going Sceptile. May switches to breloom on the Bullet Seed, but Breloom just dies to Dual Chop next turn. Relicanth comes back out and this time Bullet Seed KOs, winning us the battle.


After this battle, may gives us a Torchic with Speed Boost. Very nice.

And now, finally, the last boss of this update.

:torkoal:
Blaine - Cinnabar Island (Torkoal) @ Heat Rock
Ability: Drought
Level: 75
Quiet Nature
- Stealth Rock
- Explosion
- Lava Plume
- Earth Power

:sunflora:
Blaine - Cinnabar Island (Sunflora) @ Life Orb
Ability: Chlorophyll
Level: 76
Timid Nature
- Seed Flare
- Flamethrower
- Earth Power
- Sunny Day

:cinderace:
Blaine - Cinnabar Island (Cinderace) @ Life Orb
Ability: Protean
Level: 75
Jolly Nature
- Pyro Ball
- Sucker Punch
- High Jump Kick
- Zen Headbutt

:typhlosion:
Blaine - Cinnabar Island (Typhlosion) @ Heavy-Duty Boots
Ability: Blazing Soul
Level: 76
Modest Nature
- Eruption
- Flamethrower
- Hidden Power Ice
- Focus Blast

:exeggutor:
Blaine - Cinnabar Island (Exeggutor) @ Focus Sash
Ability: Harvest
Level: 76
Timid Nature
- Growth
- Giga Drain
- Psyshock
- Weather Ball

:charizard-mega-y:
Blaine - Cinnabar Island (Charizard-Mega-Y) @ Charizardite Y
Ability: Drought
Level: 76
Timid Nature
- Flamethrower
- Air Slash
- Solar Beam
- Dragon Pulse


Unfortunately, Blaine is just another gym leader this update who completely crumbles before the might of Drednaw.

Unlike the other gym leaders though, just setting up an SD isnt enough to win. We also need to set up rocks. I put rocks on Drednaw because I couldnt figure out how else to safely get it in a position where it could Rock Polish. So Torkoal and Dred trade Rocks, then Dred just Rock Polishes as Torkoal explodes. Even if Torkoal switches out here instead, its not a huge threat, but it will only either switch out or Explode, so the Rock Polish here is free. Cinderace comes in and gets obliterated by Jaw Lock. Eggy comes in and dies to Crunch after rocks. Typhlosion comes in here and uses Eruption (illegal btw), which leaves us at 7HP as we almost KO it with Jaw Lock. With its Blazing Soul broken however, we can finish it off the next turn. Sunflora gets obliterated by Jaw Lock. That leaves only Zard, and, funny enough, even a resisted Jaw Lock is enough to take it out after rocks, winning us the battle and getting us the badge.


Radical Red 3.1_33.png
Radical Red 3.1_34.png

Showing Blaine a pokemon with more than 125 Sp.Atk will get us the Choice Specs. We show him Chandelure and complete the trifecta of powerful items we now have access to.


Next update should be either tomorrow or day after. We are ramping up into the end game now, cheers.
 

Attachments

Radical Red 3.1_05.png

Last time we left off having just defeated Blaine. This time we will go all the way through to Victory Road.
Radical Red 3.1_06.png

But first, Viridian Gym.
Radical Red 3.1_07.png

god fucking dammit what now
Radical Red 3.1_08.png
Radical Red 3.1_09.png
Radical Red 3.1_10.png

Hello to you too bestie
Radical Red 3.1_11.png
Radical Red 3.1_12.png

can it wait until I kick Giovanni's ass
Radical Red 3.1_13.png

Oh nvm he'll probably be there
Radical Red 3.1_14.png
Radical Red 3.1_15.png

I mean probably why else would they care about a cave
Radical Red 3.1_17.png
Radical Red 3.1_19.png

Very abrupt. but LEGGOOO
Radical Red 3.1_20.png
Radical Red 3.1_21.png

we literally came here looking for team rocket how are you surprised by this
Radical Red 3.1_22.png
Radical Red 3.1_24.png
Radical Red 3.1_25.png
Radical Red 3.1_26.png

No... I dont think I will.

See, first off, we need to do some prep work for the upcoming battles.
Radical Red 3.1_27.png

We evolve Meltan into Melmetal. We also get Heracross to the level cap and put a Heracronite on it. We also train up Galvantula (last seen in episode 3) all the way up to level cap and put Sucker Punch on it.
And NOW we are ready for the upcoming boss fight.

ARCHERS TEAM:
:mamoswine:

Rocket Admin Archer - Cerulean Cave (Mamoswine) @ Focus Sash
Ability: Thick Fat
Level: 77
Jolly Nature
- Earthquake
- Ice Shard
- Endeavor
- Icicle Crash

:durant:
Rocket Admin Archer - Cerulean Cave (Durant) @ Life Orb
Ability: Hustle
Level: 78
Jolly Nature
- Hone Claws
- Iron Head
- X-Scissor
- Superpower

:mimikyu:
Rocket Admin Archer - Cerulean Cave (Mimikyu) @ Lum Berry
Ability: Disguise
Level: 79
Jolly Nature
- Play Rough
- Swords Dance
- Shadow Claw
- Shadow Sneak

:houndoom-mega:
Rocket Admin Archer - Cerulean Cave (Houndoom-Mega) @ Houndoomite
Ability: Dark Aura
Level: 79
Timid Nature
- Fiery Wrath
- Flamethrower
- Sucker Punch
- Sludge Bomb

ARIANAS TEAM:
:hatterene:

Rocket Admin Ariana - Cerulean Cave (Hatterene) @ Sitrus Berry
Ability: Magic Bounce
Level: 77
Modest Nature
- Trick Room
- Psychic
- Dazzling Gleam
- Mystical Fire

:rhyperior:
Rocket Admin Ariana - Cerulean Cave (Rhyperior) @ Weakness Policy
Ability: Solid Rock
Level: 78
Adamant Nature
- Earthquake
- Rock Blast
- Ice Punch
- Heat Crash

:honchkrow:
Rocket Admin Ariana - Cerulean Cave (Honchkrow) @ Scope Lens
Ability: Super Luck
Level: 78
Jolly Nature
- Sucker Punch
- Night Slash
- Drill Peck
- Superpower

:mawile-mega:
Rocket Admin Ariana - Cerulean Cave (Mawile-Mega) @ Mawilite
Ability: Huge Power
Level: 79
Adamant Nature
- Sucker Punch
- Iron Head
- Play Rough
- Swords Dance


Now, the way this battle works is as such: You have 6 pokemon. Archer and Ariana have four each. The battles are back to back, so you dont get any time to change your team or heal in between. That means we need a team of six pokemon that can deal with both teams. The way I usually approach it is to have three pokemon dedicated to Archer, and three dedicated to Ariana. That way, if we win the Archer battle, we have atleast 1 sack in the back to deal with Ariana.

I decide to use Mega Heracross under webs for Archer, and Melmetal + Ferro with Typhlosion as a backup for Ariana.
Lets see how it went.

We lead off with Galvantula against Mamoswine. We set up webs turn 1, and sucker punch turn 2 to break Mamo's sash as we get taken out by Earthquake into Ice Shard. Greninja comes in. Scald is a straight OHKO on Mamo, getting us Ash-Gren. Mimikyu comes in, and Water Shuriken takes it to about half after Disguise procs as it SDs. Scald then almost takes it out, and Play Rough gets us down to Sash. Water Shuriken takes it out the next turn. Durant comes in next, and I take a risk and go for Hydro Pump, which OHKOs it. The safer play is to Scald and let Hera clean up the battle, but this was the cooler play, and doesnt risk too much, since Hera can deal with Durant + Houndoom as long as its at full HP going into the matchup. Houndoom comes in and Suckers us. Thats my bad, I forgot Sucker Punch existed. Anyways, Heracross comes in, and Arm Thrust (buffed to 25 bp per hit in RR) is a clean OHKO on Houndoom.

Now, Ariana. I deliberately put Melmetal in slot 2 in the party so it would be the lead in this battle after Galvantula fainted. Melmetal takes out Hatterene with a CB Adamant Double Iron Bash immediately, only needing 1 hit. Mawile comes out, and the Intim makes this not a guaranteed OHKO. I dont get the OHKO roll, but Mawile just SDs anyways so it didnt matter. Next turn, I switch out to Ferro. I Stealth Rock as Play Rough does an obscene amount of damage and takes out Mawile with Iron barbs. Honchkrow comes out here and kills us with Superpower. Melmetal comes in next and takes a LOT of damage from crit superpower, but KOs back with DIB. Rhyperior comes in next and takes us out with EQ. We go Heracross, and Bullet Seed is an OHKO on rhyperior. Theres a version of the battle where the order of pokemon sent out is hatterene - rhyp - mawile - honchkrow, and we are very lucky to not have gotten that extremely annoying version of the battle.


As a reward, we get the Houndoomite and Mawilite.

Now for, no joke, the hardest boss fight in the game.

:tapu lele:
Giovanni 3 - Cerulean Cave (Tapu Lele) @ Terrain Externder
Ability: Psychic Surge
Level: 80
Timid Nature
- Moonblast
- Psychic
- Thunderbolt
- Focus Blast

:scrafty:
Giovanni 3 - Cerulean Cave (Scrafty) @ Psychic Seed
Ability: Intimidate
Level: 80
Modest Nature
- Roar
- Knock Off
- Drain Punch
- Ice Punch

:tyranitar:
Giovanni 3 - Cerulean Cave (Tyranitar) @ Assault Vest
Ability: Sand Stream
Level: 80
Careful Nature
- Crunch
- Rock Slide
- High Horsepower
- Fire Punch

:excadrill:
Giovanni 3 - Cerulean Cave (Excadrill) @ Focus Sash
Ability: Sand Rush
Level: 80
Adamant Nature
- High Horsepower
- Iron Head
- Rock Slide
- Swords Dance

:celesteela:
Giovanni 3 - Cerulean Cave (Celesteela) @ Power Herb
Ability: Beast Boost
Level: 80
Modest Nature
- Autotomize
- Meteor Beam
- Flamethrower
- Air Slash

:mewtwo:
Giovanni 3- Cerulean Cave (Mewtwo) @ Mewtwonite Y
Ability: Timid
Level: 80
Pressure Nature
- Expanding Force
- Soul Robbery
- Aura Sphere
- Flamethrower

:mewtwo-mega-y:
Giovanni 3 - Cerulean Cave (Mewtwo-Mega-Y) @ Mewtwonite Y
Ability: Timid
Level: 80
Insomnia Nature
- Expanding Force
- Soul Robbery
- Aura Sphere
- Flamethrower


So, lets go over it. Firstly, the mewtwo will mega evolve and get back all its health after it dies. Secondly, this is a double battle. Thirdly, we dont even have access to all our pokemon. This is a tag team battle with Lance. Lance is, and I am putting this as gently as I can, the stupidest most idiotic dumbest piece of shit to ever hold a pokeball. We essentially have 3 teamslots to deal with 7 pokemon. God help us all.
But first, the level cap jumps up 1 level to 80 after Archer+Ariana. So...
Radical Red 3.1_30.png

LEGGOOOOO
(This makes absolutely no difference for this particular battle but its rly useful later on)
We choose Greninja, Sceptile, and Melmetal for this fight.
The reason is pretty simple: If you kill base mewtwo with a multi hit move, then the move will continue on mega mewtwo. In addition, Expanding Force from Mega Mewtwo is a BIG threat, so we have 1 resistance (Melm), 1 immunity (gren). Sceptile is just our most powerful multi hit attacker, and has enough speed to outspeed everything except Mewtwo, who we can possibly outspeed as long as we get a safe Scale Shot off. This comp was pretty decent in tested, although I put Rock Tomb over Aerial Ace on Sceptile after getting fucked over by a sceptile v celesteela endgame. With all that out of the way, lets get into the fight.
We lead with Gren and Dragapult into Lele and Scrafty. Draga has a 50/50 between Reflect and Light Screen. Its really good if it uses Light Screen, because that means itll also get a reflect up before dying. Unfortunately, Lance's AI is quite stupid, and he goes for Reflect in this battle, dying to Moonblast. We Hydro the Lele as Draga dies to Moonblast and Scrafty does respectable damage with Drain Punch. Mence comes out. This is another reason why Draga using Light Screen turn 1 is preferred; we kinda want Scrafty to be on the field as long as possible because its the least threatening thing on this team. However, Mence is guaranteed to 1 shot it with Double Edge turn 1. Theres nothing I can do about that unfortunately, so I just kill the Lele with Scald. Ttar + Mewtwo come out. Mewtwo outspeeds and kills us with Aura Sphere. In hindsight, I should have put Timid on Gren to outspeed it, but I only just now realized that was a possibility. Salamence Double Edges Mewtwo to yellow as Ttar Rock Slides Mence, leaving it in red. Melm comes in next, and Expanding Force takes out Salamence while doing around 40 to Melm. High Horsepower hilariously does less than Expanding Force, and Double Iron Bash activates Mega Mewtwo, and then brings it down to yellow, red after sandstorm chip. Dialga comes out. Expanding Force fails to kill Melm, and Dialga takes out the Mewtwo with Dragon Pulse. Rock Slide kills Melm. We are left with only Sceptile and Dialga against three gigantic threats. Excadrill comes out. Exca SDs, after which Bullet Seed and Flamethrower kill it. TTar Crunches Sceptile for about 40ish. Celesteela comes in. I cant do much to Steela, so I focus down the TTar, unluckily getting only a 2 hit, leaving it in yellow. Dialga flamethrowers Celesteela, bringing it to yellow, and thankfully burning it. Celesteela Flamethrowers dialga back, doing not a whole lot, as TTar crunches us again into red. Next turn, Bullet Seed takes out TTar, and Flamethrower takes out Celesteela.

Radical Red 3.1_31.png
Radical Red 3.1_32.png

Yaa fuck u u goddamn terrorist
Radical Red 3.1_33.png
Radical Red 3.1_34.png
Radical Red 3.1_35.png

Me and my friend have this bit where we bring up the sunk cost fallacy for everything. Got a large fries at mcdonalds instead of a medium? Sunk cost fallacy. Bought games for our switch? Sunk Cost Fallacy. Taking summer courses to graduate from uni? Sunk cost fallacy. This does seem a little more serious though.
Radical Red 3.1_36.png

Not you two
Radical Red 3.1_37.png
Radical Red 3.1_38.png

This part is so fucking cheesy
Radical Red 3.1_39.png
Radical Red 3.1_41.png
Radical Red 3.1_42.png
Radical Red 3.1_43.png

YOU HELPED HIM. TRY TO TAKE OVER THE WORLD. WITH A GOD. THIS IS NOT. A HEARTWARMING MOMENT. YOU ABSOLUTE FUCKS.
Radical Red 3.1_44.png

YOUR LOYALTY WAS CLEARLY IMMORAL
Radical Red 3.1_47.png
Radical Red 3.1_48.png

This genuinely feels like a Pokemon-esque scene, and I dont know if thats a compliment or an insult.
Radical Red 3.1_49.png
Radical Red 3.1_50.png

I feel like this is the only case where unconditional love might be a bad thing
Radical Red 3.1_51.png
Radical Red 3.1_52.png
Radical Red 3.1_53.png

Ok are u gonna like stop being crazy and go to PokeJail now or
Radical Red 3.1_54.png
Radical Red 3.1_55.png
Radical Red 3.1_56.png
Radical Red 3.1_57.png

Ok but why not Lance? He was the one to actually land the killing blow on you
Radical Red 3.1_58.png
Radical Red 3.1_59.png
Radical Red 3.1_60.png

He forces us like 10 feet out of a cave, I dont know if thats powerful
Radical Red 3.1_61.png
Radical Red 3.1_62.png
Radical Red 3.1_63.png
Radical Red 3.1_64.png

This is genuinely the worst part of the game for me. This writing just aint it. In the original FRLG, Gio was just like. A gangster. In this he's basically a terrorist. Why are we meant to like him all of a sudden?
Radical Red 3.1_65.png
Radical Red 3.1_66.png
Radical Red 3.1_67.png

GO. TO. JAIL. PLEASE. LANCE. ARREST HIM.
Radical Red 3.1_72.png
Radical Red 3.1_73.png

ARE YOU FUCKING SERIOUS
Radical Red 3.1_74.png
Radical Red 3.1_75.png
Radical Red 3.1_76.png

I had to delete the joke I wrote here because it was insensitive, so fill in the blanks.
Radical Red 3.1_77.png
Radical Red 3.1_78.png
Radical Red 3.1_79.png
Radical Red 3.1_80.png

And then he just kinda. Fucks off.
Amazing.
That detour done with, its finally time to do Viridian gym.
Radical Red 3.1_108.png

Sidenote, the following pokemon thingy got really fucked up in Viridian and it was quite funny.

Anyways
Next boss!

:aerodactyl:
Clair - Viridian City (Aerodactyl) @ Focus Sash
Ability: Pressure
Level: 80
Jolly Nature
- Stealth Rock
- Stone Edge
- Earthquake
- Taunt

:magearna:
Clair - Viridian City (Magearna) @ Leftovers
Ability: Soul-Heart
Level: 81
Modest Nature
- Shift Gear
- Fleur Cannon
- Flash Cannon
- Aura Sphere

:dracovish:
Clair - Viridian City (Dracovish) @ Choice Scarf
Ability: Strong Jaw
Level: 80
Adamant Nature
- Fishous Rend
- Psychic Fangs
- Outrage
- Crunch

:dragonite:
Clair - Viridian City (Dragonite) @ Weakness Policy
Ability: Multiscale
Level: 80
Adamant Nature
- Extreme Speed
- Dragon Dance
- Fire Punch
- Dual Wingbeat

:naganadel:
Clair - Viridian City (Naganadel) @ Life Orb
Ability: Beast Boost
Level: 81
Timid Nature
- Nasty Plot
- Sludge Wave
- Draco Meteor
- Flamethrower

:duraludon-mega:
Clair - Viridian City (Duraludon-Mega) @ Duraldite
Ability: Bad Company
Level: 81
Timid Nature
- Draco Meteor
- Steel Beam
- Thunderbolt
- Dark Pulse


Duraludon-mega's ability makes it immune to stat drops (including self inflicting stat drops) and recoil damage (including from Steel Beam). Good design. Might use it in gym leader rematches.

We lead off with Sceptile into Aero. Aero is guaranteed to go for a taunt turn 1 if we have any status moves, so its trivial to just kill it with 2 bullet seeds. In comes Magearna. The only way that Chandy can die to Mag is crit fleur cannon into crit fleur cannon and it cant get off two fleur cannons in any scenario (specs flame is an OHKO, and it needs to Shift Gear to outspeed), so I go Chandy and kill it with flamethrower, taking a FC in the process. Dracovish comes in, and I sack Chandy to see its move. If it locks into Psychic Fangs, I go Krook, if it locks into Fisheous, the battle is much easy since I can go Sceptile. In this case, it locks into Fischeous, and I go Sceptile. I SD into Scale Shot, taking a very weak Rend in the process. Dragonite comes in, and easily dies to Scale Shot. Naganadel comes in, and easily dies to Scale Shot. Duraludon comes in, and surprisingly lives a 2 hit Scale Shot, killing with Steel Beam afterwards. I just go Krook and kill with a scarf EQ, getting us the last gym badge.

And with that, we are officially done with all the badges! only a few battles remain in our way!

Radical Red 3.1_109.png
Radical Red 3.1_110.png
Radical Red 3.1_111.png

Thanks! It was a piece of cake.
Radical Red 3.1_112.png
Radical Red 3.1_113.png
Radical Red 3.1_114.png

Thanks but they are a pain to catch without hacking in masterballs, and I dont plan to actually use any of them, so, maybe next playthrough <3
Time for the next boss fight!

:staraptor:
Rival 4 [Water] - Route 22 (Staraptor) @ Choice Band
Ability: Intimidate
Level: 80
Jolly Nature
- U-turn
- Double-Edge
- Brave Bird
- Close Combat

:kartana:
Rival 4 [Water] - Route 22 (Kartana) @ Choice Scarf
Ability: Beast Boost
Level: 81
Adamant Nature
- Leaf Blade
- Smart Strike
- Sacred Sword
- X-Scissor

:electivire:
Rival 4 [Water] - Route 22 (Electivire) @ Expert Belt
Ability: Iron Fist
Level: 80
Jolly Nature
- Plasma Fists
- Close Combat
- Mach Punch
- Ice Punch

:darmanitan:
Rival 4 [Water] - Route 22 (Darmanitan) @ Life Orb
Ability: Sheer Force
Level: 81
Jolly Nature
- Flare Blitz
- Earthquake
- U-turn
- Rock Slide

:azumarill:
Rival 4 [Water] - Route 22 (Azumarill) @ Mystic Water
Ability: Huge Power
Level: 81
Adamant Nature
- Aqua Jet
- Ice Punch
- Play Rough
- Liquidation

:venusaur-mega:
Rival 4 [Water] - Route 22 (Venusaur-Mega) @ Vensaurite
Ability: Thick Fat
Level: 81
Modest Nature
- Giga Drain
- Sludge Bomb
- Sleep Powder
- Earth Power


I was looking thru megas for one that could sweep his team, and unfortunately came up short. So I decided to do this battle without any megas.

We lead off with Lyca into Staraptor. We set up rocks as Staraptor takes us out with CC. Dodrio comes in, and OHKOs with Flare Blitz. Azumarill comes in, and this is a free switch to Ferrothorn. I try to catch the Electivire next turn by switching into dodrio immediately, but Green just switches to Kart instead. This is honestly fine. Chandy is never 2hkod by any of Karts moves, barring a crit, so we can easily go Chandy and kill with Flamethrower. Darm comes in, and I dont have a safe switchin, so Chandy dies to Flare Blitz. Dodrio comes out, and Headlong Rush kills Darm. Electivire comes in, and Mach Punch does about half as Headlong kills. Azu comes in, and we switch to Ferro. Now, Azu isnt actually guaranteed to switch here, and I dont want Delphox getting frozen by Ice Punch, so I opt to stay in and tickle the venu that comes in with power Whip. We go Delphox next turn, who easily survives an Earth Power and OHKOs with Life Orb Psychic. Azu comes back out, and I dont want Melm feeling left out, so even tho Ferro is better here, I go Melm and kill it with DIB, taking some damage from Jet into Liquidate, winning the fight.


Now, the upcoming boss battle is really hard, so I do some prep work.
Radical Red 3.1_116.png

Namely, catching this Buizel.
Radical Red 3.1_117.png
Radical Red 3.1_118.png
Radical Red 3.1_119.png

And teaching it Fake Out and Surging Strikes, as well as changing its ability to Technician. Yeah. Technician Surging Strikes. Fear this.

Now, I have bad news.
I dont know why, but vba just,,, didnt record this battle. it recorded upto the battle starting, then the recording shit out and the rest of the battle is blank screen. And I already saved the game afterwards. You guys are just gonna have to take my word for it that I beat his team with a mix of Chandy, Floatzel, Golem, and Melmetal. I am sorry. This will not happen again, I'll double check the recordings in the future.

All the photos from this point on were also corrupted. This probably has something to do with how low my storage space is right now. I will work it out for the next couple of updates.
For now, just enjoy this screenie from after victory road I just took.
Radical Red 3.1_01.png


Last update soon! Love you all!
 

Attachments

A lil sneaky peaky update to tide you guys over until the finale.

Edit: Dont know what happened w the youtube links.
So, there are some boss battles left in the game. After Sabrina, Brock thru Erika become available for rematches again, we also skipped Whitney and Morty, and there is also an extra boss battle that I actually want to do because the reward is awesome.

We've already explored all of the map at this point, so lets just jump straight into the boss battles.

First up, Brock.

:gigalith:
Brock (Rematch) - Pewter City (Gigalith) @ Smooth Rock
Ability: Sand Stream
Level: 83
Adamant Nature
- Stealth Rock
- Stone Edge
- Earthquake
- Explosion

:tyranitar:
Brock (Rematch) - Pewter City (Tyranitar) @ Weakness Policy
Ability: Sand Stream
Level: 83
Jolly Nature
- Stone Edge
- Fire Punch
- Crunch
- Dragon Dance

:lycanroc:
Brock (Rematch) - Pewter City (Lycanroc) @ Life Orb
Ability: Tough Claws
Level: 83
Jolly Nature
- Accelerock
- Stone Edge
- Close Combat
- Crunch

:omastar:
Brock (Rematch) - Pewter City (Omastar) @ Power Herb
Ability: Battle Armor
Level: 83
Modest Nature
- Shell Smash
- Meteor Beam
- Ice Beam
- Surf

:sandslash:
Brock (Rematch) - Pewter City (Sandslash) @ Soft Sand
Ability: Sand Rush
Level: 83
Adamant Nature
- Swords Dance
- Earthquake
- Stone Edge
- X-Scissor

:aerodactyl-mega:
Brock (Rematch) - Pewter City (Aerodactyl-Mega) @ Aerodactylite
Ability: Tough Claws
Level: 83
Jolly Nature
- Stone Edge
- Earthquake
- Dual Wingbeat
- Dragon Dance


As always, Brock is a complete pushover. Atleast most of the other battles in this update required some setup or something, but no, Brock just straight up loses outright from lead matchup to Drednaw. We set up a Rock Polish on Gigaliths Stealth Rocks, and then Jaw Lock takes out Gigalith. From there, in order, we oneshot Omastar(Jaw Lock), Sandslash(Aqua Fang), Lycanroc(Jaw Lock), Tyranitar(Jaw Lock), and Aerodactyl(Aqua Fang).

Beating Brock gives us the Aerodactylite and the Stone Edge TM. Stone Edge is the more useful out of the two, Aerodactyl isnt that great until the postgame (Where you get an event Aerodactyl with Brave Bird and Headlong Rush).

Next on our list is Misty.

:politoed:
Misty (Rematch) - Cerulean City (Politoed) @ Damp Rock
Ability: Drizzle
Level: 83
Modest Nature
- Scald
- Ice Beam
- Hypnosis
- Flip Turn

:greninja:
Misty (Rematch) - Cerulean City (Greninja) @ Life Orb
Ability: Protean
Level: 83
Timid Nature
- Dark Pulse
- Water Shuriken
- Ice Beam
- Grass Knot

:gorebyss:
Misty (Rematch) - Cerulean City (Gorebyss) @ White Herb
Ability: Regenerator
Level: 83
Modest Nature
- Shell Smash
- Surf
- Moonblast
- Ice Beam

:kingdra:
Misty (Rematch) - Cerulean City (Kingdra) @ Life Orb
Ability: Swift Swim
Level: 83
Modest Nature
- Dragon Pulse
- Surf
- Hurricane
- Ice Beam

:inteleon:
Misty (Rematch) - Cerulean City (Inteleon) @ Scope Lens
Ability: Sniper
Level: 83
Timid Nature
- Snipe Shot
- Dark Pulse
- Ice Beam
- Air Slash

:gyarados-mega:
Misty (Rematch) - Cerulean City (Gyarados-Mega) @ Gyaradosite
Ability: Mold Breaker
Level: 83
Adamant Nature
- Dragon Dance
- Waterfall
- Crunch
- Earthquake


Now, so far in this run, I've refrained from using Weather teams, because weather in RR is just incredibly powerful, and I feel like it makes some gym leaders too easy (for example, sun destroys Misty with Victreebel + Torkoal and Sand destroys Surge if you can get rocks up). However, I do want to use Mega Abomasnow atleast once this run, because the buff for it is so fun. So we go out and catch two new pokemon.
Radical Red 3.1_02.png
Radical Red 3.1_03.png

Now, Abomasnow-Mega in this game gets Slush Rush. So if you have base Aboma with Snow Warning, you just have a +2 speed monster for 5 turns. Unfortunately, Misty has 6 pokemon (nerd), so I also catch a Vanilluxe. The plan is Abomasnow, Mega, kill 5 things, go Vanilluxe, Explode, kill the last thing with Abomasnow again.

We lead with Abomasnow. We underspeed Politoed, so our Hail goes up. We mega evolve turn 1 and kill Politoed with Wood Hammer. Greninja, Gorebyss, Kingdra and Inteleon all drop to Freeze Dry. Hail ends and Gyarados comes out. We swap to Vanilluxe as Gyara DDs. Explosion brings it to yellow after we live a Crunch, then Aboma comes back in and kills with Freeze Dry.

The reward for this battle is a Protean Froakie and the Gyaradosite. Neither are particularly good, but oh well. It is what it is.

Next battle!

:pachirisu:
Lt. Surge (Rematch) - Vermillion City (Pachirisu) @ Light Clay
Ability: Prankster
Level: 83
Impish Nature
- Reflect
- Light Screen
- Nuzzle
- U-turn

:dracozolt:
Lt. Surge (Rematch) - Vermillion City (Dracozolt) @ Choice Scarf
Ability: Hustle
Level: 83
Adamant Nature
- Bolt Beak
- Dragon Claw
- Crunch
- Fire Fang

:dedenne:
Lt. Surge (Rematch) - Vermillion City (Dedenne) @ Terrain Extender
Ability: Electric Surge
Level: 83
Timid Nature
- Rising Voltage
- Volt Switch
- Dazzling Gleam
- Grass Knot

:rotom-wash:
Lt. Surge (Rematch) - Vermillion City (Rotom-Wash) @ Life Orb
Ability: Levitate
Level: 83
Timid Nature
- Nasty Plot
- Rising Voltage
- Hidden Power Grass
- Hydro Pump

:rotom-mow:
Lt. Surge (Rematch) - Vermillion City (Rotom-Mow) @ Life Orb
Ability: Levitate
Level: 83
Timid Nature
- Thunderbolt
- Leaf Storm
- Hidden Power Ice
- Nasty Plot

:manectric-mega:
Lt. Surge (Rematch) - Vermillion City (Manectric-Mega) @ Manectite
Ability: Intimidate
Level: 83
Timid Nature
- Volt Switch
- Rising Volt
- Flamethrower
- Hidden Power Grass


We lead with Sceptile against Pachirisu. We SD as Pachirisu Reflects, then Brick Break as Pachirisu Light Screens. Now, theres a bug where if you kill something with Scale Shot, you dont get the speed boost, which messed up the ending of this battle for me. Regardless, Scale Shot kills Pachirisu. Dracozolt dies to Scale Shot, Rotom-Wash dies to Bullet Seed, Dedenne dies to Bullet Seed, Rotom dies to Scale Shot, and Manectric takes a Scale Shot into Bullet seed while hitting us with Flamethrower.

As a reward, we get the Manectrite and Light Clay. Light Clay could be useful in the E4.

Next battle!
Radical Red 3.1_04.png
Radical Red 3.1_05.png

Oh right, we need to get medicine for her Gloom before we can fight her. Luckily...

Radical Red 3.1_39.png

Foreshadowing
We know exactly where to get it.
Radical Red 3.1_07.png
Radical Red 3.1_08.png
Radical Red 3.1_09.png
Radical Red 3.1_10.png

Ez
Radical Red 3.1_11.png
Radical Red 3.1_12.png
Radical Red 3.1_13.png
Radical Red 3.1_14.png

And NOW we can battle Erika!

:tsareena:
Erika (Rematch) - Celadon City (Tsareena) @ Focus Sash
Ability: Striker
Level: 83
Adamant Nature
- Triple Axel
- Trop Kick
- High Jump Kick
- Rapid Spin

:hawlucha:
Erika (Rematch) - Celadon City (Hawlucha) @ Grassy Seed
Ability: Unburden
Level: 83
Adamant Nature
- Swords Dance
- Acrobatics
- Close Combat
- Roost

:bellossom:
Erika (Rematch) - Celadon City (Bellossom) @ Leftovers
Ability: Chlorophyll
Level: 83
Timid Nature
- Sleep Powder
- Quiver Dance
- Giga Drain
- Fiery Dance

:rillaboom:
Erika (Rematch) - Celadon City (Rillaboom) @ Grassy Seed
Ability: Grassy Surge
Level: 83
Timid Nature
- Swords Dance
- Grassy Glide
- Acrobatics
- High Horsepower

:serperior:
Erika (Rematch) - Celadon City (Serperior) @ Focus Sash
Ability: Contrary
Level: 83
Timid Nature
- Leaf Storm
- Giga Drain
- Dragon Pulse
- Leech Seed

:venusaur-mega:
Erika (Rematch) - Celadon City (Venusaur) @ Venusaurite
Ability: Thick Fat
Level: 83
Modest Nature
- Giga Drain
- Sludge Bomb
- Earth Power
- Synthesis


Now, we can use pretty much the exact same strategy as our first Erika fight for this.

We lead off with Lycanroc into Tsareena. We gets rocks up before dying to Trop Kick. In comes Typhlosion. Modest Specs Flamethrower OHKOs Tsareena, Bellossom, Hawlucha, Rillaboom and Serperior, and 2HKOs Venusaur as we live an Earth Power.


Now, Whitney!
In prep, we evolve our Torchic we got from May.
Radical Red 3.1_16.png

And now we are ready.
:wigglytuff:
Whitney - Route 11 (Wigglytuff) @ Sitrus Berry
Ability: Sheer Force
Level: 83
Adamant Nature
- Drain Punch
- Fire Punch
- Lovely Kiss
- Play Rough

:miltank:
Whitney - Route 11 (Miltank) @ Leftovers
Ability: Thick Fat
Level: 83
Adamant Nature
- Body Slam
- Body Press
- Stomping Tantrum
- Milk Drink

:vigoroth:
Whitney - Route 11 (Vigoroth) @ Eviolite
Ability: Vital Spirit
Level: 83
Jolly Nature
- Bulk Up
- Slack Off
- Body Slam
- Knock Off

:indeedee:
Whitney - Route 11 (Indeedee) @ Twisted Spoon
Ability: Psychic Surge
Level: 83
Timid Nature
- Psyshock
- Hyper Voice
- Mystical Fire
- Drain Kiss

:drampa:
Whitney - Route 11 (Drampa) @ Leftovers
Ability: Berserk
Level: 83
Modest Nature
- Dragon Breath
- Roost
- Flamethrower
- Thunderbolt


In prep, we give Blaziken a Chesto Berry.

Insanely easy fight. We SD, then CC kills everything. Its Blaziken against mono normal. What did you expect.

As a reward, we get the Normal Gem and an Eviolite.
Next battle!
Now, I want something that can set up both rocks and webs. I would prefer Smeargle, but its locked to postgame. So Shuckle it is.
Radical Red 3.1_17.png

:mimikyu:
Morty - Lavender Town (Mimikyu) @ Lum Berry
Ability: Disguise
Level: 83
Jolly Nature
- Play Rough
- Shadow Claw
- Shadow Sneak
- Swords Dance

:zoroark-hisui:
Morty - Lavender Town (Zoroark-Hisui) @ Colbur Berry
Ability: Illusion
Level: 83
Timid Nature
- Hyper Voice
- Shadow Ball
- Flamethrower
- Nasty Plot

:dusknoir:
Morty - Lavender Town (Dusknoir) @ Reaper Cloth
Ability: Hustle
Level: 83
Adamant Nature
- Shadow Punch
- Shadow Sneak
- Dynamic Punch
- Will-O-Wisp

:gengar-mega:
Morty - Lavender Town (Gengar-Mega) @ Gengarite
Ability: Shadow Tag
Level: 83
Timid Nature
- Shadow Ball
- Sludge Wave
- Nasty Plot
- Focus Blast

:weavile:
Morty - Lavender Town (Weavile) @ Focus Sash
Ability: Infiltrator
Level: 83
Jolly Nature
- Triple Axel
- Knock Off
- Ice Shard
- Swords Dance

:typhlosion-hisui:
Morty - Lavender Town (Typhlosion-Hisui) @ Charcoal
Ability: Flash Fire
Level: 83
Timid Nature
- Flamethrower
- Infernal Parade
- Focus Blast
- Hidden Power Grass


Now, here was my strategy. Set up webs and rocks with Shuckle, then break Mimikyu's disguise and die. Floatzel comes in, will always survive a +6 Shadow Sneak from Mimikyu, and kill it. Everything except Gengar gets outsped and killed by a CB Surge. Gengar is faster because of Levitate, so we swap to Melm, who can tank a Focus Blast and kill. Melm gets killed by whatever and our Floatzel can mop up whatevers left.
Lets see what actually happened tho.

Now it starts off good, we get up webs, rocks, and break Disguise with Infestation before dying. Floatzel kills Mimikyu. Zoroark comes in and dies to Surging Strikes as well. Gengar comes in, and I go Melmetal on the Sludge Wave. Unfortunately, Focus Blast crits us, and melm just dies. I just cut my losses and go Drednaw, kill Gengar with Crunch. Aqua Fang takes out Typhlosion, Weavile dies to Jaw Lock, and Dusknoir dies to Crunch again.

We get the TM for Shadow Ball as well as the Soothe Bell and Shed Shell. Showing him a pokemon with max happiness also gets you a Gengarite, but I forgot to do this.

Now, for the final boss battle of this update (and final boss before the e4 of the game).

:azumarill:
Ketchup - Cerulean Cave (Azumarill) @ Assault Vest
Ability: Huge Power
Level: 83
Adamant Nature
- Liquidation
- Aqua Jet
- Play Rough
- Superpower

:aggron-mega:
Ketchup - Cerulean Cave (Aggron-Mega) @ Aggronite
Ability: Solid Rock
Level: 83
Careful Nature
- Curse
- Heavy Slam
- Rest
- Sleep Talk

:urshifu:
Ketchup - Cerulean Cave (Urshifu) @ Choice Band
Ability: Unseen Fist
Level: 83
Jolly Nature
- Wicked Blow
- Close Combat
- Sucker Punch
- Poison Jab

:urshifu-rapid-strike:
Ketchup - Cerulean Cave (Urshifu-Rapid-Strike) @ Choice Band
Ability: Unseen Fist
Level: 83
Jolly Nature
- Surging Strikes
- Aqua Jet
- Close Combat
- U-turn

:gliscor:
Ketchup - Cerulean Cave (Gliscor) @ Toxic Orb
Ability: Poison Heal
Level: 83
Adamant Nature
- Swords Dance
- Earthquake
- Facade
- Roost

:dracozolt:
Ketchup - Cerulean Cave (Dracozolt) @ Choice Scarf
Ability: Hustle
Level: 83
Jolly Nature
- Bolt Beak
- Dragon Claw
- Earthquake
- Fire Fang


Okay so, for this battle, I wanted to use Duraludon-Mega.
Mega Duraludon
Type: Steel/Dragon
Ability: Bad Company
Stats: 85 HP/95 Atk/140 Def/140 SpAtk/90 SpDef/95 Speed

Bad Company: Prevents self-lowering stat drops and recoil.

Mega Duraludon is just a monster dropping drawback-free STAB. Draco Meteors and Steel Beams. The only things that resist both STABs are steel types, which are easily taken out by Chandelure. Really good mon.

Unfortunately, same issue as last time. But we set up webs with Shuckle, after which Duraludon took out everything with Steel Beam except for Urshifu-Rapid-Strike and Dracozolt, who went down to Draco, and Aggron, who went down to one Steel Beam + one Draco (cuz I ran out of Steel Beam PP)

As a reward, we get a kubfu! Very good pickup.

Next time, e4 prep + possibly e4 fight!


Love you all! See you soon for the end!
 
Last edited:
Finale time!

So, last time we left off, we had done everything in the base game except for the elite 4.
The teambuilding for the E4 is below.

Now, each member of the Elite 4 has two different teams they can use. This means that if we were just picking our pokemon to counterteam the E4, we would probably lose if we saw a different team than what we expected. So, I decided it was better to just make a team of strong pokes while keeping in mind the three problem pokemon of the e4, which are:
:ss/zacian-crowned:
Brunos Zacian can be a run killer. It pretty much necessitates speed control or running hyper specific pokemon to deal with it.
1688863532871.png

Lance's Primal Dialga is such a fucking pain in the ass. Roar of Time in this game is a special 80bp move that forces you to switch, and Primal Armor reduces super effective damage by 1/2, meaning with Rest Talk+Roar Of Time, it can demolish a team just by outlasting it. This necessitates a fairy type pokemon to block roar of time.
:ss/yveltal:
Green's AV Yveltal is such a fuckin pain in the ass to take down, and while its on paper the easiest of the three to deal with, it almost necessitates perfect play or good RNG to overcome. It wont sweep you, but it WILL wear you down to the point where you cant deal with the rest of Green's threats.

So, where do we begin?
:ss/gorebyss:
With this, strange enough. Gorebyss in this game is a Water/Fairy with Dazzling, so right off the bat its great into a potential Lance CB Dragonite. Its also probably one of the best mons into Primal Dialga. Fairy types that can tank a couple of flamethrowers and set up are generally the play for PD, and Shell Smash is obviously one of the best options for this. Its also pretty great into a couple of other matchups in the E4, so I decide to start with this.

Now, we need a mega.
:sceptile-mega: :duraludon-gmax: :drednaw-gmax: :toxtricity-gmax: :gallade-mega:
These are the options I consider. I discard sceptile immediately. I've beat the E4 with Sceptile before and I wanna do something new this run. Similarly, it would feel cooler to use a custom mega, so I discard gallade as well. Duraludon is promising, but is reaaaally bad into Green, so it goes out as well. Between Toxtricity and Drednaw. Now, base Drednaw has swift swim, which is actually really clutch for one specific matchup in the e4, and I also feel more comfortable with Drednaw's defensive attributes, so I decide to go for Drednaw-mega.
:ss/drednaw-gmax:

Next, I have to consider support options. I have two in mind.
:ss/galvantula: :ss/volbeat:
Our reliable supporters from throughout this run make a repeat performance here. Galvantula can Sticky Web and paralyze something, while having threatening Thunders, while Volbeat has Encore for Zacian, Thunder Wave, and can use Light Screen in a pinch. Its pretty bad into a couple of matchups, but overall strong.

:ss/chandelure:
Trapping remains broken. We have to ensure that weakened threats actually get finished off to prevent any last minute comebacks. Chandy is an easy add here, even if only to guarantee Melm and Bruno's Scizor get annihilated.

:ss/urshifu:
I was taking a hiatus when Shifu was legal in SS OU, so I always like to use it wherever I can. And it is spectacular here, providing a strong offensive backbone to our team.

:ss/Galvantula: :ss/Gorebyss: :ss/Urshifu: :ss/Drednaw-Gmax: :ss/Volbeat: :ss/Chandelure:
And with that, we have our team. I do a few test runs to make sure it works, then get ready to record. Here we fucking go.


Part 1: Lorelei

:poliwrath:
Lorelei - Rain Team - Pokemon League (Poliwrath) @ Focus Sash
Ability: Water Absorb
Level: 84
Adamant Nature
- Flip Turn
- Close Combat
- Ice Punch
- Surging Strikes

:politoed:
Lorelei - Rain Team - Pokemon League (Politoed) @ Damp Rock
Ability: Drizzle
Level: 84
Timid Nature
- Scald
- Rain Dance
- Haze
- Flip Turn

:swampert-mega:
Lorelei - Rain Team - Pokemon League (Swampert-Mega) @ Swampertite
Ability: Swift Swim
Level: 85
Adamant Nature
- Power-Up Punch
- Earthquake
- Ice Punch
- Liquidation

:kingdra:
Lorelei - Rain Team - Pokemon League (Kingdra) @ Life Orb
Ability: Swift Swim
Level: 85
Timid Nature
- Muddy Water
- Dragon Pulse
- Ice Beam
- Hurricane

:kyogre-primal:
Lorelei - Rain Team - Pokemon League (Kyogre-Primal) @ Blue Orb
Ability: Primordial Sea
Level: 85
Timid Nature
- Water Sport
- Origin Pulse
- Thunder
- Ice Beam

:dracovish:
Lorelei - Rain Team - Pokemon League (Dracovish) @ Choice Scarf
Ability: Strong Jaw
Level: 85
Jolly Nature
- Fishious Rend
- Outrage
- Psychic Fangs
- Crunch

Now, Lorelei is actually the only member where we know the team going in. Theres an NPC outside the E4 who will tell you whether she is using her rain team or her hail team. So we built our team with the knowledge that we were going to be facing the rain team.
Gorebyss with Dazzling gleam looks GREAT in this matchup, however, we need Sticky Web up to outspeed Kingdra under Rain with 1 shell smash.
Now, this is the only battle I did last night. The rest I did this morning. So, for whatever reason, I completely spaced on that I could lead Kingdra+Galvantula to get a Smash and a Web up, and instead decided to lead Gal + Shifu. I also made a couple other mistakes. If I was fully awake, I might have not decided on Drednaw, since I would have realized I didnt need it for this fight. But it worked out in any case.

I lead with Gal and Shifu against the two toads. I web up with Galvantula and Wicked Blow to break Poliwraths Sash. Shifu dies to Scald + Close Combat, and I send out Gorebyss. I Thunder the Politoed with Gal and Shell Smash Gorebyss as I take a Scald + CC on Gore, leaving me in yellow. Next turn, Dazzling Gleam takes out both Polis. Kingdra and Dracovish come in here. Now, because I was sleepy, I forgot I had set up the web, and so I use Protect on Gorebyss and thunderwave the Kingdra, in an attempt to outspeed it (which I already did). Drednaw comes in after Galvantula dies to Rend. Dazzling Gleam takes out both Kingdra and Dracovish the next turn. Kyogre-Primal and Swampert get sent out. I HP Grass the Swampert and Stone Edge the Kyogre. Kyogre lives at around 50%, and kills Gorebyss with Thunder. Volbeat comes in, and Thunderbolt+Stone Edge wins us the battle.


Part 2: Bruno

Now, onto Bruno. Bruno has two possible teams: one with Urshifu as a lead, and one with Infernape as a lead. Our matchup is slightly better into the Urshifu team. Which obviously meant that in the game I recorded, we ended up fighting the Infernape team.

:infernape:
Bruno - Team 2 - Pokemon League (Infernape) @ Focus Sash
Ability: Blaze
Level: 84
Jolly Nature
- Taunt
- Pyro Ball
- Stealth Rock
- Close Combat

:kommo-o:
Bruno - Team 2 - Pokemon League (Kommo-o) @ Throat Spray
Ability: Overcoat
Level: 85
Timid Nature
- Clanging Scales
- Clangorous Soul
- Aura Sphere
- Flash Cannon

:urshifu:
Bruno - Team 2 - Pokemon League (Urshifu) @ Choice Scarf
Ability: Unseen Fist
Level: 85
Jolly Nature
- U-turn
- Close Combat
- Wicked Blow
- Poison Jab

:zacian-crowned:
Bruno - Team 2 - Pokemon League (Zacian-Crowned) @ Rusty Sword
Ability: Intrepid Sword
Level: 85
Jolly Nature
- Swords Dance
- Behemoth Blade
- Close Combat
- Crunch

:conkeldurr:
Bruno - Team 2 - Pokemon League (Conkeldurr) @ Assault Vest
Ability: Iron Fist
Level: 85
Careful Nature
- Drain Punch
- Ice Punch
- Mach Punch
- Knock Off

:lucario-mega:
Bruno - Team 2 - Pokemon League (Lucario-Mega) @ Lucarionite
Ability: Adaptability
Level: 85
Jolly Nature
- Bullet Punch
- Meteor Mash
- Close Combat
- Swords Dance


Now, Infernape in this game has a buffed speed, being 113. This notably outspeeds Galvantula. Accounting for the Infernape team, I had put a mental herb on Gal before this battle.

We lead off with Galvantula as Bruno leads off with Infernape. Infernape taunts away our Mental Herb as we Thunder Wave it. Sticky Webs go up next turn as Nape taunts once more. Thunder the next turn brings nape into yellow as Nape uses Pyro Ball, killing us outright. I go Chandelure, and kill nape with Shadow Ball. In comes Urshifu. Since we know Shifu wants to use Wicked Blow here, we can safely switch into our own Urshifu. The next turn Urshifu stays in and Wicked Blows again for some reason as CC from our Shifu takes it out. In comes Zacian, and I switch out to Volbeat, who takes a decent chunk from CC. It Thunder Waves the Zacian before dying to Behemoth Blade. Now we can go Drednaw, mega evolve, and SD. We need the paralysis on Zacian, because it is still faster than Drednaw even at -1 speed. Zacian goes for a CC, bringing us to half. From here, Drednaw can OHKO every remaining member with Jaw Lock, which it proceeds to do, winning us the fight.


Part 3: Agatha

Halfway through the elite four now. Agatha has two different teams, both very annoying. Her leads are completely different. For her Zoroark team, its better to lead Galvantula, but against Grimmsnarl, letting it get up screens can be veery annoying. I decide to put Brick Break on Urshifu for the Grimmsnarl team, and lead Gal anyways to get atleast a web off incase of a Grimmsnarl team. Luckily, we dont see the Grimmsnarl team on our attempt.

:zoroark:
Agatha 1 - Pokemon League (Zoroark) @ Focus Sash
Ability: Illusion
Level: 84
Timid Nature
- Taunt
- Dark Pulse
- Flamethrower
- Sludge Bomb

:spectrier:
Agatha 1 - Pokemon League (Spectrier) @ Choice Scarf
Ability: Grim Neigh
Level: 85
Timid Nature
- Shadow Ball
- Hidden Power Fighting
- Dark Pulse
- Sleep Talk

:marshadow:
Agatha 1 - Pokemon League (Marshadow) @ Focus Sash
Ability: Technician
Level: 85
Jolly Nature
- Spectral Thief
- Close Combat
- Shadow Sneak
- Bulk Up

:silvally-dark:
Agatha 1 - Pokemon League (Silvally-Dark) @ Leftovers
Ability: Battle Armor
Level: 85
Adamant Nature
- Multi-Attack
- Flamethrower
- Thunder Wave
- Parting Shot

:aegislash:
Agatha 1 - Pokemon League (Aegislash) @ Leftovers
Ability: Stance Change
Level: 85
Calm Nature
- Shadow Ball
- Toxic
- Flash Cannon
- Kings Shield

:gengar-mega:
Agatha 1 - Pokemon League (Gengar-Mega) @ Gengarite
Ability: Shadow Tag
Level: 85
Timid Nature
- Shadow Ball
- Sludge Wave
- Nasty Plot
- Thunderbolt


We lead Galvantula as Agatha leads Zoroark(disguised as Gengar). We Thunder Wave turn 1 as our Mental Herb is used up by Taunt. Sticky Web goes up next turn as Zoroark taunts us again. Thunder brings Zoro down to yellow as he gets fully paralyzed. Our good luck is punished immediately as we miss the next Thunder, taking a Flamethrower to red. The next Thunder hits and takes out Zoroark. In comes Aegislash, and Thunder does respectable damage and paralyzes as it Toxic's us. Next turn Thunder takes it down to yellow as it Shadow Balls us to death. Drednaw comes in and SDs as Aegislash uses Kings Shield. This was a severe misplay by my part, I didnt need the SD to kill anything that was left, and all it did was give Marshadow a potential boost. We Aqua Fang the Aegislash next turn. Gengar comes in. Thunderbolt does about 75% to us after it mega evolves, and we kill it back with Aqua Fang. Marshadow comes in, and I had miscalced something here because it turned out to be faster, and killed us with Spectral Thief, taking our +2 boost. We go Volbeat and Thunder Wave it as it kills with Spectral Thief into Shadow Sneak. Gorebyss comes in and baaarely doesnt kill with Moonblast, but luckily Marshadow gets fully paralyzed. The next Moonblast takes it out. Spectrier comes in and we switch to Shifu on the Shadow Ball. Another Shadow Ball takes us down to yellow, but Shifu one shots with Wicked Blow. Silvally comes in next, and we switch to Chandy, who takes a thunder wave on the switch, then dies to Multi Attack. Shifu comes back in, and one shots with Close Combat, winning us the battle.


Part 4: Lance

Next battle is Lance. Lance has two teams, one with an Aerodactyl lead, and one with a Garchomp lead. To deal with the Garchomp lead, I put Toxic on Galvantula, overwriting Sucker Punch.

:aerodactyl:
Lance - Team 1 - Pokemon League (Aerodactyl) @ Focus Sash
Ability: Rock Head
Level: 85
Jolly Nature
- Stealth Rock
- Earthquake
- Taunt
- Stone Edge

:melmetal:
Lance - Team 1 - Pokemon League (Melmetal) @ Assault Vest
Ability: Clear Body
Level: 85
Adamant Nature
- Double Iron Bash
- Earthquake
- Thunder Punch
- Ice Punch

1688863500442.png

Lance - Team 1 - Pokemon League (Dialga-Primal) @ Adamant Orb
Ability: Primal Armor
Level: 85
Calm Nature
- Roar of Time
- Flamethrower
- Rest
- Sleep Talk

:dracovish:
Lance - Team 1 - Pokemon League (Dracovish) @ Choice Scarf
Ability: Strong Jaw
Level: 85
Adamant Nature
- Fishious Rend
- Outrage
- Psychic Fangs
- Crunch

:dragonite:
Lance - Team 1 - Pokemon League (Dragonite) @ Choice Band
Ability: Multiscale
Level: 85
Jolly Nature
- Extreme Speed
- Outrage
- Dual Wingbeat
- Earthquake

:salamence-mega:
Lance - Team 1 - Pokemon League (Salamence-Mega) @ Salamencite
Ability: Aerialate
Level: 85
Jolly Nature
- Dragon Dance
- Double-Edge
- Earthquake
- Fire Fang


We lead off with Galvantula as Lance leads off with Aero. Aero taunts our Mental Herb as we Thunder Wave. Sticky Web goes up the next turn as Aero gets fully paralyzed. Thunder then brings Aero into Focus Sash as it Taunts again. The next Thunder takes it out. Primal Dialga comes out. I decide to get a little bit of damage off with Thunder as Dialga kills us with Flamethrower. We go Gorebyss. We shell smash as Dialga Flamethrowers us to around half. We Shell Smash again as Dialga uses rest. Now, I quickly do some mental math. Even at +6, Moonblast is still shy of an OHKO on Dialga. We just need to see 1 Roar of Time or Rest through Sleep Talk through the next 2 turns in order to get a cleaner win. The odds are overwhelmingly in our favor, so I decide to just risk it and Shell Smash again. We get hit by Flamethrower turn 1, bringing us to 14 health. We Moonblast Dialga into a similar range, as Sleep Talk thankfully calls Roar of Time. Moonblast takes it out next turn. Melmetal comes in, and Hydro Pump OHKOs. Dracovish comes in and Moonblast OHKOs. Moonblast OHKOs dragonite, and then salamence, winning us a CLEAN Lance battle.


Part 5: Green

We've come a long way. But one final boss remains. And unfortunately, theres no way to cheese this one.

:pheromosa:
Champion - Pokemon League (Pheromosa) @ Focus Sash
Ability: Beast Boost
Level: 85
Jolly Nature
- U-turn
- Close Combat
- Triple Axel
- Poison Jab

:metagross-mega:
Champion - Pokemon League (Metagross-Mega) @ Metagrossite
Ability: Tough Claws
Level: 85
Jolly Nature
- Bullet Punch
- Zen Headbutt
- Fire Punch
- Meteor Mash

:groudon-primal:
Champion - Pokemon League (Groudon-Primal) @ Red Orb
Ability: Desolate Land
Level: 85
Careful Nature
- Fire Punch
- Precipice Blades
- Thunder Wave
- Roar

:yveltal:
Champion - Pokemon League (Yveltal) @ Assault Vest
Ability: Dark Aura
Level: 85
Modest Nature
- Oblivion Wing
- Dark Hole
- Heat Wave
- Sucker Punch

:eternatus:
Champion - Pokemon League (Eternatus) @ Power Herb
Ability: Pressure
Level: 85
Timid Nature
- Meteor Beam
- Sludge Bomb
- Flamethrower
- Dynamax Cannon

:ditto:
Champion - Pokemon League (Ditto) @ Choice Scarf
Ability: Imposter
Level: 85
Jolly Nature
- Transform


Green only has 1 possible team. Unfortunate, it is an absolute monster of a team. I wasnt even sure we COULD beat it with our current team, but we did on a couple of runs, so I knew it was possible with a solid gameplan. It took a solid hour of just prep fights to learn the AI's patterns, but I finally felt confident enough to go ahead and hit record.
Also:
Dark Hole: Dark Type. Special. 100 BP. 100 Accuracy. 40% chance to inflict sleep, bypasses substitute.
In prep for this fight, I put Light Screen on Galvantula and Volbeat, and gave Galvantula a Rocky Helmet, replacing its Mental Herb. We also, funnily enough, use an Ability Pill on Volbeat to turn its ability into Illuminate. This is because we will sometimes need Volbeat to Thunder Wave Yveltal, who it is naturally faster than, and Prankster makes Yveltal immune to Thunder Wave.

We lead off with Galvantula against Pheromosa. Now, with how hilariously mismatched our teams are, a couple of things need to go right for this battle to be winnable. Firstly, we have to see ANY move except U-Turn from Phero. Luckily, in our game, it goes for the best move for us, and uses Triple Axel, taking a shitton from Rocky Helmet as we Thunderwave. Now, at this range, a Paralyzed Phero will ALWAYS switch to either Metagross or Eternatus, so I Thunder Wave again, catching the Eternatus on the switch. Now, I Light Screen. Light Screen is more impactful than Sticky Web in this fight. Luckily, Eternatus gets fully paralyzed, so I manage to get up both before dying to Flamethrower. Gorebyss comes out. I Shell Smash, living the Sludge Bomb through Light Screen. Ice Beam takes out Eternatus with a crit. Even without the crit, Eternatus would be in range of a Chandelure Shadow Ball. We Moonblast Yveltal to yellow as it takes us out with Oblivion Wing. We go Volbeat, and two Thunder Bolts take out Yveltal as we take a Dark Hole, dodging sleep and living on yellow. Groudon comes in, and theres nothing to do but sack Volbeat, getting up an inconsequential Light Screen as we die to Fire Punch. Drednaw comes in, and uses Jaw Lock twice, bringing Groudon to red as we die to two Precipice Blades. Urshifu comes in here, and we Wicked Blow to kill the Groudon. Ditto comes in, transforming into Urshifu. This is brilliant for us. We switch to Chandelure. Knowing my own moves, I know that Ditto is going to go for either Brick Break or Close Combat. We trap the ditto and OHKO with Flamethrower. Pheromosa comes in, and easily dies to Flamethrower. Last is Metagross. The only way we can lose from here is a Zen Headbutt crit/flinch on Chandy into a Meteor Mash crit on Urshifu. Zen Headbutt gets neither and we kill Metagross with Flamethrower, winning us the battle, and the game.


Radical Red 3.1_02.png
Radical Red 3.1_03.png
Radical Red 3.1_04.png

Radical Red 3.1_12.png


And with that, we have won the game. We took all that Radical Red could throw at us, and won with a team that had a fucking Gorebyss and a Volbeat on it. Victory has never tasted sweeter.


And there we go folks. Its been a fun run, and Im glad to have completed it. Thank you all for reading! See you next time I do a run, or if you want, check out SV OU Theorymons which I run (shameless plug ik stfu). Bye! Love you all!
 

Users Who Are Viewing This Thread (Users: 1, Guests: 0)

Top