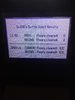
Gen III Battle Frontier Discussion and Records

:rs/dusclops: @ Leftovers (Pressure)
Destiny Bond
Will-o-Wisp
Protect
Substitute
120 HP, 130 Defence, 252 SDef (Impish)
Not sure if you're still using this Dusclops set, but an EV spread of 252/64/192 with an Impish nature gives you about 8% more bulk on both sides, if my calculations are correct.

I agree with your reasoning that this is probably the best Ghost option, but I wonder if other Pokemon might be able to offer additional utility that compensates for not being able to status an incoming Pokemon after Explosion KOs one or both opponents.

Slowbro seems very solid, but I feel like you might miss Sableye's Fake Out and Dusclops' utility.

A weird suggestion I have is Thick Fat Dewgong. It can use Protect/Water move/Icy Wind/Fake Out, threatening (at least some of) the Fire mons that Metagross doesn't like and replicating some of the post-Explosion utility that the Ghosts have. Stats definitely leave something to be desired though, as do the weaknesses of the Ice type. Also, egg move incompatibility strikes yet again: Perish Song and Encore could be fun options, but neither is compatible with the other, nor with Fake Out.
 
I got somewhat inspired to do the factory after watching lrxc's video. Gotta say this is a lot of fun. Would love to do more in the other areas too but I'm dreading getting good IVs and natures. For now (hopefully) I'll keep climbing the factory tomorrow.
I should have kept a better log of this, but I didn't really think I'd make it this far
I drafted Jolteon 4/Starmie 4/Armaldo 3. This is round 9 so Ivs are random, except the Jolteon is elevated so it's a round 10 jolteon with 31IVs

Over the course of the battles I swap Armaldo for swagger/psy up regirock, starmie for boltbeam psychic earthquake latias, and finally regirock for EQ dragonbreath rock tomb roar steelix.

The facility leader I remember because I was caught off guard by him, I thought he only appeared at 21 and 42 battles.
My jolteon meets his Aerodactyle---- Thunderbolt OHKO
Victrebell comes out
Jolteon uses bite to chip him for latias to guarrentee the kill no matter the set, Victrebell uses stun spore and paralyzes jolteon
Swap to latias, sludge bomb hits for more than half and a poison status
Psychic knocks out victrebell
Dodrio comes out
Dodrio outspeeds and KOs latias (I just assumed I would outspeed and knock out so my heart sank for a second)
Steelix comes out and spams rock tombs to close out the game
 

Attachments

Last edited:

QuentinQuonce

formerly green_typhlosion
Not sure if you're still using this Dusclops set, but an EV spread of 252/64/192 with an Impish nature gives you about 8% more bulk on both sides, if my calculations are correct.
I actually haven't gotten around to testing it yet but thanks for this! Not the best with calculations so appreciate the help. Is this for level 50 or open level? I was working on the basis that if it survives Slaking3's Shadow Ball (as well as Crobat3 and Dusclops3 after Screech/Swagger respectively) it can survive pretty much any other physical move. Houndoom's Crunch is probably the most threatening special move out there, but there's not much Dusclops can do against Houndoom anyway short of using Destiny Bond for the double KO next turn and praying you don't flinch. Houndoom in general is a pain for this team if Dusclops is on it; two sets have Crunch, while sets 2, 3, and 4 KO Metagross for certain - it has a one-third chance of surviving set 1's Flamethrower, but that's not much consolation.

I've actually been thinking lately Metagross should run Jolly; the decrease in power is annoying, but you still OHKO a lot of extremely bulky stuff with Explosion (and actually still just manage it against stuff like Scizor). It would allow some investment in Special Defence because tbh there's not much around 122 Speed you'll be desperate to outspeed, but then again, max speed gets you to 134 which outruns Blaziken3 and several Tauros variants...

I agree with your reasoning that this is probably the best Ghost option, but I wonder if other Pokemon might be able to offer additional utility that compensates for not being able to status an incoming Pokemon after Explosion KOs one or both opponents.

Slowbro seems very solid, but I feel like you might miss Sableye's Fake Out and Dusclops' utility.

A weird suggestion I have is Thick Fat Dewgong. It can use Protect/Water move/Icy Wind/Fake Out, threatening (at least some of) the Fire mons that Metagross doesn't like and replicating some of the post-Explosion utility that the Ghosts have. Stats definitely leave something to be desired though, as do the weaknesses of the Ice type. Also, egg move incompatibility strikes yet again: Perish Song and Encore could be fun options, but neither is compatible with the other, nor with Fake Out.
Hmm, Dewgong's an interesting one. I feel like it's a Pokemon I often underestimate but it's a better mon than it looks on paper for sure. It's usually not one that's completely safe to face at the very least. I also had Kangaskhan in mind as a Fake Out user but it can't really achieve much outside of that.

Water typing is useful though because it covers several of the Rock/Steel types that don't fear Explosion - though as you alluded to it's not powerful enough to outright OHKO, especially when you factor in the spread damage penalty for Surf. Aggron is a 3HKO with Surf; you could run Waterfall for a more sure hit, but you'd still need to go Modest 252 for a slim chance of an OHKO and investing in defences is definitely more worthwhile. It's crying out for Hydro Pump really; still, there's always Sheer Cold, I guess...

My thinking is just that running anything that isn't immune to Explosion and therefore needs to spend time Protecting is such a waste, since ghosts have the freedom to take their turn in the face of Metagross blowing up (particularly if you're in a scenario where you do need to blow up on turn one). That said, Dewgong does get Dive which would of course enable it to avoid being hit by Explosion. But then if that was the play I'd be more inclined to go with Suicune instead and that's better suited to the backup slot.

Ugh, decisions. This became a bit of an essay, apologies.
 
Hi everyone! I’m here to report my new personal record of 134 championships in Dome (doubles) on cartridge, Lv. 100, using a hyper-offensive team as usual.

Battle Dome Doubles. Clear streak: 134. Open Level. Retail.

Team:
1695954438653.png

Harambe (Slaking) @ Choice Band
Level 100 Stats: 449/460/236/192/165/292
EVs: 32/252/0/0/0/224
Adamant Nature
- Double-Edge
- Earthquake
- Shadow Ball
- Hidden Power Steel 70

1695954460936.png

Oniiros (Latios) @ Twisted Spoon
Level 100 Stats: 309/194/196/394/256/312
EVs: 32/0/0/252/0/224
Modest Nature
- Psychic
- Ice Beam
- Thunderbolt
- Waterfall

1695954472784.png

Saphira (Salamence) @ Lum Berry
Level 100 Stats: 338/405/195/230/195/292
EVs: 28/252/0/0/0/228
Adamant Nature
- Aerial Ace
- Brick Break
- Hidden Power Rock 70
- Flamethrower

Description:
The team is basically the same I used in my previous record, but now Slaking has HP Steel to OHKO Armaldo and Aerodactyl (DE kills the flying fossil too, but Hidden Power doesn’t waste the precious health points). Also, steel helps to deal with Shuckle and Cradily, so it’s a better option than the previous set with Hyper Beam (almost never used it, only for fancy wins).

The EVs are simple: max attack (or special attack), nearly max speed (only the necessary to out-speed the 291 and 311 niches) and the rest in HP. The variety of attacking moves this team has allows me to hit super-effectively the entire Pokedex, except for Kingdra, Swampert/Quagsire/Whiscash, Sableye and Girafarig, so most battles were quick as a flash.

Loss:
Swimmer Pedro sent Granbull and Blissey. I sent Slaking and Latios, both attacked the pink blob and killed her. Then Granbull mega-kicked my Latios (OHKO) and then repeated the punishment on my Slaking (who was notably weakened by the recoil damage) during the Truant turn. I really should have gone for the dog first instead of Blissey, but I think I wasn’t paying enough attention to the battle and underestimated the canine’s rage.

Proof:
Battle Dome Record.jpg


Example of a round:

Hope everyone is doing well, until next time!
 
Last edited:
My Battle factory run came to an end today at 78. I got a not great draft but I could have also played better probably. I documented all of my battles from 64 onward, I'll put those in a spoiler tag below. I'll be back again, I definitely want to do more of this.
Round 10
Psychic/Free unrestrained
Draft
Alakazam1/Exploud/Xatu/Cradily/Claydol/Hypno
Alakazam punches/Exploud overheat/Claydol psy up

Battle 1
Alakazam vs slowbro
Thunderpunch, Raindance
Thunderpunch, KO
Alakazam vs Snorlax
Swap to Exploud/Curse
Swap to claydol/Hyper beam miss
Psy up/Curse
Earthquake/Shadowball
Earthquake/Shadowball KO
Exploud vs Snorlax
Overheat/Snorlax Hyper beam KO
Alakazam vs Snorlax
Thunderpunch/ recharge
Thunderpunch KO
Alakazam vs Latios
Icepunch/Dragon claw
Icepunch KO

No Fav/Free spirited
Swap Exploud for Latios

Battle 2
Alakazam vs Steelix
Swap to claydol/Block
Earthquake (claydol)/ Sandstorm
Earthquake KO
Claydol vs Weezing (cant be 2, less likely to be 1)
Rockslide/Flinch
Rockslide/Flinch again
Rockslide miss/ Explosion KOKO
Alakazam vs Magmar( cannot be 3)
Thunderpunch crit KO

Flying/High Risk Return
Swap Claydol for Steelix

Battle 3
Alakazam vs Dodrio
Thunderpunch KO
Alakazam vs Zapdos
Ice punch/ Thunderwave/ Syncronize/ Zapdos leftovers
Swap to steelix/ Thunderbolt
5 dragonbreaths/ drill pecks trades with some full paralysis
Steelix KOs Zapdos while at full health
Steelix vs Swampert
Surf KO (remember to keep the calculator on singles mode in the future)
Alakazam vs Swampert
Earthquake/Ice punch
Ice beam KO
Latios vs Swampert
Earthquake/Counter
Dragon claw KO (Proud of my counter/mirror coat option select there)

Water/Free spirited
Swap steelix for Zapdos

Battle 4
Alakazam vs Medicham
Fire Punch crit KO
Alakazam vs Walrein
Thunderpunch/Ice beam
Thunderpunch ko
Alakazam vs Milotic
Thunderpunch/Icebeam KO
Zapdos vs milotic
Thunderbolt KO

No Favs/High risk return
No swap

Battle 5
Alakazam vs Rhydon likely horn drill set
Ice punch KO
Alakazam vs Forretress likely explode
Fire punch KO
Alakazam vs Dewgong
Thunderpunch/Disable miss
Thunderpunch ko

No Favs/ Free spirited
No swap

Battle 6
Alakazam vs Starmie
Surf/ Thunderpunch KO
Alakazam vs Dusclops
Fire punch/ Double team/ leftovers
Fire punch/toxic/Syncronize
Swap to zapdos/ double team
Substitute/Toxic failure
Protect/Drill peck
Drill peck miss/toxic fail
Protect/Drill peck
Drill peck KO
Zapdos vs Registeel
Thunderbolt/Curse
Tbolt and rest stalling for a few turns before registeel KOs

No Fav/Free spirited
No Swap

Battle 7
Alakazam vs Ursaring cannot be 2, unlikely 1,4678
Ice punch/ Mega kick miss
Ice punch/ Mega kick KO
Zapdos vs Ursaring
Thunderbolt KO
Zapdos vs Cradily
Substitute(Zapdos)/Confuse ray fail
Thunderwave/Barrier
Drill peck x3/ no damage to substitute
Drill peck crit/ barrier
Thunderbolt/para
thunderbolt/some move failed
thunderbolt KO
Zapdos (sub) vs Magmar
Thunderbolt/flamethrower break sub
Thunderbolt KO

End of round 10

Round 11

No Favs/Free sprit
Draft
Hypno/Jolteon/Xatu/Raichu/Jolteon/Registeel (Didn't know you could get 2 of the same pokemon lol)
Jolteon Xatu Registeel

Battle 1
Jolteon vs Suicune
Thunderbolt KO
Jolteon vs Steelix
Swap to xatu/Earthquake
Swap to registeel/Rocktomb/leftovers full recovers
Swap to xatu to stall earthquake/Earthquake
Swap to registeel/Rock tomb miss
Swap to Xatu/Rock tomb (should be more careful)
Swap to registeel/ Rock tomb
Swap to xatu/ Rock tomb (red health, plan not working)
Swap to registeel/ Rock tomb
Substitute/Earthquake breaks sub
Substitute/ Rock tomb
Focus punch/ Rock tomb sub still holds
Double team/Rock tomb miss
Double team/ Earthquake breaks sub
Substitute/ Earthquake breaks sub
Substitute/ Something missed didn't catch what
Focus punch/ Another miss
Focus punch/EQ breaks sub, punch ko's steelix
Registeel vs Entei
Entei Double team/Registeel sub
Flamethrower miss/ Toxic hit
Flamethrower breaks sub/Focus punch hits
Flamethrower miss/ Substitute
Flamethrower breaks sub/ Focus punch KO

No Favs/Free spirit
Swap Xatu for Suicune

Battle 2
Jolteon vs Latias
Thunderwave/Earthquake
Bite/Shadowball KO
Suicune vs Latias
Ice beam/Psychic
Bite KO
Suicune vs wailord
Reflect/Icy wind
Surf/Surf
Surf/Surf
Surf crit/Icy wind
Surf KO
Suicune vs Marowak
Swap to registeel/Earthquake
Focus punch fail/Earthquake KO
Suicune vs Marowak
Surf KO

No Fav/Slow and steady
Swap suicune for Latias

Battle 3
Jolteon vs Moltres
Thunderbolt KO
Jolteon vs Tentacruel
Thunderbolt/ confuse ray/leftovers
Swap to registeel/Toxic
Surf/Sub
Confuse ray fail/ Double team
Surf miss/Double team
Confuse ray fail x4/ Double team x 4
Confuse ray fail x4/ focus punch x 4 KO
Registeel vs snorlax
Focus punch/Psy up/ focus punch hit
Focus punch miss/psy up
Focus punch hit/ psy up/ Focus punch KO

YOUR TOTALLY LACKING
IN FASHION SENSE

she's salty lol

No Favs/Free sprited
No swap

Battle 4
Jolteon vs Vileploom
swap to registeel/ double team
Substitute/ double team
focus punch/ double team
Focus punch miss/ ingrain (strap in for a long one)
Complete PP stall on both sides into a struggle war
Ingrain would keep healing vileplume back up and vileplume can't do enough to registeel
I did this for forever on speedup before remembering my latias has aerial ace
Swap to latias
Aerial Ace x3or4 KO
Latias vs Exploud
Swap to registeel/shadowball
Hyper voice/struggle several times
Rest/struggle, wake with chesto
Struggle hyper voice until registeel KOd
Jolteon vs exploud
Thunderbolt KO
Jolteon vs latios cant be 57
thunder wave/full para
bite critical hit KO
(Let this be a lesson about PP stalling and ingrain)

No favs/High risk return
Swap latias for latios

Battle 5
Jolteon vs Rhydon likely 234
swap to latios/earthquake
Ice beam/ rock tomb miss (set 1)
Ice beam KO
Latios vs Marowak
Ice beak KO
Latios vs Regirock
Psychic/rockslide x 2
Psychic KO

No fav/High risk return
No swap

Battle 6
Jolteon vs Ursaring
Thunderbolt crit KO
Jolteon vs Swampert
Swap to latios/ Earthquake
Earthquake/mirror coat (paid off this time)
Psychic/surf (nevermind, it didn't because I got a bad range)
Psychic KO
Latios vs Breloom
psychic KO

No Fav/Free Spirited
no swap

Battle 7
Jolteon vs Hariayama likely 24
Swap to latios/counter ---there can be no more 4style on the team
Psychic/counter
Psychic/focus band activation/rock slide
Psychic/focus band activation again/rock slide
Ice beam KO (Should have been going for ice beam the whole time after the first psychic)
Latios vs Scizor Cant be sets 1 and 3
Swap to registeel/silver wind
Silver wind/ substitute
Focus punch/swords dance/focus punch hit
Focus punch/silver wind no break/focus punch hit
silver wind break/double team
silver wind/ substitute
focus punch/baton pass/MAGMAR/Focus punch hit
Focus punch/fire blast miss/focus punch hit/flame body burn
Focus punch x2 to close the game

End round 11

Round 12

Ground/Free spirit

Draft
Lapras/Hariyama/Nidoqueen/Salamance/Weezing/Misdreavous
Salamance/Weezing/Lapras

Battle 1
Salamance vs shuckle
Earthquake/shuckle substitute, shuckle set 3
swap to weezing/attract fail because both female
flamethrower break sub/double team
flamethrower/double team
flamethrower KO (no misses nice)
Weezing vs Nidoking Can't be set 1, less likely set 3
Thunder/Explosion KOKO
Lapras vs Flygon (of course this set has no ice moves)
Sunny day/Surf crit
Sunny day/surf x 2 KO

No favs/Free spirit
salamence vs porygon 2
swap to weezing/ thunderwave
Psychic/ Full para (was gonna explode sogood)
Tri attack KO
Salamence vs porygon2
Double edge/thunderwave
Psychic/double edge KO
Salamance vs Ludicolo
Swap to lapras/double team
confuse ray/hit in confusion/ leftovers
swap to salamance/ hit in confusion
Double edge miss/double team
Double edge hit/ leech seed
Ludicolo proceeds to stall out the rest of my team

END RUN

I was so concerned with Porygon 2 being set 4 with ice beam
In hindsight swapping to weezing was a losing strategy
If I valued my pokemon equally I think the right play would have been to risk the 25% chance of ice beam
Probably overrelied on Weezing for covverage and problem breaking
It probably would have been better to take Hariyama instead of Lapras, or trade it for the Nidoking, but I was afraid of psychics
I cannot stress enough how bad Lapras 1 is.
 

Attachments

QuentinQuonce

formerly green_typhlosion
My Battle factory run came to an end today at 78. I got a not great draft but I could have also played better probably. I documented all of my battles from 64 onward, I'll put those in a spoiler tag below. I'll be back again, I definitely want to do more of this.
Round 10
Psychic/Free unrestrained
Draft
Alakazam1/Exploud/Xatu/Cradily/Claydol/Hypno
Alakazam punches/Exploud overheat/Claydol psy up

Battle 1
Alakazam vs slowbro
Thunderpunch, Raindance
Thunderpunch, KO
Alakazam vs Snorlax
Swap to Exploud/Curse
Swap to claydol/Hyper beam miss
Psy up/Curse
Earthquake/Shadowball
Earthquake/Shadowball KO
Exploud vs Snorlax
Overheat/Snorlax Hyper beam KO
Alakazam vs Snorlax
Thunderpunch/ recharge
Thunderpunch KO
Alakazam vs Latios
Icepunch/Dragon claw
Icepunch KO

No Fav/Free spirited
Swap Exploud for Latios

Battle 2
Alakazam vs Steelix
Swap to claydol/Block
Earthquake (claydol)/ Sandstorm
Earthquake KO
Claydol vs Weezing (cant be 2, less likely to be 1)
Rockslide/Flinch
Rockslide/Flinch again
Rockslide miss/ Explosion KOKO
Alakazam vs Magmar( cannot be 3)
Thunderpunch crit KO

Flying/High Risk Return
Swap Claydol for Steelix

Battle 3
Alakazam vs Dodrio
Thunderpunch KO
Alakazam vs Zapdos
Ice punch/ Thunderwave/ Syncronize/ Zapdos leftovers
Swap to steelix/ Thunderbolt
5 dragonbreaths/ drill pecks trades with some full paralysis
Steelix KOs Zapdos while at full health
Steelix vs Swampert
Surf KO (remember to keep the calculator on singles mode in the future)
Alakazam vs Swampert
Earthquake/Ice punch
Ice beam KO
Latios vs Swampert
Earthquake/Counter
Dragon claw KO (Proud of my counter/mirror coat option select there)

Water/Free spirited
Swap steelix for Zapdos

Battle 4
Alakazam vs Medicham
Fire Punch crit KO
Alakazam vs Walrein
Thunderpunch/Ice beam
Thunderpunch ko
Alakazam vs Milotic
Thunderpunch/Icebeam KO
Zapdos vs milotic
Thunderbolt KO

No Favs/High risk return
No swap

Battle 5
Alakazam vs Rhydon likely horn drill set
Ice punch KO
Alakazam vs Forretress likely explode
Fire punch KO
Alakazam vs Dewgong
Thunderpunch/Disable miss
Thunderpunch ko

No Favs/ Free spirited
No swap

Battle 6
Alakazam vs Starmie
Surf/ Thunderpunch KO
Alakazam vs Dusclops
Fire punch/ Double team/ leftovers
Fire punch/toxic/Syncronize
Swap to zapdos/ double team
Substitute/Toxic failure
Protect/Drill peck
Drill peck miss/toxic fail
Protect/Drill peck
Drill peck KO
Zapdos vs Registeel
Thunderbolt/Curse
Tbolt and rest stalling for a few turns before registeel KOs

No Fav/Free spirited
No Swap

Battle 7
Alakazam vs Ursaring cannot be 2, unlikely 1,4678
Ice punch/ Mega kick miss
Ice punch/ Mega kick KO
Zapdos vs Ursaring
Thunderbolt KO
Zapdos vs Cradily
Substitute(Zapdos)/Confuse ray fail
Thunderwave/Barrier
Drill peck x3/ no damage to substitute
Drill peck crit/ barrier
Thunderbolt/para
thunderbolt/some move failed
thunderbolt KO
Zapdos (sub) vs Magmar
Thunderbolt/flamethrower break sub
Thunderbolt KO

End of round 10

Round 11

No Favs/Free sprit
Draft
Hypno/Jolteon/Xatu/Raichu/Jolteon/Registeel (Didn't know you could get 2 of the same pokemon lol)
Jolteon Xatu Registeel

Battle 1
Jolteon vs Suicune
Thunderbolt KO
Jolteon vs Steelix
Swap to xatu/Earthquake
Swap to registeel/Rocktomb/leftovers full recovers
Swap to xatu to stall earthquake/Earthquake
Swap to registeel/Rock tomb miss
Swap to Xatu/Rock tomb (should be more careful)
Swap to registeel/ Rock tomb
Swap to xatu/ Rock tomb (red health, plan not working)
Swap to registeel/ Rock tomb
Substitute/Earthquake breaks sub
Substitute/ Rock tomb
Focus punch/ Rock tomb sub still holds
Double team/Rock tomb miss
Double team/ Earthquake breaks sub
Substitute/ Earthquake breaks sub
Substitute/ Something missed didn't catch what
Focus punch/ Another miss
Focus punch/EQ breaks sub, punch ko's steelix
Registeel vs Entei
Entei Double team/Registeel sub
Flamethrower miss/ Toxic hit
Flamethrower breaks sub/Focus punch hits
Flamethrower miss/ Substitute
Flamethrower breaks sub/ Focus punch KO

No Favs/Free spirit
Swap Xatu for Suicune

Battle 2
Jolteon vs Latias
Thunderwave/Earthquake
Bite/Shadowball KO
Suicune vs Latias
Ice beam/Psychic
Bite KO
Suicune vs wailord
Reflect/Icy wind
Surf/Surf
Surf/Surf
Surf crit/Icy wind
Surf KO
Suicune vs Marowak
Swap to registeel/Earthquake
Focus punch fail/Earthquake KO
Suicune vs Marowak
Surf KO

No Fav/Slow and steady
Swap suicune for Latias

Battle 3
Jolteon vs Moltres
Thunderbolt KO
Jolteon vs Tentacruel
Thunderbolt/ confuse ray/leftovers
Swap to registeel/Toxic
Surf/Sub
Confuse ray fail/ Double team
Surf miss/Double team
Confuse ray fail x4/ Double team x 4
Confuse ray fail x4/ focus punch x 4 KO
Registeel vs snorlax
Focus punch/Psy up/ focus punch hit
Focus punch miss/psy up
Focus punch hit/ psy up/ Focus punch KO

YOUR TOTALLY LACKING
IN FASHION SENSE

she's salty lol

No Favs/Free sprited
No swap

Battle 4
Jolteon vs Vileploom
swap to registeel/ double team
Substitute/ double team
focus punch/ double team
Focus punch miss/ ingrain (strap in for a long one)
Complete PP stall on both sides into a struggle war
Ingrain would keep healing vileplume back up and vileplume can't do enough to registeel
I did this for forever on speedup before remembering my latias has aerial ace
Swap to latias
Aerial Ace x3or4 KO
Latias vs Exploud
Swap to registeel/shadowball
Hyper voice/struggle several times
Rest/struggle, wake with chesto
Struggle hyper voice until registeel KOd
Jolteon vs exploud
Thunderbolt KO
Jolteon vs latios cant be 57
thunder wave/full para
bite critical hit KO
(Let this be a lesson about PP stalling and ingrain)

No favs/High risk return
Swap latias for latios

Battle 5
Jolteon vs Rhydon likely 234
swap to latios/earthquake
Ice beam/ rock tomb miss (set 1)
Ice beam KO
Latios vs Marowak
Ice beak KO
Latios vs Regirock
Psychic/rockslide x 2
Psychic KO

No fav/High risk return
No swap

Battle 6
Jolteon vs Ursaring
Thunderbolt crit KO
Jolteon vs Swampert
Swap to latios/ Earthquake
Earthquake/mirror coat (paid off this time)
Psychic/surf (nevermind, it didn't because I got a bad range)
Psychic KO
Latios vs Breloom
psychic KO

No Fav/Free Spirited
no swap

Battle 7
Jolteon vs Hariayama likely 24
Swap to latios/counter ---there can be no more 4style on the team
Psychic/counter
Psychic/focus band activation/rock slide
Psychic/focus band activation again/rock slide
Ice beam KO (Should have been going for ice beam the whole time after the first psychic)
Latios vs Scizor Cant be sets 1 and 3
Swap to registeel/silver wind
Silver wind/ substitute
Focus punch/swords dance/focus punch hit
Focus punch/silver wind no break/focus punch hit
silver wind break/double team
silver wind/ substitute
focus punch/baton pass/MAGMAR/Focus punch hit
Focus punch/fire blast miss/focus punch hit/flame body burn
Focus punch x2 to close the game

End round 11

Round 12

Ground/Free spirit

Draft
Lapras/Hariyama/Nidoqueen/Salamance/Weezing/Misdreavous
Salamance/Weezing/Lapras

Battle 1
Salamance vs shuckle
Earthquake/shuckle substitute, shuckle set 3
swap to weezing/attract fail because both female
flamethrower break sub/double team
flamethrower/double team
flamethrower KO (no misses nice)
Weezing vs Nidoking Can't be set 1, less likely set 3
Thunder/Explosion KOKO
Lapras vs Flygon (of course this set has no ice moves)
Sunny day/Surf crit
Sunny day/surf x 2 KO

No favs/Free spirit
salamence vs porygon 2
swap to weezing/ thunderwave
Psychic/ Full para (was gonna explode sogood)
Tri attack KO
Salamence vs porygon2
Double edge/thunderwave
Psychic/double edge KO
Salamance vs Ludicolo
Swap to lapras/double team
confuse ray/hit in confusion/ leftovers
swap to salamance/ hit in confusion
Double edge miss/double team
Double edge hit/ leech seed
Ludicolo proceeds to stall out the rest of my team

END RUN

I was so concerned with Porygon 2 being set 4 with ice beam
In hindsight swapping to weezing was a losing strategy
If I valued my pokemon equally I think the right play would have been to risk the 25% chance of ice beam
Probably overrelied on Weezing for covverage and problem breaking
It probably would have been better to take Hariyama instead of Lapras, or trade it for the Nidoking, but I was afraid of psychics
I cannot stress enough how bad Lapras 1 is.
Nice work! I also got inspired and did a run yesterday; unfortunately got nowhere near this far, only making it to 34 wins. Got Kingdra2 as a lead in round 4 which is an absolutely god-tier mon and swept damn near all 21 foes on its own which made me a bit overconfident: it was late and I should have called it a night and picked up the next day but I stupidly decided I could do another round. Had Slaking3 in my draft so used that as a lead, pairing it with Weezing3 for a cheap and dirty kill-switch-explode-switch-kill strategy. Worked well until I stupidly traded away the Metagross I hadn't used at all for a Donphan and then was promptly swept by a Slowbro after Slaking got paralysed by the lead Porygon2. Would have won if Weezing had been able to blow up but it got a Quick Claw activation and KO'd with Psychic.

When will I learn: don't switch for the sake of switching after battle 21!

Draft
Hypno/Jolteon/Xatu/Raichu/Jolteon/Registeel (Didn't know you could get 2 of the same pokemon lol)
Yeah, your elevations can overlap with your regular draft. I was once unfortunate enough to get two Nidoqueen and two Medicham simultaneously. Gen 3's Factory is a lot more loose with item/species clause, since you can encounter and trade for mons with the same items you have, unlike in Gen IV.

Out of interest, anyone know for definite which species are excluded from appearing in the Factory? Bulbapedia says Unown will never show up, but it has to be more than that since even in round 1 I've never seen, say, Magikarp or Weedle or Metapod. Comparatively powerful Pokemon like Magcargo, Dustox, and Poliwhirl can show up in round 1, but I think there's a lower limit - I'd presume the game "cuts off" Pokemon below a certain stat range (much like how Dragonite/Tyranitar and the upper sets for Raikou, Entei, and Suicune are excluded in level 50). I'm just not sure where it starts because I've definitely seen Grimer, which has a BST of 325. The next Pokemon by BST is Clefairy at 323, which I can't recall seeing at any point; Seel and Magnemite have identical BSTs to Grimer so I would assume they're included too but offhand I can't recall seeing either of those the last few times I've played (though as I type this I'm relatively sure I've seen Seel in the Factory before).

Something occurred to me as I was writing this and I checked to see whether the Factory's pool might start where Slateport's Battle Tent pool leaves off since I know for a fact Magikarp is an option there, but of course it doesn't since the pool in Slateport goes upwards to things like Seviper and Machoke. I either wasn't aware or had forgotten, but the Slateport rentals are actually different sets altogether - apparently nowhere ever bothered to record a list of the Battle Tent rentals apart from www.upokecenter.com, which was an amazing site and it's frankly a crime that it's only accessible now via the Wayback Machine. So I'm leaving it here for anyone who's interested... which is probably just me.

As far as I can tell these are always generated with IVs of 0. It's weird how many don't have items. I've not played this facility enough to know if natures are fixed or randomised, but I presume the latter since they aren't listed.

Top picks at a glance: anything evolved, basically. Pelipper is a pretty safe bet purely because of all the grasses and bugs here; Linoone, Graveler, and Baltoy are all pretty powerful; Kirlia is a potential nuke with Calm Mind/Confusion. I can't imagine anyone's longing to crush this facility though.

Should probably nag someone on Bulbapedia to create a page for this.

No.NameNatureItemAbilityMovesHPAtkDefSp. AtkSp. DefSpeed
0ZigzagoonCHOICE BANDTackle, Charm, Odor Sleuth, Pin Missile0255000255
1ZigzagoonLUM BERRYDig, Mud Sport, Tail Whip, Rest0255000255
2BeautiflyStun Spore, Mega Drain, Gust, Harden0002550255
3DustoxORAN BERRYPoison Sting, Moonlight, Protect, Gust12701271271270
4WailmerRAWST BERRYRollout, Curse, Growl, Whirlpool170170170000
5WailmerSITRUS BERRYRollout, Growl, Whirlpool, Water Pulse170017017000
6MarillWHITE HERBRollout, Defense Curl, Tail Whip, BubbleBeam2550002550
7WingullMETAL COATSupersonic, Growl, Wing Attack, Steel Wing017001700170
8PelipperDRAGON FANGTwister, Water Sport, Growl, Wing Attack001701701700
9CacneaLAX INCENSESandstorm, Leer, Leech Seed, Pin Missile00000255
10LombreMIRACLE SEEDAstonish, Water Gun, Fake Out, Absorb2550025500
11LotadMYSTIC WATERSynthesis, Nature Power, Rain Dance, Mega Drain170017017000
12SeedotSALAC BERRYSunny Day, Synthesis, Leech Seed, Bide170017001700
13NuzleafFake Out, Nature Power, Harden, Attract2552550000
14NinjaskFury Cutter, Screech, Swords Dance, Double Team1020102102102102
15NinjaskSILVERPOWDERFury Cutter, Double Team, Screech, Sand-Attack0255255000
16GravelerMud Sport, Block, Rock Tomb, Magnitude170170001700
17BaltoySelfdestruct, AncientPower, Psybeam, Reflect0255025500
18MightyenaBLACKGLASSESBite, Roar, Swagger, Tackle170001700170
19MightyenaSHELL BELLOdor Sleuth, Howl, Sand-Attack, Poison Fang2552550000
20LinooneMENTAL HERBHeadbutt, Tickle, Tail Whip, Rest170170001700
21GoldeenSCOPE LENSWater Sport, Horn Attack, Waterfall, Supersonic001701701700
22ElectrikeMAGNETBite, Spark, Roar, Flash017017000170
23VoltorbSpark, Rollout, Charge, Screech0002552550
24AronDig, Metal Claw, Iron Defense, Endeavor170170170000
25AronLEPPA BERRYMud-Slap, Iron Tail, Harden, Roar170001701700
26TrapinchBody Slam, Focus Energy, Sand Tomb, Sand-Attack2552550000
27CacneaBRIGHTPOWDERIngrain, Sandstorm, Poison Sting, Destiny Bond2550000255
28TaillowSHARP BEAKGrowl, Aerial Ace, Agility, Endeavor0255000255
29SwellowSupersonic, Growl, Focus Energy, Peck170170170000
30GolbatSPELL TAGAstonish, Gust, Mean Look, Confuse Ray001700170170
31LoudredAstonish, Screech, Uproar, Supersonic170170170000
32SpindaCHESTO BERRYDizzy Punch, Faint Attack, Hypnosis, Rest017017001700
33MagnemiteQUICK CLAWMetal Sound, Supersonic, Thunder Wave, Spark0002550255
34WhismurSILK SCARFRest, Sleep Talk, Howl, Body Slam12712712701270
35MakuhitaFOCUS BANDSand-Attack, Knock Off, Arm Thrust, Belly Drum2552550000
36NumelEmber, Take Down, Growl, Focus Energy0255025500
37BarboachSEA INCENSEMagnitude, Mud Sport, Water Sport, Water Gun2552550000
38TentacoolPOISON BARBScreech, BubbleBeam, Acid, Barrier2552550000
39VigorothAGUAV BERRYFocus Energy, Fury Swipes, Endure, Yawn2552550000
40MagikarpDRAGON SCALETackle, Flail, Splash2552550000
41SeviperLick, Poison Fang, Glare, Wrap170170017000
42SolrockHARD STONERock Throw, Harden, Psywave, Tackle017017001700
43KecleonPsybeam, Substitute, Thief, Tail Whip170001700170
44KecleonIAPAPA BERRYFaint Attack, Astonish, Lick, Screech2550002550
45ShroomishPERSIM BERRYStun Spore, Tackle, Leech Seed, Mega Drain0002550255
46ShroomishFIGY BERRYAbsorb, Stun Spore, Spore, Leech Seed02550000
47LombreNature Power, Astonish, Growl, Absorb0255000255
48NumelCHARCOALEmber, Growl, Earthquake, Sunny Day001701701700
49TrapinchASPEAR BERRYFaint Attack, Dig, Bite, Quick Attack170170170000
50PelipperWIKI BERRYWing Attack, Supersonic, Mist, Agility12701270127127
51WingullNEVERMELTICEWater Gun, Supersonic, Growl, Icy Wind0255000255
52MarillGANLON BERRYDouble-Edge, Rain Dance, Tail Whip, Water Gun2550025500
53SkittyPETAYA BERRYAssist, Attract, Sing, Charm170170170000
54SeviperSwagger, Wrap, Poison Tail, Haze001701701700
55GolbatLEFTOVERSBite, Torment, Screech, Poison Fang2550000255
56RaltsMAGO BERRYHypnosis, Imprison, Psychic, Dream Eater0002550255
57SandshrewSOFT SANDSlash, Sand-Attack, Sand Tomb, Defense Curl000000
58SwalotYawn, Sludge, Encore, Pound017017001700
59VolbeatTackle, Confuse Ray, Quick Attack, Double Team0255002550
60IllumiseCHERI BERRYCharm, Tackle, Encore, Moonlight170170000170
61KadabraDisable, Confusion, Reflect, Recover0002550255
62KirliaTWISTEDSPOONCalm Mind, Confusion, Double Team, Growl12712712701270
63BreloomAbsorb, Tackle, Stun Spore, Mega Drain170170170000
64PlusleLIECHI BERRYSpark, Encore, Thunder Wave, Growl0255000255
65PluslePECHA BERRYSpark, Fake Tears, Substitute, Quick Attack2550025500
66ElectrikeAPICOT BERRYSpark, Charge, Roar, Thunder Wave00000255
67SwabluSing, Peck, Steel Wing, Safeguard0255000255
68MachopBLACK BELTFocus Energy, Vital Throw, Seismic Toss, Foresight0255000255
69MachokeFocus Energy, Leer, Karate Chop, Foresight170017001700
 

atsync

Where the "intelligence" of TRAINERS is put to the test!
is a Pokemon Researcheris a Contributor to Smogon
Out of interest, anyone know for definite which species are excluded from appearing in the Factory? Bulbapedia says Unown will never show up, but it has to be more than that since even in round 1 I've never seen, say, Magikarp or Weedle or Metapod. Comparatively powerful Pokemon like Magcargo, Dustox, and Poliwhirl can show up in round 1, but I think there's a lower limit - I'd presume the game "cuts off" Pokemon below a certain stat range (much like how Dragonite/Tyranitar and the upper sets for Raikou, Entei, and Suicune are excluded in level 50). I'm just not sure where it starts because I've definitely seen Grimer, which has a BST of 325. The next Pokemon by BST is Clefairy at 323, which I can't recall seeing at any point; Seel and Magnemite have identical BSTs to Grimer so I would assume they're included too but offhand I can't recall seeing either of those the last few times I've played (though as I type this I'm relatively sure I've seen Seel in the Factory before).
I posted some stuff about this in this thread years ago but from my observations you can only see the following sets in Round 1 of level 50:

Aipom-1, Anorith-1, Ariados-1, Aron-1, Azumarill-1, Bayleef-1, Beautifly-1, Beedrill-1, Butterfree-1, Cacnea-1, Charmeleon-1, Chinchou-1, Clamperl-1, Combusken-1, Corsola-1, Croconaw-1, Delcatty-1, Delibird-1, Drowzee-1, Dustox-1, Eevee-1, Elekid-1, Exeggcute-1, Farfetch'd-1, Flaaffy-1, Furret-1, Gloom-1, Graveler-1, Grimer-1, Grovyle-1, Growlithe-1, Haunter-1, Houndour-1, Illumise-1, Ivysaur-1, Kadabra-1, Kabuto-1, Koffing-1, Krabby-1, Ledian-1, Lickitung-1, Lileep-1, Lombre-1, Loudred-1, Luvdisc-1, Machoke-1, Magby-1, Magcargo-1, Marshtomp-1, Masquerain-1, Mawile-1, Minun-1, Murkrow-1, Nidorina-1, Nidorino-1, Nosepass-1, Nuzleaf-1, Omanyte-1, Onix-1, Parasect-1, Phanpy-1, Pidgeotto-1, Plusle-1, Poliwhirl-1, Ponyta-1, Porygon-1, Pupitar-1, Quilava-1, Raticate-1, Rhyhorn-1, Roselia-1, Sableye-1, Sealeo-1, Skiploom-1, Spinda-1, Spoink-1, Staryu-1, Sudowoodo-1, Teddiursa-1, Tentacool-1, Togetic-1, Vibrava-1, Volbeat-1, Voltorb-1, Wailmer-1, Wartortle-1, Weepinbell-1, Wobbuffet-1, Yanma-1

This covers entries 111 - 200 on Bulbapedia's list of Frontier sets (starting with Grimer-1 at 111 in the Group 1 list and ending with Furret-1 at 200 near the beginning of the Group 2 list) but excludes Unown (number 127). Everything above Grimer (entries 1-110, covering Sunkern to Seel) shouldn't appear at all in Factory.

It's been a good while since I've played this format so I may have specific details wrong (maybe Seel DOES appear but I don't think it does), but Bulbapedia's Factory page is a bit misleading because it says "the enemy Pokémon and initial rental Pokémon encountered come from these lists" and then just links to the entire Group 1 list in the Round 1 section and mentions Unown as being excluded. Technically this isn't "wrong" but to me, the wording implies that EVERYTHING in Group 1 can appear except Unown, but there are certainly other Pokemon that also can't appear from that group - you are never going to encounter a Metapod or Weedle for instance.

(The rest of the info on that page seems correct though)
 

QuentinQuonce

formerly green_typhlosion
I posted some stuff about this in this thread years ago but from my observations you can only see the following sets in Round 1 of level 50:

Aipom-1, Anorith-1, Ariados-1, Aron-1, Azumarill-1, Bayleef-1, Beautifly-1, Beedrill-1, Butterfree-1, Cacnea-1, Charmeleon-1, Chinchou-1, Clamperl-1, Combusken-1, Corsola-1, Croconaw-1, Delcatty-1, Delibird-1, Drowzee-1, Dustox-1, Eevee-1, Elekid-1, Exeggcute-1, Farfetch'd-1, Flaaffy-1, Furret-1, Gloom-1, Graveler-1, Grimer-1, Grovyle-1, Growlithe-1, Haunter-1, Houndour-1, Illumise-1, Ivysaur-1, Kadabra-1, Kabuto-1, Koffing-1, Krabby-1, Ledian-1, Lickitung-1, Lileep-1, Lombre-1, Loudred-1, Luvdisc-1, Machoke-1, Magby-1, Magcargo-1, Marshtomp-1, Masquerain-1, Mawile-1, Minun-1, Murkrow-1, Nidorina-1, Nidorino-1, Nosepass-1, Nuzleaf-1, Omanyte-1, Onix-1, Parasect-1, Phanpy-1, Pidgeotto-1, Plusle-1, Poliwhirl-1, Ponyta-1, Porygon-1, Pupitar-1, Quilava-1, Raticate-1, Rhyhorn-1, Roselia-1, Sableye-1, Sealeo-1, Skiploom-1, Spinda-1, Spoink-1, Staryu-1, Sudowoodo-1, Teddiursa-1, Tentacool-1, Togetic-1, Vibrava-1, Volbeat-1, Voltorb-1, Wailmer-1, Wartortle-1, Weepinbell-1, Wobbuffet-1, Yanma-1

This covers entries 111 - 200 on Bulbapedia's list of Frontier sets (starting with Grimer-1 at 111 in the Group 1 list and ending with Furret-1 at 200 near the beginning of the Group 2 list) but excludes Unown (number 127). Everything above Grimer (entries 1-110, covering Sunkern to Seel) shouldn't appear at all in Factory.

It's been a good while since I've played this format so I may have specific details wrong (maybe Seel DOES appear but I don't think it does), but Bulbapedia's Factory page is a bit misleading because it says "the enemy Pokémon and initial rental Pokémon encountered come from these lists" and then just links to the entire Group 1 list in the Round 1 section and mentions Unown as being excluded. Technically this isn't "wrong" but to me, the wording implies that EVERYTHING in Group 1 can appear except Unown, but there are certainly other Pokemon that also can't appear from that group - you are never going to encounter a Metapod or Weedle for instance.

(The rest of the info on that page seems correct though)
Ah! Splendid, thanks - might actually make an account on Bulbapedia and flag that as a correction on the Battle Factory page, as that's a pretty big oversight.

In the meantime, I have a CRAZY Battle Factory streak to write up. I got to 21 wins last night and did the subsequent three this morning; currently at 42 wins which I'll no doubt pick up again soon, but the final three rounds were so wacky I felt compelled to write them up.

Shoutout to LRXC for reviving my interest in the Factory again, been enjoying your streams a lot. (Incidentally, if you haven't uploaded it here already, would you be able to send me that AI information sheet you were using please?) I've actually been beavering away at the Gen IV Factory lately but it's very slow going, so weirdly Gen III's Factory has become a sort of casual relaxing breather in between my attempts. Which is something I never thought I'd say about it.

Writeups of my six rounds are below, in progressively more detail.

The first two rounds were unremarkable, as they so often are, though I did have a couple of false starts. In round 1 I got Houndour and led off with that, switching at every opportunity, while in round 2 I got Ninjask which I led with and alternated various bulky heavy hitters in the back who'd appreciate being BP'd the extra speed (Machoke, Piloswine, Parasect, Camerupt, Solrock, Lickitung).

14 trades

Got the excellent Grumpig2 in my draft so of course I led with that. Other draft members were pretty average at best so I went with Lunatone2 and Gligar2, swapping that last slot a few times as I was never quite satisfied with the team and wanted either a massively competent sweeper or a really good defensive mon in backup. After battle 4 I swapped for Banette which was useful but I ended up deciding to swap for Jumpluff2. I don't know why I keep thinking Jumpluff is a good mon but fast Sleep Powder+Leech Seed is pretty nifty so I figured it might make good insurance for Noland.

And it sort of did! But my win against Noland was the luckiest freaking thing EVER. Went in with Grumpig2, Jumpluff2, and Lunatone2: he opened with Seaking. Uh oh. Megahorn and Horn Drill make for one very unhappy Grumpig. Since nothing else could really deal with that I decided to stay in and do as much damage as I could, hoping for misses. Got one Thunderpunch in for 40% and he predictably KO'd me with Horn Drill. Argh.

Okay, Jumpluff - it's all on you now. Managed to use Sleep Powder and get in a few Double Teams as he hit with Megahorn a couple of times; eventually got a Leech Seed up and inflicted sleep; yes this is a RestTalk set but it gives a very, very small amount of breathing room. Didn't even bother with Giga Drain until I was sure it would definitely finish it off - Jumpluff is so pathetically weak that it doesn't even 3HKO. The match swiftly turned into a cycle of Seaking Resting and me praying like hell that 1.) Sleep Talk wouldn't select Horn Drill 2.) if it did, it would miss. I got lucky and gradually managed to whittle him down, thanks to the wasted Sleep Talk turn every time it awoke.

Next is Wartortle. Oh, christ. Not good. Put it to sleep and got another Leech Seed off but it woke up too quickly and HIT THROUGH +6 EVASION FOR THE KO with Ice Beam. Unreal. Well, this doesn't look good.

What to do with Lunatone. I need a Calm Mind to survive Surf and 2HKO and then have any faint hope of beating the last mon. Luckily, Wartortle induldges me by using Protect, letting me get one up. He uses Surf next turn - getting a crit and leaving me on 38 HP. Luckily, I outspeed and see him off with Psychic but it's over now, let's be real. Unless his last Pokemon is, like, Weedle or something.

Not quite. It's Kadabra. His last pokemon is Kadabra. Well, shit. It uses Thunder Wave and I Ice Beam and GET A FREEZE. Holy crap. Except I have full paralysis next turn, and the following turn Kadabra defrosts and uses Psychic - but thanks to the one Calm Mind I used earlier, I survive with 7 hp and win.

Ridiculous luck there on my part.

20 trades

Wasn't really bothering to record progress at this stage since my streak was nothing great, but an initially bland-looking opening draft proved to actually be really great as I chose Heracross2, Salamence1, and Gengar1. None of those are great sets but it turned out to be a highly effective squad (mainly due to Heracross, tbh; Gengar wasn't actually used at all until battle 6) and because of this I didn't swap until after battle 5, when I exchanged Salamence for Gyarados. The very next battle was hilarious as the opponent opened with Charizard - I switched to Gyarados, ate a Fire Blast, and incapacitated Charizard with Thunder Wave. It hit me twice more, missing once, and then when I finally went to attack with a +2 Frustration its Focus Band triggered, and the last Fire Blast got a critical hit and knocked me out.

That was annoying, but since it meant Charizard was out of Fire Blast PP and had no other attacking moves I figured I could set up on it. Easier said than done though, because its other moves were Scary Face and Roar. I didn't particularly want Heracross at lower speed even if it was bulked to the max, since I'd been told that the trainer specialised in Water-types. Gengar and Heracross were both female so could use Attract, but Gengar's only other option was Confuse Ray so I figured keep it in reserve in case one of the backups proved to be really difficult. I switch-stalled for a bit until it ran out of Scary Face PP and used Roar every turn. Annoying position. Even when Roar PP is exhausted, Sunny Day only has 5 PP (and it had already used it twice before I decided the best course of action) so it's not enough before it Struggles to death. Obviously I ideally wanted six boosts but I figured if I could get two Bulk Ups under my belt, minimum, it'd be safe to try and sweep the rest of the team. Attract didn't prove reliable enough to buy me the time I needed and I wasn't able to get more than one Bulk Up in before being Roared out.

What an infuriating situation. The best I could hope for was two Bulk Ups, and this was eventually what I got. I managed to count correctly and arranged for Gengar to take the final Roar so that Heracross ended up on the field; Charizard used its last Sunny Day while I boosted, then I boosted once more and it hit with with Struggle, falling to the 1 recoil damage. Next mon out was Slowking - probably the mon I was dreading most, but Heracross managed to hit with Megahorn for the KO, and then the final mon was Wailord, who used Curse once as I 2HKO'd with Earthquake. Ended up swapping Heracross for Wailord because the final opponent of the round specialised in Fire-types.

23 trades

Pretty unimpressive opening draft: Slaking3, Aerodactyl3, Blaziken2, Ampharos2, Golem2, Xatu2.

Went with Slaking, Ampharos, and Blaziken: the first trainer specialised in Water-types, but I chose Blaziken regardless due to its overall power. Ampharos was no help at all but I managed to make it through the first battle intact and traded it for a Slowking, which proved to be a fantastic pivot out of Slaking's first kill. In battle 3 I had an annoying first matchup against a Shiftry that took ages to kill: should have gone for Brick Break rather than Aerial Ace as it survives the latter, but I was hoping it'd spend time boosting evasion (Dig doesn't even 10HKO) and didn't twig that Early Bird meant that it could Rest and then wake up one turn later, locking us into a cycle of Aerial Ace/Rest, sleep while I truant, Aerial Ace/Rest, etc. Finally bit the bullet and switched out to Blaziken and managed to drop it.

Wasn't planning to take Shiftry after that, but the next foe specialised in Water-types so I figured why not. Between them, Shiftry and Slowking made an absolutely fantastic pair - Shiftry was able to stall out a surprising amount of stuff, or simply provide valuable passive healing for the others. I didn't swap again as it worked so well, though it meant every subsequent battle went at a snail's pace.

Good preparation for the next round...

26 trades

So this was a truly abysmal opening draft. Genuinely one of the worst I think I've ever seen. Miltank4, Ninetales4, Gyarados3, Ludicolo3, Magmar3, Mr Mime3.

After a lot of thought, I went with Gyarados, Miltank, and Ludicolo. In hindsight, this really highlights how my playstyle has improved over time because I don't think I would ever have considered taking this combination in years gone by.

Gyarados3 isn't a great set, but if I couldn't sweep with it I figured Ludicolo3 was a decent Blissey approximation that 1.) appreciates Intimidate support 2.) can actually reliably kill stuff with Leech Seed & 3.) gets a phenomenal amount of healing thanks to having Leftovers, Leech Seed, and this individual having Rain Dish! And it can pass Leech Seed's effect onto Miltank if I want to boost with that.

In the very first battle the lead mon was Blissey. Didn't even bother Earthquaking, just switched straight to Ludicolo, set up Leech Seed and Rain Dance, and started boosting my evasion. It took a few turns for Blissey to attempt attacking, and thanks to the piss-poor accuracy of both Fire Blast and Blizzard I was quite safe. Only one Blizzard hit, and the 3x passive healing that turn was almost equal to the damage it inflicted. Ended up fighting Blissey3 a second time later in the round; this time it hit through +6 evasion to OHKO Ludicolo with a crit Fire Blast. Luckily Miltank was able to come in and enjoy the massive healing a Leech Seeded Blissey provided while it used Curse and Double Team six times each, evading all the remaining Fire Blasts and Blizzards. I was never going to Double-Edge Blissey (why take the recoil?) so just spammed Double Team and Curse once I was maxed until it ran out of Softboiled PP and started using Calm Mind out of concession.

Well, these next few battles truly were the longest ones of my life. Not the most fun experience for someone who loves a quick battle, but definitely a good learning experience. A couple of of bouts here ended with me simply draining something out of PP and letting nature take its course:
  • Ludicolo fainted in one match, leaving Miltank and Gyarados up against Gengar. I stalled initially, intending to switch Gyarados in once it was out of Thunderbolt PP and finish it off, but rationalised it was more efficient just to boost evasion, heal when needed, Curse when I could, and wait for both mons to use up all their PP; finally Miltank won with a +6 Struggle
  • The final mon in battle 5 was Meganium3: Gyarados was fainted and Ludicolo was on the field with Miltank in the back. Since Leech Seed wasn't going to work, I opted to simply Double Team to the max and just spammed non-functional moves at it until it burned up all its Earthquake and Giga Drain usage. Intended to let Miltank come in, boost up, and safely take it out but ended up just chipping it down with Struggle since even at minimum health Flail is not even a guaranteed 2HKO after Leftovers - though it did hit on the last turn, which was alarming.
I didn't swap once all round. These three were an absolutely stellar combination - Ludicolo can set up on so much stuff it's insane. I actually think in a lot of cases this is superior to set4 (which is identical sans Toxic over Giga Drain) because Toxic just puts a timer on how much you can boost, and if you can get Rain Dance AND Leech Seed AND +6 evasion set up before the foe faints, you're in prime position for the next one. The only thing is that forgoing Toxic means that you can't reliably beat Leftovers sets. It's a delicate balance, but as long as you're not trying to sweep with it alone, it's workable. There's very few Leftovers sets in the set 3 band - Shuckle, Cradily, and Breloom would all be pretty much impossible for this set. Managed not to run into the latter two; I did face Vileplume3, but my other two squad members were still active so I simply went down the usual route of evasion boosting and then draining as much PP as I could - it eventually hit me with Sludge Bomb for the KO though.

Battle 6 was the scariest, because it always seems to be. The opponent opened with Salamence; I switched in Ludicolo because none of Salamence3's moves are threatening to it (especially at -1), but I was only able to use Double Team once before it got a critical hit with Double-Edge, knocking me out. Figured the best thing to do was set up on it with Miltank, so I switched Gyarados back in for another Attack nerf and then swapped, but Salamence started using Crunch. The damage was low enough that I could boost evasion, but eventually it got a Sp.Def drop.

Decided it was safest to switch Gyarados in again and then go back to Miltank. This worked, and once Crunch's PP was exhausted none of its other moves made a dent: I safely got Miltank to +6/+6/+6 with full HP. Dropped Salamence with Double-Edge and OHKO'd the Porygon2 that came out second... and of course, the final mon is Misdreavus. Brilliant. Except it is brilliant because it used Perish Song on its first turn! Never mind.

Feeling apprehensive, I prepared to face Noland.

He opened with Shuckle! It has Toxic so wouldn't be safe to set up on; I rationalised it's better to try and kill it as quickly as possible with Gyarados, and 3HKOed with Surf.

His next Pokemon was Electrode. Hmmm. Well, it's obviously going to kill Gyarados. I'm thinking that switching to Ludicolo isn't safe, as Thunderbolt just does too much damage, so I sack Gyarados and let it die to Thunderbolt. Ludicolo vs Electrode: I get off a Double Team, then Leech Seed as it uses Thunder Wave... but then it gets two consecutive crits on top of a turn of full paralysis. Argh argh argh.

Just Miltank left, then. Miltank, then. I've got Leech Seed up, so the best play is to alternate Double Team and Milk Drink, hoping that it'll start missing enough to let me sneak in some Curses. As it happens, I only manage to get two evasion boots and one use of Curse before Electrode goes for broke and uses Explosion - but it misses me.

Noland's last mon turned out to be Golem.

Well, this isn't good. Golem3 knows Brick Break. It uses Earthquake as I Double Team again, so suddenly I wonder if Noland could somehow be running Golem4 instead - but then it uses Brick Break the next turn, confirming my fear. Fortunately, it misses. Okay... is evasion maxing or defence maxing the priority here? Evasion maxing seems best, as I'm already at +1 so a non-critical Brick Break can at best 3HKO if it hits.

I manage to get to +6 evasion and then max with Curse, and miraculously none of Golem's Brick Breaks hit, though it uses Earthquake a couple of times and both connect. I'll take that. Finally, at +6/+6/+6, I take the plunge and go for a Double-Edge, dealing what appears to be the maximum roll which is sadly not quite enough to KO. But that's fine, another one will do it - and then Golem uses Explosion. But this one also misses!

Happily, at +6 it should have done under 50% - but I'm still glad. Massive sigh of relief, what a crazy round that was.

This round really makes it apparent how much stuff will still hit you even when you're at +6 evasion. Fucking Frontier luck.

Streak's still active so I'm pressing onwards! Though I don't anticipate breaking the world record any time soon.

EDIT: Ugh, nope. Just ended my run at 44 battles.

Opening draft: Porygon24, Marowak4, Blaziken3, Armaldo4, Medicham4, Weezing3.

Wasn't entirely pleased with this but went with Porygon2, Blaziken, and Marowak in the hope I'd be able to trade up before long. On the first battle I came very close to being wiped out by a Starmie, which I then traded for. Felt a bit shaky and lost on the third battle when Porygon2 victim to Destiny Bond Misdreavus. I switched to Starmie for the opponent's second Pokemon, Houndoom - miraculously paralysed it with Thunderbolt, got full paralysis the same turn, fell a pixel short of a 2HKO next turn but it used Solarbeam so I was able to KO it without taking damage. Last out was Salamence, and Starmie's Ice Beam missed as it used Dragon Dance; it subsequently smashed Starmie with Earthquake and a got a critical hit Double-Edge on Marowak.

Gutted.
 
Last edited:
Hello! I've lurked in this forum for so long... but, now, I want to thank everyone for the their precious guides and their first-hand experiences, without which I wouldn't have been able to fulfill the promise I made myself, when I was ten years old: to get, one day, all the gold symbols in the Emerald Battle Frontier.
Well, I'm not there yet, actually. In fact, I'm still missing the Battle Factory gold. Luckily, LRXC is putting out some great, informative and enjoyable content about the Factory, so I'll try to emulate him and his thought process, untill I'll succeed.


Anyway, I have some questions for the community:

- Context: I'd like to take a shot at the Pyramid record, since it's my favorite facility and I'm kind of decent at it - probably because it's the easiest one, to be honest, and it requires patience, more than anything else. Right now I'm sitting on a streak of 280 cleared floors (ongoing, level 50) and I'm having a blast. This record would place me in 2nd or 3rd place... BUT, it's not a run I can submit: I genned the pokémon I'm using. I didn't think I wanted to compete with other players, when I started; therefore I didn't care about the unfair advantage I'd get, when I knowingly avoided the onus of breeding in gen 3. I just wanted to battle. Things have changed and, now, I want to start from the beginning, to beat this game fair and square.

- So, the questions are: where do I start, if I want to get a team with competitive IVs? Is RNG manipulation allowed? What should I do if I want - let's say - a Gengar, but I don't have access to trading (I'm playing on VBA)? Is breeding with genned parents allowed? I've seen the post linked at the start of this thread (in which allowed glitches are listed), but it didn't extinguish all of my aforementioned doubts.

I hope I didn't mess up and this is the right place to ask. If it's not, I humbly apologize.
Thank you and have a great day!
RNG manipulation is absolutely allowed! It's the only reason we're all running around with 5 IV Suicunes and Moltreses and what have you. You can actually evolve your Gengar quite easily with VBA. Just download VBALink. It allows your game to connect to other emulated games. Hell, you can even duplicate your save file and trade with yourself (using the same game). I was able to make perfect PokéBlocks (that fill every stat) using this method lol.

From what I gathered, it's ok to breed using genned parents, but I'm not sure. If you're using RNG though, it's not even difficult to get the right parents for the breeding anyway. Oh, and don't forget that we have a Discord where we can lend you the mons you need. :)


As for me, I have started recording for the Battle Tower. I lost on purpose so that I could start the run from 36 and on. These videos take forever though. I'm not speeding them up on purpose so it's like 45 to 60 minutes per 7 battles. I will probably speed them up post-production and combine a certain amount of fights. I was thinking maybe 35 battles per video? What would be the ideal speed up? I'm back on my old team with Suicune, Steelix and Salamence btw.
 
Hello, reporting an ongoing 210 streak for level 50 at the Battle Palace for the following team:

Latios @ Lum Berry
Ability: Levitate
Level: 50
EVs: 36 HP / 252 SpA / 220 Spe
Hasty Nature
IVs: 0 Atk
- Psychic
- Thunderbolt
- Ice Beam
- Substitute

Swampert @ Salac Berry
Ability: Torrent
Level: 50
EVs: 36 HP / 220 Atk / 252 Spe
Hasty Nature
- Earthquake
- Surf
- Rock Slide
- Substitute

Metagross @ Liechi Berry
Ability: Clear Body
Level: 50
EVs: 4 HP / 252 Atk / 252 Spe
Hasty Nature
- Meteor Mash
- Earthquake
- Aerial Ace
- Substitute

Modified blue offense for the Battle Palace. EV spread for Swampert is to survive 3 Extremespeed from Spenser's Arcanine. This team is a bit slower than Starmie-Flygon-Scizor, but the power output and increased bulk are definitely noticeable, and it matches up better against the more common threats, especially Swampert, Lati@s, Machamp, and Gengar, which the previous team was having some issues with. I would say my average streak with this team is around 150-160 while the other one would usually end at around 90-100.

I also have an ongoing 105 streak for level 100 with my previous Tyranitar-Latios-Scizor team, but with the adjustment being Latios is now in slot 1 with a Lum Berry, and Tyranitar is in slot 2 with a Salac Berry. Latios just has better initial matchup generally. Honestly the level 50 team would probably work great here too but I wanted to play with the Sandstorm to cancel Leftovers recovery. I'm probably going to stop both runs for a while now because I have a Battle Tower team that I'd like to experiment with.

Lastly, I really love Actaeon's Frontier Assistant program and it's been immensely helpful through this run. I did notice though when I was playing that there are actually two trainers named Gillian, one of which only uses NFEs, but since it's higher on the csv it looks to that row instead of the CoolTrainer which actually is the threat. So I just deleted that first row. I also was having issues with inputting Mr. Mime as a Pokemon into the program, so I went into both csvs and changed it to Mrmime and it worked better.

Thanks for reading!

EDIT:

Never really thought too much about legality on my first run for Starmie-Flygon-Scizor since I bred all 3 of them using almost perfect IV Dittos I got using saved battle video RNG. The issue arises with the Latios. I only legally own a Timid 29/2/29/29/31/31 Latios from Southern Island ACE/RNG. To get this Hasty Latios, I just made a copy and modified its PID in PkHex. Hypothetically, there is a legal way to get a Latios that's very close in IVs and attainable with RNG (frame 475971, 27/12/26/31/27/31), but I caught that Latios before I had a GBXcart to back up my cartridge saves.

So I understand if my 2 streaks with Latios are ineligible for the leaderboard and I apologize if ever lead anyone on. My goal in general was to test the Hasty-Sub strategy at the Palace, and see which Pokemon had the best synergy. I've never cheated with regards to backing up streaks or anything and I want to be transparent about everything that I do, especially with high streaks like this.
 

Attachments

Last edited:
RNG manipulation is absolutely allowed! It's the only reason we're all running around with 5 IV Suicunes and Moltreses and what have you. You can actually evolve your Gengar quite easily with VBA. Just download VBALink. It allows your game to connect to other emulated games. Hell, you can even duplicate your save file and trade with yourself (using the same game). I was able to make perfect PokéBlocks (that fill every stat) using this method lol.

From what I gathered, it's ok to breed using genned parents, but I'm not sure. If you're using RNG though, it's not even difficult to get the right parents for the breeding anyway. Oh, and don't forget that we have a Discord where we can lend you the mons you need. :)


As for me, I have started recording for the Battle Tower. I lost on purpose so that I could start the run from 36 and on. These videos take forever though. I'm not speeding them up on purpose so it's like 45 to 60 minutes per 7 battles. I will probably speed them up post-production and combine a certain amount of fights. I was thinking maybe 35 battles per video? What would be the ideal speed up? I'm back on my old team with Suicune, Steelix and Salamence btw.
Thank you so much, for your reply! I don't know why I didn't think about the VBALink, given that I already knew of its existence lol.


During these days, I've been trying to understand how to RNG abuse: I'm reading Smogon's guides, Reddit posts and i'm also watching video on Youtube... but I'm simply not getting it. So RNG is out of the equation. If you, or other users, can confirm that it's okay to use genned parents, I'll try that path. I guess I could also try to ask for a team on Discord (and I'm definitely interested in joining in, anyway), even though I'm afraid I could lose them, because of my potato-laptop :(


Thanks, again, and good luck for your Battle Tower attempts!
 
I previously said I was most likely done with Gen III battle facilities, but I really wanted to achieve something in retail. For a long time, I did not have a way to import to my Emerald cartridge key Pokemon that were RNG'ed on emulator using Lua Scrips (Mons that I used in emulator runs), however, I met a guy who had one of these devices to export retail savefiles to a PC, so I handed him over my cartridge and the mons I needed on retail and he put them on my savefile.

Before getting my mons on retail, I tried different teams on emulator but they were failures. Even felt like giving Gengar a second chance (Latios - Tauros - Swampert - Gengar) and it was still absolute trash for this team. I'm pretty sure I explained this before, but this mon is very appealing since it's a fast Ghost-type and can be useful to deal with Explosion, but it just gets OHKO by way too many things, especially by all the abundant QC Psyquic users like Slowbro, Slowking, Latios, Latias, Gardevoir and also QC Crunch Tyranitar, just to name a few... They would not even let it get an attack off. It was simply impossible to use. So the disaster scenario and where I almost always lost using Gengar was: Latios + Tauros, Latios goes down to say a crit, Instaswitch into Gengar and it gets OHKO right away too since it's so fragile and I end up in a position stuck using EQ with Tauros hitting my own Swampert.

In the end, Latios - Tauros - Swampert - Articuno is what works for me, I just had to do some tweaking around this core.

In my original Open Level streak on emulator almost a year ago, I used an HP Fire Latios which was a very interesting option since you can OHKO all Forretress sets and 2/4 Scizor Sets (But you can KO the other 2 sets with HP Fire + EQ), HP Fire + EQ KOs all Metagross and Steelix sets, so needless to say it was a nice option. However, Protect was far more valuable to deal with Explosion and also if Latios has low HP, the AI would usually double target it, so Protect buys VERY valuable turns this way.

Because of this, and if you check my LV. 50 run, I opted for a Protect version of Latios because in the long run I believed this move provided far more benefits than HP Fire. However, both are good options and can be used in a successful run. Now, in my retail runs I started with an HP Fire Latios but then switched to a Protect one after I was YET AGAIN convinced this version was more helpful.

Coming back again to my Open Level run on emulator, I used an HP Grass Articuno while in my LV. 50 run I opted for a Substitute one. Substitute was meant to reduce my chances of losing vs. late game Explosion but to be honest I don't think it was as impactful as I thought it would've been, so for the retail runs I chose the HP Grass version to deal great damage to Swampert, Quagsire and Whiscash, and to also have a way to hit water and rock types, even if it's not too much damage it definitely helps. Articuno's main job is to Haze and help deal with Dragon and Grass types.

Now, the most interesting and -curious- part of this tweaking process: I was intrigued by Hyper Beam Tauros since other users ran this move. Psyquic + HB for instance KOs all Regice sets but Regice-4, and also Snorlax-1,4,5,6. So based on this information, I replaced Return with Hyper Beam... at least for my playstyle it was a mistake and I'll explain why in just a bit. So the initial team on my retail runs was:


Latios (M) @ Lum Berry
Ability: Levitate
EVs: 28 HP / 12 Def / 244 SpA / 224 Spe
Timid Nature
- Psychic
- Ice Beam
- Thunderbolt
- Hidden Power [Fire]


Tauros @ Choice Band
Ability: Intimidate
EVs: 40 HP / 252 Atk / 218 Spe
Jolly Nature
- Double-Edge
- Earthquake
- Hyper Beam
- Hidden Power [Ghost]


Swampert (F) @ Leftovers
Ability: Torrent
EVs: 168 HP / 252 Atk / 90 Spe
Adamant Nature
- Protect
- Substitute
- Earthquake
- Hidden Power [Rock]


Articuno @ Cheri Berry
Ability: Pressure
EVs: 6 HP / 252 SpA / 252 Spe
Timid Nature
- Protect
- Haze
- Ice Beam
- Hidden Power [Grass]

With this team I lost about four times in total at like 200s-400s and to be honest, only one of those defeats was real bad luck (I think I got hit by 2 QC Sheer Colds). But for the rest, I realized that it was a mix of losing Tauros way too early and also some situations where having Protect on Latios would've bought me a key turn to do something else.

This was the very first time that I ran Double Edge - Hyber Beam combo on Tauros, so obviously DE was its main STAB move but the recoil damage was punishing me way too much because in many instances losing these health points put Tauros in KO range for many mons... This means that I was usually losing it very early, whereas before when I had Return as the main STAB move, I was able to keep on the field longer.

Although these 2 moves changes on Tauros and Latios don't seem like a big deal at first sight I can't stress enough how HUGE of a difference it was at least for my playstyle... To the point where I got the 1106 Win streak (which was exactly my goal: Get 1100+) on my first try after I made those changes. The final team was:


Latios @ Lum Berry
Ability: Levitate
EVs: 28 HP / 12 Def / 244 SpA / 6 SpD / 220 Spe
Timid Nature
- Psychic
- Ice Beam
- Thunderbolt
- Protect


Tauros (M) @ Choice Band
Ability: Intimidate
EVs: 40 HP / 252 Atk / 218 Spe
Jolly Nature
- Double-Edge
- Earthquake
- Return
- Hidden Power [Ghost]


Swampert (F) @ Leftovers
Ability: Torrent
EVs: 168 HP / 252 Atk / 90 Spe
Adamant Nature
- Protect
- Substitute
- Earthquake
- Hidden Power [Rock]


Articuno @ Cheri Berry
Ability: Pressure
EVs: 6 HP / 252 SpA / 252 Spe
Timid Nature
- Protect
- Haze
- Ice Beam
- Hidden Power [Grass]

Streak Proof.jpg


Last edited:
Hello all,

I'd like to submit a Level 50 Multi-Battle run that I did with my brother. We are currently at 63 Wins. I've been a lurker for a while on here but never posted so let me know if you guys need more than these pics for proof of the streak.
My team:
Latios@LumBerry
Timid 28Hp 12Def 244 SpAtk 4 Spdef 220 Spe
-Psychic
-Dragon Claw
-Thunderbolt
-Ice Beam

Zapdos@Leftovers
Modest 248 SpAtk 252 Spe 4 Def 4 Spdef
-Thunderbolt
-Hidden Power Grass (70 Power)
-Protect
-Aerial Ace

My brother's team:
Aerodactyl@Choice Band
Adamant 252 Atk, 252 Spe, 6 Hp
-Ancient Power
-Earthquake
-Aerial Ace
-Hyper Beam

Snorlax@Chesto Berry
Careful 140 HP 96 Atk 56 Def 216 Spdef
-Body Slam
-Earthquake
-Shadow Ball
-Rest

20231013_142941.jpg
20231013_142012.jpg
20231013_140912.jpg
 
Last edited:

Texas Cloverleaf

This user has a custom title
is a Social Media Contributor Alumnusis a Forum Moderator Alumnusis a Community Contributor Alumnusis a Tiering Contributor Alumnusis a Contributor Alumnusis a Smogon Media Contributor Alumnusis a Battle Simulator Moderator Alumnus
13 wins in the Dome open level on emulator

Zapdos @ Magnet, Modest
29 / 19 / 14 / 22 / 27 / 21
4 HP / 252 SpAtk / 252 Speed
Thunderbolt / Hidden Power Grass 64 / Thunder Wave / Roar Frontier

Gengar @ Lum Berry, Hasty
27 / 31 / 25 / 31 / 11 / 27
24 Atk / 252 SpAtk / 232 Spe
Thunderbolt / Ice Punch / Psychic / Explosion

Vaporeon @ Leftovers, Bold
23 / 28 / 2 / 24 / 31 / 16
252 HP / 252 Def / 4 SpDef
Surf / Ice Beam / Toxic / Protect


Vappy is very effective as discount Suicune, Zapdos hits hard af, Gengar glues against normals, weak to Raikou (gengar boom)/Latios (vap)/Jynx (vap-ish)/multi elecs/psys
 

Attachments

Last edited:
Hi guys. Me again. I've done another update on my edited version of Hozu's spreadsheet with even more accessibility (I hope!)

I'll just do a short description to explain how it works. The first two tabs are the only ones interesting for you. The first shows you the Trainer first and their possible Pokémon, then the three Pokémon (if you decide to select them). The second shows you the three Pokémon before you see the Trainer possibilities.

As an example:
Let's say we're facing Cooltrainer Leon and we pick the first tab. He sends out Flygon. We set accordingly and get the following screen. Leon can have all types of Flygon (1-4). For the example, let's also say he has a Scizor (1-4).
1697328746589.png

Assume for a moment that my lead is a Suicune. I Protect on my first turn and Flygon uses Sunny Day. That means it has to be Set 2. This also means that Scizor will never have BrightPowder so if we fill that in, we get the following screen (I clicked the blue arrow to show the three Pokémon.
1697329091331.png

If we then fill in BrightPowder in Item 1 (or 2), both Set 2 of Flygon and Set 4 of Scizor will disappear, which makes prediction of the next Pokémon much easier. It's probably easier to fill that in once Flygon is down lest you forget which one it was. The red on the Set option still remains though plus the check box.
1697329378831.png


To be honest, I usually just use the first Pokémon Set and just replace it by the second. I like using the Trainer tab since it can auto exclude certain sets because they only come with Set 2 for example. Once I have figured out a proper way to record, I'll just give a demonstration. I did actually record one with my old file, but it was hard to read since the screen was too small lol.

Now that I think about it, I forgot to add another idea I had, and that is to add the PP per move for if you don't remember the amount. I've had many instances where I would forget that Roar has 20 PP and then set up for nothing... I'll make a new post once I push the update through. For now, enjoy!
 

Attachments

Texas Cloverleaf

This user has a custom title
is a Social Media Contributor Alumnusis a Forum Moderator Alumnusis a Community Contributor Alumnusis a Tiering Contributor Alumnusis a Contributor Alumnusis a Smogon Media Contributor Alumnusis a Battle Simulator Moderator Alumnus
New personal best of 23 Dome Open level wins with Latios, Metagross, Milotic

Lost the run to a team of Heracross, Scizor, and Armaldo; Heracross and Scizor are the two biggest threats to the team because they require handling in different ways, normally a Latios lead is sufficient to cover Hera (for some reason they don't recognize Psychic kills from full and so don't Endure) but this team comp dissuades Latios lead, but Heracross dissuades Milotic lead. Thus when Scizor leads against Metagross I'm forced to switch for the threat of Counter and when Surf fails to 2HKO I get swept by +4 Silver Wind off Swords Dance Scizor. Clean run aside from this specific team, the only other close calls were the usual Frontier hax, multiple Quick Claw procs in combination with crits etc, but I avoided the OHKO pitfalls and no other team composition could effectively threaten me.

Latios @ Lum Berry, Timid
31 / 31 / 31 / 31 / 31 / 31
80 HP / 252 SpA / 176 Spe
Psychic / Thunderbolt / Ice Beam / Calm Mind

Metagross @ Persim Berry, Adamant
31 / 31 / 31 / 31 / 31 / 31
4 HP / 252 Atk / 252 Spe
Meteor Mash / Earthquake / Rock Slide / Explosion

Milotic @ Leftovers, Bold
31 / 31 / 31 / 31 / 31 / 31
252 HP / 180 Def / 76 SpA
Surf / Ice Beam / Toxic / Recover


Latios speed outpaces the 329s. Miltotic defenses guarantees Rhydon Earthquake never KOs with a crit (at 156) and guarantees +1 Metagross Earthquake never 2HKOs as well.

1000001243.png


1000001244.png
 
I present to you, the cheesiest strategy ever devised for the Battle Arena (Lv. 50), that finally got me the Gold Symbol on the 2nd attempt without having anything close to perfect IVs: It's Fake Out + Protect + Dig.

Using this with your lead means you'll win Skill and Body in judging against practically anything aside from EQ users, Inner Focus and untimely Quick Claw activations (Opponents with Leftovers/Recovery moves tie you if Fake Out does less than 19%. My experience, however, is that they never use Rest/Recover/Softboiled at 80%, so that wasn't a problem). This set is learnable by Persian, Kanghaskhan and Sneasel, so at one point I tried using all 3, which misfired horribly. The idea, however, worked great in the Lead Slot, especially in later sets. I ended up choosing Persian since it can't be messed up by Static. Better IVs would with outspeeding 31 IV Modest Jolteon, but other than that it didn't hinder me.

Persian @ Leftovers
Ability: Limber
Level: 50
EVs: 252 Atk / 4 SpD / 252 Spe
Jolly Nature
IVs: 3 HP / 13 Def / 23 SpA / 16 SpD / 22 Spe
- Fake Out
- Protect
- Dig
- Shadow Ball

Essentially, Persian made it a 2v2 fight (often with one opp weakened), instead of 3v3. Now I needed two sweepers who could thrive in that format. Tauros felt like a natural choice due to Intimidate against Physical Ground types + its speed and ability to 2hko a wide array of targets (Persian often helped turn ranges into guaranteed 2HKOs). Having STAB Hyper Beam to soften up targets for Starmie came in handy many times as well. HP Ghost would have been nice, but didn't have the patience to breed for it.

Tauros @ Lum Berry
Ability: Intimidate
Level: 50
EVs: 4 HP / 252 Atk / 252 Spe
Adamant Nature
IVs: 29 HP / 30 Def / 20 SpA / 23 SpD / 26 Spe
- Earthquake
- Return
- Iron Tail
- Hyper Beam

Lastly, I wanted a Psychic for Greta, and since I only had access to bad Latios, I opted for Starmie. It covers Tauros's fighting weakness, and beat Fire types, one of the few things that can OHKO Tauros (with Overheat).

Starmie @ Twistedspoon
Ability: Natural Cure
Level: 50
EVs: 252 SpA / 252 Spe
Modest Nature
IVs: 14 HP / 25 Atk / 29 SpA / 30 Spe
- Surf
- Psychic
- Ice Beam
- Thunderbolt


Might continue the streak at some point, but now I'm off to do Factory or Tower. Proof of streak (on retail):
1697835047478.png
 
Last edited:
I’m First time poster here. I'm working on clearing as many floors as possible in the Battle Pyramid, my favorite facility in the Frontier. I will update this when/if I complete this loop and/or defeat Brandon, for the umpteenth time lol. Right now I just cleared the Steel-type round which currently puts me at 399 floors cleared, on Open Level. Picture posted for proof.

I switch up my team slightly depending on what wild 'Mons I expect to encounter, accounting for both the wilds and any possible trainers I may, intentionally or not, I get locked into (a Water-type, namely Milotic or Starmie, for the Rock-type floor for example in place of one of my attackers). Here are the troopers I most commonly use...

SLAKING ("King Louie")
Ability: Truant (duh)
Nature: Adamant
Item: Choice Band
252 Attack / 252 Speed / 4 HP
-Return
-Hyper Beam
-Earthquake-
-Shadow Ball
My number one attacker and most commonly used lead. It can KO a large number of opponents. In my experience the most dangerous foes for even this monster include Regirock, Registeel and Tyranitar; they're all just bulky enough to survive even a Banded Earthquake. In fact the only floor I don't bring it on is the Rock-type one. It can KO Golem and such just fine but struggles against Cradily and Armaldo. Those monsters are pains in the butt if you don’t have something to hit them super effectively. Curse users are also potentially a threat to this team. I recently faced some sticky situations with Curse Swampert and Curse+Amnesia Wailord of all things because Slaking’s Hyper Beam missed. This is one reason I almost always lead with Slaking so I can KO Cursers before they can set up. It struggles a bit against Brandon. It can KO Articuno with STAB Banded Hyper Beam and sometimes Zapdos (who is usually the second to come in); the AI is dumb enough that Zapdos more often than not uses Detect even on the turn Slaking loafs/recharges. Slaking is also just bulky enough it can survive a STAB Thunder at full health and KO back.

SALAMENCE ("Maleficent")
Ability: Intimidate
Nature: Adamant
Item: Choice Band
252 Attack / 252 Speed / 4 HP
-Aerial Ace
-Earthquake
-Rock Slide
-Flamethrower
Makes a good partner for both Slaking and Blissey by switching into Fighting-type attacks for both of them and softening physical blows for them both too. Fighting-type 'Mons themselves aren't usually a problem though as Slaking can outspeed and KO all of them. I use Fire coverage even on a Choice set specifically to roast Scizor, Forretress, and Skarmory. In my experience those three are tough to muscle by if you don't have coverage for them. Even with no Sp. Attack investment it's usually enough to get by them reliably. All of them also have variants that can run Counter, which Fire coverage foils. 'Mence makes a great counter against Reversal-Salac sweepers too thanks to resisting Fighting and weakening their attack with Intimidate. I’ve had bad luck against those; if you don’t have a resist against them you’re usually dead. It can also sweep all of Brandon's birds with Rock Slide, barring miss hax. I also tried out a mostly special/mixed variant of this using 252 Sp. Attack/Speed, a Rash nature, Scope Lens (my item of choice for special attackers) and - Dragon Claw, Flamethrower, Hydro Pump, Aerial Ace. You could call this a "poor man's Latios." It performed decently but I prefer the mostly physical set. As a side note I've tried Latios here and there but it unfortunately disappoints. I tough lucked on a bad nature (Impish), and so with even 252 Sp. Attack it couldn't even O-KO a Gyarados. I had better overall luck with Starmie, who can learn most of the same attacks Latios can and doesn’t fear Ice coverage that nearly every Water-type carries.

BLISSEY ("Maxine")
Ability: Natural Cure
Nature: Bold
Item: Leftovers
252 Defense / 252 HP / 4 Sp. Defense
-Seismic Toss
-Soft-Boiled
-Thunder Wave
-Counter
I have another variant of this set that runs Heal Bell, but as I currently have 99 Lum Berries I don't really have any need for it now. Counter is a great move on Blissey as it turns her worst defensive weakness into potentially a strength. I don't know what my IVs are but I do know this is bulky enough that it once survived a Focus Punch from a Regirock from near full health and blasted it back with Counter. With Blissey's massive HP it almost always results in a KO if something hits her with a physical. I also originally ran Toxic on this set but in some ways found Thunder Wave to be more helpful. It doesn't whittle the opposition's HP down, but it makes up for it by making healing with Soft-Boiled even easier since I can almost always outspend anything with paralysis support and sometimes keeping foes from attacking back altogether. It also increases the odds of fleeing “wild” encounters with the speed cut if I don’t want to fight. Her job is mainly to wall and whittle down the bulky special attackers the other two may struggle against. 'Mence struggles against bulky Water-types, though Slaking can usually KO them all with STAB Banded Hyper Beam, assuming I lead with it in the first. She does excellently against Brandon's birds, too and cuts down on poison use with Soft-Boiled. I currently have 80+ Hyper Potions saved up, though I only use them if I can't find an opportunity to send Blissey out against something that can't hurt it much so she can heal herself (like on the Fighting-type floor or any floor that has mostly physical attackers on it).
 

Attachments

Last edited:
As promised here is my update. I cleared the Normal floor, the 20th and final round, and beat Brandon with my ol' reliables; Slaking, Salamence, and Blissey. That puts me at 420 floors cleared so far. I intend to do more, as much as I can. Maybe someday I'll beat Cody "The Machine's" 1400+ record lol. Pic of my Battle Quest record for proof.

I also intend to try to win the 100 win Gold Shield for the Battle Tower. The closest I've come to that is 92 wins. Long story short I lost as a consequence of misplaying around an Armaldo of all things. My team on that occasion was Salamence, Blissey, and Forretress. After that I lost at 62 (?) wins to a Bulk Up Machamp, with my team being Salamence, Blissey, and Swampert. The 'Mence and Bliss are mostly the same ol' reliables from the Battle Pyramid, accept I run Fire Blast on 'Mence specifically for steel birds and armored insects lol. The two others are...

Forretress ("Smartbomb")
Ability: Sturdy
Nature: Careful
Item: Quick Claw
252 HP / 252 Sp. Defense / 4 Attack
Earthquake, Toxic, Counter, Explosion
I made this specifically to foil One-Hit KO abusers, most of which are special attackers, like Dewgong and Walrein. Hate those things. It also has good synergy with lead Salamence's Intimidate. I chose Forry for the job instead of the faster and slightly more bulky Skarmory for its resistance to Ice and ability to have a shot at getting past Magneton with EQ. Most of the time I end up exploding on the special O-KOers and using Counter against the physical ones, namely Horn Drill Rhydon. Toxic is there to whittle stuff down. I've considered replacing Explosion with Chesto-Rest but I generally find Explosion more useful. Forry doesn't do much damage with investment lacking non STAB Earthquakes anyway.

Swampert ("Chunder")
Ability: Torrent
Nature: Careful
Item: Chesto Berry
252 Sp. Defense / 240 HP / 16 Defense
Curse, Rest, Earthquake, Rock Slide
I've had some moderate success with this set and it can be a nearly unstoppable beast if it can set up against the right opponent. Usually an Electric or Fire-type. It doesn't take neutral special hits as well as Curselax (I may even replace and use that instead), but it is faster than Lax which means it can often get at least one Curse off against slower opponents and the Electric immunity is handy for foiling Thunder Wave abusers, both of which can sometimes be key. It also has good synergy with lead Salamence's Intimidate, which can make Cursing against physical attackers easier.
 

Attachments

Last edited:
What is some good general advice / Pokémon choices if I am trying to get the two Battle Tower ribbons on a weak Pokémon like Farfetch'd? Either the Ruby / Sapphire one or the Emerald one, but R/S preferred if it actually gives the ribbons (can't remember).

Also, I understand that I need to win battles 50-56 to get the ribbon? As in, I can't win just the 50th battle and have the ribbons. Is that the case?
 

QuentinQuonce

formerly green_typhlosion
What is some good general advice / Pokémon choices if I am trying to get the two Battle Tower ribbons on a weak Pokémon like Farfetch'd? Either the Ruby / Sapphire one or the Emerald one, but R/S preferred if it actually gives the ribbons (can't remember).

Also, I understand that I need to win battles 50-56 to get the ribbon? As in, I can't win just the 50th battle and have the ribbons. Is that the case?
I did a couple of posts about the RS Tower a few pages back. You actually don't need to win 56 battles in RS: just making it past 50 is enough, though it's quite easy to get to 56 wins anyway since the RS Tower is far, far easier than Emerald's (which does require 56 wins specifically). It gives the same ribbons as Emerald's does.
 
I did a couple of posts about the RS Tower a few pages back. You actually don't need to win 56 battles in RS: just making it past 50 is enough, though it's quite easy to get to 56 wins anyway since the RS Tower is far, far easier than Emerald's (which does require 56 wins specifically). It gives the same ribbons as Emerald's does.
Thanks for this!

I also had fun reading your analyses of the R/S Tower's Pokémon. Yeah, I remembered R/S's Battle Tower being ridiculous. I mean, the first time I tried it, back in 2003, I was miserably underprepared and just could not even seem to get to 50. But by the time I knew about IVs and EVs after Emerald or so, I rocketed to ~150 something and got that gold shield.

A real problem as far as I can tell to doing Ruby / Sapphire's Battle Tower, though, is just leveling the damn Pokemon up to 100. My memory's not what it used to be, but I think R/S is just 50 and 100, instead of 50 and Open like Emerald. I remember the horrors of going through the E4 + Champion dozens and dozens of times to level up just two more Pokemon to beat the Orre Colosseum (which was a Lv100 challenge), and I do not want to do that again for ... Farfetch'd.

I'll probably just use the Emerald glitch to get a bunch of Rare Candy if that's possible. That is, supposing I go from XD emulator -> R/S/E cartridge, instead of from XD emulator -> R/S/E emulator -> R/S/E cartridge somehow. (Still pretty green on this.)
 

QuentinQuonce

formerly green_typhlosion
Thanks for this!

I also had fun reading your analyses of the R/S Tower's Pokémon. Yeah, I remembered R/S's Battle Tower being ridiculous. I mean, the first time I tried it, back in 2003, I was miserably underprepared and just could not even seem to get to 50. But by the time I knew about IVs and EVs after Emerald or so, I rocketed to ~150 something and got that gold shield.

A real problem as far as I can tell to doing Ruby / Sapphire's Battle Tower, though, is just leveling the damn Pokemon up to 100. My memory's not what it used to be, but I think R/S is just 50 and 100, instead of 50 and Open like Emerald. I remember the horrors of going through the E4 + Champion dozens and dozens of times to level up just two more Pokemon to beat the Orre Colosseum (which was a Lv100 challenge), and I do not want to do that again for ... Farfetch'd.

I'll probably just use the Emerald glitch to get a bunch of Rare Candy if that's possible. That is, supposing I go from XD emulator -> R/S/E cartridge, instead of from XD emulator -> R/S/E emulator -> R/S/E cartridge somehow. (Still pretty green on this.)
You could just level Farfetch'd to 50 and use something else for the first few rounds, then sub it in for the final one so it gets the ribbon. Or do the Open Level mode on Emerald since the minimum for that is 60 rather than 100.
 
You could just level Farfetch'd to 50 and use something else for the first few rounds, then sub it in for the final one so it gets the ribbon. Or do the Open Level mode on Emerald since the minimum for that is 60 rather than 100.
Yes, that's true, although it's not just Farfetch'd that would have to be leveled up drastically; two other Pokemon would have to be leveled up, too. And as long as I can do the R/S tower, I'd much rather do it than frustrate myself trying to get 7 consecutive wins after 49 in the Emerald Battle Tower.
 

Users Who Are Viewing This Thread (Users: 1, Guests: 1)

Top