PREFACE
Hey guys, with the possibility of Breloom being banned I thought I'd take the time to post one of my favourite Breloom teams to use even though it contains one of my least favourite Breloom sets, and one that has been losing traction (the focus sash set). I wanted a team that was pretty simple to use that just focused on applying pressure constantly with boosters + taunt and the result was a team that became my go to for whenever I wanted to ladder or play in room tours. It's quick to play with and that's probably what I like most about it :P.
~~
TEAM DEVELOPMENT

Started off with this guy, great mon, exerts pressure via Spore, SD yadayada and I wanted Breloom to be Focus Sash so it could guarantee that it gets off a Swords Dance or Spore.


If Breloom went down it would usually be against something like a Latias or Togekiss so a Pokemon that could set up against those was the next one I added was Scizor, Scizor is also Focus Sash so it can set up against Life Orb Latias HP Fires or take a hit from Mega Manectric or whatever. Took this idea from a team that FLCL used in UU Open finals, no idea who made it.


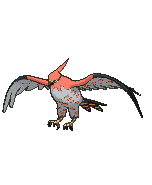
Talon was added to be able to set up against things like Infernape or Chanedlure that get locked into Fire type moves and in general was just pretty nice for defensive reasons in addition to the fact that it can boost and Taunt.


Cant have a Talonflame team without hazard control, and for this specific team it's also important to keep Breloom's and Scizor's Focus Sash intact. Starmie having the ability to outspeed and punish most rockers is also a really valuable asset.


I actually made this team when the tier had Mamoswine, he was a good lad, a good Manectric check for offences like this and is sorely missed now that he's OU, hopefully he comes back soon. Anyway I needed a rocker and a Ground-type so I went with Krookodile which ended up being pretty nice. Taunt + Intimidate + Rocks is super useful despite its low speed and it does its job really consistently.


This last slot was kinda put together thoughtlessly, I figured Magic Bounce would be nice to have to pressure some defensive builds assuming you can wear down Quagsire with Talonflame + Rocks and stuff and continues to limit the opponents ability to set hazards. The additional priority is also nice to have.
DETAILED ANALYSIS

Breloom @ Focus Sash | Jolly Nature
Technician | 252 Atk / 4 Def / 252 Spe
- Spore
- Swords Dance
- Bullet Seed
- Mach Punch
Breloom is probably the Pokemon I go to as soon as the first one goes down, immobolising a foe and automatically being able to exert pressure is wonderful. That's usually how this guy gets used in my experience, it's most useful in the midgame and will usually chip away at the opponent to create opportunities for a more reliable cleaner like Scizor to finish off.
The moveset I elected to go with was a pretty straightforward one, it has two STAB moves in Bullet Seed and Mach Punch which are mandatory. Spore is also mandatory in order to create set up opportunities or
Dont think there is any wiggle room with this set. I wouldn't consider using any other Breloom set on this team.
Talonflame @ Flyinium Z | Jolly Nature
Gale Wings | 252 Atk / 4 SpD / 252 Spe
- Swords Dance
- Brave Bird
- Flame Charge
- Taunt
Talon is really important defensively as it patches up the Infernape problem pretty well by being able to set up on it in addition to being one of the best ways this team has to pressure stall in that it's a really good way of wearing down Quagsire to the point where the other boosters can position themselves well enough to break through. Though it does help if you Knock Off its leftovers with Mega Absol though.
The set is pretty straight forward, well the first two moves anyway so I'll focus on Flame Charge which I decided to use to pick off weakened Pokemon and given the Gale Wings nerf make Talonflame harder to revenge KO by things like Manectric or Scarf Hydreigon. Taunt is there to ensure nothing can set up hazards against Talon and it can prevent the likes of Hippo or Quagsire from recovering.
I guess if you dont like Flame Charge you can use Flare Blitz. Not worth losing out on Taunt though.

Scizor @ Focus Sash | Adamant Nature
Technician | 252 Atk / 4 Def / 252 Spe
- Swords Dance
- Bullet Punch
- Bug Bite
- Superpower
It's the most dangerous Pokemon in the tier so there's really not that much I can specifically say about this. Games usually end with this Pokemon because it has access to strong priority and the other Pokemon generally are able to create scenarios where this can set up and win.
I went with a moveset that I saw FLCL use ages ago. It was the first time I considered the effectiveness of Focus Sash on Scizor. It has way more freedom setting up against Latias or Togekiss and cant be revenged by things like Magneton or Manectric which is really nice. I have Bug Bite here to wear down bulky waters and i chose it over knock off because I didn't want Mega Absol or Krookodile's Knock Off to be weakened. Swords Dance makes it strong and Bullet Punch is STAB priority that helps with with mons like Aerodactyl and DD Mega Altaria.
You could probably try a Quick Attack set over Bug Bite, but that would require you to run Life Orb.

Starmie @ Life Orb | Timid Nature
Analytic | 252 SpA / 4 SpD / 252 Spe
- Rapid Spin
- Hydro Pump
- Ice Beam
- Thunderbolt
Hazard control was mandatory here since I had 1 4x rocks weak and 2 focus sash users and it obviously couldn't be a defogger given the nature of the team so Starmie was pretty much the only choice since it it's one of the few hazard spinners (along with blastoise) that scare out hazard setters.
Straightfoward set, Spin does Spin things, Hydro Pump because Starmie aint that strong and needs a good Water STAB and Ice Beam + Thunderbolt combination to offer the best possible coverage in conjunction with Hydro.
Haven't tried any other set with this and I doubt any other one would be worth using. I guess you could replace it with Mega Blastoise but then you have to replace Mega Absol as well, so that's up to you.

Krookodile @ Focus Sash | Jolly Nature
Intimidate | 252 Atk / 4 SpD / 252 Spe
- Stealth Rock
- Knock Off
- Earthquake
- Taunt
Krookodile is pretty important considering it's the best response I have for electric types and providing rocks helps wear those electric types and defensive teams down.
Intimidate also provides some form of defence for this team.
Got the idea of using this set from a monotype RMT i came across (i think) and I thought Focus Sash would be a nice way to guarantee hazards and with Taunt and Knock Off you can generally put yourself in a favourable position. Lastly comes Earthquake after all the other moves have been used this is just nice for racking up that extra damage.
Dont really think anything about this set can be changed.

Absol @ Absolite | Jolly Nature
Justified | 252 Atk / 4 Def / 252 Spe
- Swords Dance
- Knock Off
- Sucker Punch
- Superpower / Iron Tail
I used Mega Absol due to its synergy with talonflame, both typing and ability wise, and for "improving" my match up against stall, mostly because it can force in quagsire or aggron and put one of them in a bad spot to deal with the other dudes. More priority also meant I could ease my Manectric or Aero m/u just a little bit more.
SD Absol does SD Absol things, Sucker is not replaceable because of Manectric as I mentioned before, the chip damage is incredibly crucial. Superpower was the coverage move I wanted to run with because I felt like pressuring Mega Aggron was more useful than hitting Togekiss or Mega Altaria, though I can see the argument for running it.
~~
THREATLIST
--
Importable
Hey guys, with the possibility of Breloom being banned I thought I'd take the time to post one of my favourite Breloom teams to use even though it contains one of my least favourite Breloom sets, and one that has been losing traction (the focus sash set). I wanted a team that was pretty simple to use that just focused on applying pressure constantly with boosters + taunt and the result was a team that became my go to for whenever I wanted to ladder or play in room tours. It's quick to play with and that's probably what I like most about it :P.
~~
TEAM DEVELOPMENT
Started off with this guy, great mon, exerts pressure via Spore, SD yadayada and I wanted Breloom to be Focus Sash so it could guarantee that it gets off a Swords Dance or Spore.
If Breloom went down it would usually be against something like a Latias or Togekiss so a Pokemon that could set up against those was the next one I added was Scizor, Scizor is also Focus Sash so it can set up against Life Orb Latias HP Fires or take a hit from Mega Manectric or whatever. Took this idea from a team that FLCL used in UU Open finals, no idea who made it.
Talon was added to be able to set up against things like Infernape or Chanedlure that get locked into Fire type moves and in general was just pretty nice for defensive reasons in addition to the fact that it can boost and Taunt.
Cant have a Talonflame team without hazard control, and for this specific team it's also important to keep Breloom's and Scizor's Focus Sash intact. Starmie having the ability to outspeed and punish most rockers is also a really valuable asset.
I actually made this team when the tier had Mamoswine, he was a good lad, a good Manectric check for offences like this and is sorely missed now that he's OU, hopefully he comes back soon. Anyway I needed a rocker and a Ground-type so I went with Krookodile which ended up being pretty nice. Taunt + Intimidate + Rocks is super useful despite its low speed and it does its job really consistently.
This last slot was kinda put together thoughtlessly, I figured Magic Bounce would be nice to have to pressure some defensive builds assuming you can wear down Quagsire with Talonflame + Rocks and stuff and continues to limit the opponents ability to set hazards. The additional priority is also nice to have.
DETAILED ANALYSIS
Breloom @ Focus Sash | Jolly Nature
Technician | 252 Atk / 4 Def / 252 Spe
- Spore
- Swords Dance
- Bullet Seed
- Mach Punch
Breloom is probably the Pokemon I go to as soon as the first one goes down, immobolising a foe and automatically being able to exert pressure is wonderful. That's usually how this guy gets used in my experience, it's most useful in the midgame and will usually chip away at the opponent to create opportunities for a more reliable cleaner like Scizor to finish off.
The moveset I elected to go with was a pretty straightforward one, it has two STAB moves in Bullet Seed and Mach Punch which are mandatory. Spore is also mandatory in order to create set up opportunities or
Dont think there is any wiggle room with this set. I wouldn't consider using any other Breloom set on this team.
Talonflame @ Flyinium Z | Jolly Nature
Gale Wings | 252 Atk / 4 SpD / 252 Spe
- Swords Dance
- Brave Bird
- Flame Charge
- Taunt
Talon is really important defensively as it patches up the Infernape problem pretty well by being able to set up on it in addition to being one of the best ways this team has to pressure stall in that it's a really good way of wearing down Quagsire to the point where the other boosters can position themselves well enough to break through. Though it does help if you Knock Off its leftovers with Mega Absol though.
The set is pretty straight forward, well the first two moves anyway so I'll focus on Flame Charge which I decided to use to pick off weakened Pokemon and given the Gale Wings nerf make Talonflame harder to revenge KO by things like Manectric or Scarf Hydreigon. Taunt is there to ensure nothing can set up hazards against Talon and it can prevent the likes of Hippo or Quagsire from recovering.
I guess if you dont like Flame Charge you can use Flare Blitz. Not worth losing out on Taunt though.
Scizor @ Focus Sash | Adamant Nature
Technician | 252 Atk / 4 Def / 252 Spe
- Swords Dance
- Bullet Punch
- Bug Bite
- Superpower
It's the most dangerous Pokemon in the tier so there's really not that much I can specifically say about this. Games usually end with this Pokemon because it has access to strong priority and the other Pokemon generally are able to create scenarios where this can set up and win.
I went with a moveset that I saw FLCL use ages ago. It was the first time I considered the effectiveness of Focus Sash on Scizor. It has way more freedom setting up against Latias or Togekiss and cant be revenged by things like Magneton or Manectric which is really nice. I have Bug Bite here to wear down bulky waters and i chose it over knock off because I didn't want Mega Absol or Krookodile's Knock Off to be weakened. Swords Dance makes it strong and Bullet Punch is STAB priority that helps with with mons like Aerodactyl and DD Mega Altaria.
You could probably try a Quick Attack set over Bug Bite, but that would require you to run Life Orb.
Starmie @ Life Orb | Timid Nature
Analytic | 252 SpA / 4 SpD / 252 Spe
- Rapid Spin
- Hydro Pump
- Ice Beam
- Thunderbolt
Hazard control was mandatory here since I had 1 4x rocks weak and 2 focus sash users and it obviously couldn't be a defogger given the nature of the team so Starmie was pretty much the only choice since it it's one of the few hazard spinners (along with blastoise) that scare out hazard setters.
Straightfoward set, Spin does Spin things, Hydro Pump because Starmie aint that strong and needs a good Water STAB and Ice Beam + Thunderbolt combination to offer the best possible coverage in conjunction with Hydro.
Haven't tried any other set with this and I doubt any other one would be worth using. I guess you could replace it with Mega Blastoise but then you have to replace Mega Absol as well, so that's up to you.
Krookodile @ Focus Sash | Jolly Nature
Intimidate | 252 Atk / 4 SpD / 252 Spe
- Stealth Rock
- Knock Off
- Earthquake
- Taunt
Krookodile is pretty important considering it's the best response I have for electric types and providing rocks helps wear those electric types and defensive teams down.
Intimidate also provides some form of defence for this team.
Got the idea of using this set from a monotype RMT i came across (i think) and I thought Focus Sash would be a nice way to guarantee hazards and with Taunt and Knock Off you can generally put yourself in a favourable position. Lastly comes Earthquake after all the other moves have been used this is just nice for racking up that extra damage.
Dont really think anything about this set can be changed.
Absol @ Absolite | Jolly Nature
Justified | 252 Atk / 4 Def / 252 Spe
- Swords Dance
- Knock Off
- Sucker Punch
- Superpower / Iron Tail
I used Mega Absol due to its synergy with talonflame, both typing and ability wise, and for "improving" my match up against stall, mostly because it can force in quagsire or aggron and put one of them in a bad spot to deal with the other dudes. More priority also meant I could ease my Manectric or Aero m/u just a little bit more.
SD Absol does SD Absol things, Sucker is not replaceable because of Manectric as I mentioned before, the chip damage is incredibly crucial. Superpower was the coverage move I wanted to run with because I felt like pressuring Mega Aggron was more useful than hitting Togekiss or Mega Altaria, though I can see the argument for running it.
~~
THREATLIST
- Mega Manectric - use priority to wear it down
- Hydreigon - same thing
- Togekiss - this is probably the most annoying match up particularly the scarf sets, if you manage to knock it off with krook or absol that's fantastic then it becomes that much easier to deal with. It's usually sent in to absorb brelooms sleep so there's that too.
--
Importable
Scizor @ Focus Sash
Ability: Technician
EVs: 252 Atk / 4 Def / 252 Spe
Jolly Nature
- Swords Dance
- Bullet Punch
- Superpower
- Bug Bite
Starmie @ Life Orb
Ability: Analytic
EVs: 252 SpA / 4 SpD / 252 Spe
Timid Nature
IVs: 0 Atk
- Rapid Spin
- Hydro Pump
- Ice Beam
- Thunderbolt
Talonflame @ Flyinium Z
Ability: Gale Wings
EVs: 252 Atk / 4 SpD / 252 Spe
Jolly Nature
- Swords Dance
- Brave Bird
- Flame Charge
- Taunt
Absol-Mega @ Absolite
Ability: Magic Bounce
EVs: 252 Atk / 4 SpD / 252 Spe
Jolly Nature
- Swords Dance
- Knock Off
- Superpower
- Sucker Punch
Krookodile @ Focus Sash
Ability: Intimidate
EVs: 252 Atk / 4 Def / 252 Spe
Jolly Nature
- Stealth Rock
- Taunt
- Earthquake
- Knock Off
Breloom @ Focus Sash
Ability: Technician
EVs: 252 Atk / 4 SpD / 252 Spe
Adamant Nature
- Spore
- Swords Dance
- Bullet Seed
- Mach Punch
Ability: Technician
EVs: 252 Atk / 4 Def / 252 Spe
Jolly Nature
- Swords Dance
- Bullet Punch
- Superpower
- Bug Bite
Starmie @ Life Orb
Ability: Analytic
EVs: 252 SpA / 4 SpD / 252 Spe
Timid Nature
IVs: 0 Atk
- Rapid Spin
- Hydro Pump
- Ice Beam
- Thunderbolt
Talonflame @ Flyinium Z
Ability: Gale Wings
EVs: 252 Atk / 4 SpD / 252 Spe
Jolly Nature
- Swords Dance
- Brave Bird
- Flame Charge
- Taunt
Absol-Mega @ Absolite
Ability: Magic Bounce
EVs: 252 Atk / 4 SpD / 252 Spe
Jolly Nature
- Swords Dance
- Knock Off
- Superpower
- Sucker Punch
Krookodile @ Focus Sash
Ability: Intimidate
EVs: 252 Atk / 4 Def / 252 Spe
Jolly Nature
- Stealth Rock
- Taunt
- Earthquake
- Knock Off
Breloom @ Focus Sash
Ability: Technician
EVs: 252 Atk / 4 SpD / 252 Spe
Adamant Nature
- Spore
- Swords Dance
- Bullet Seed
- Mach Punch


